Improve security with Azure Front Door and Azure Web Apps access restrictions
Introduction
Building solutions with Microsoft Azure cloud is quite simple. Just a few clicks in the Azure portal, and we can create Azure Web Apps that will host our web applications. This is good for tests but for production solutions, we have to also remember about a key aspect - security. This is why in this article we are going to see how to use Azure Front Door service with Web Application Firewall to secure access to Azure Web Apps. We will also see how to apply access restrictions for Azure Web Apps to make sure that they cannot be reached directly from the Internet and any IP address.
Azure Web Apps security
Probably you heard about Azure App Service Environment. If not, let’s explain it a little bit. The Azure App Service Environment is an Azure App Service feature that provides a fully isolated and dedicated environment for securely running App Service applications. App Service Environments (ASEs) are appropriate for application workloads that require high scale, high memory utilization, and what is very important - isolation and secure network access. Azure App Service Environment hosts applications from only one customer and does so in one of the Virtual Networks in Azure. Customers have fine-grained control over inbound and outbound application network traffic. There can be several usage scenarios:
- Internal line-of-business applications
- Applications that need more than 30 ASP instances
- Single-tenant system to satisfy internal compliance or security requirements
- Network isolated application hosting
Now there is a question - do I need to create ASE to make sure that my web applications hosted on Azure are properly secured? No, you do not need ASE, there are also other mechanisms available to still make sure that your solution with Azure Web Apps will be secure. In this article, we will discuss them. You should first think carefully if you need it in your solution. One of the scenarios where it can be really helpful is the one where we need to communicate with internal (on-premises) systems from our Azure Web Apps, and we have strict security requirements. Please remember that ASE is also quite costly:

Solution architecture
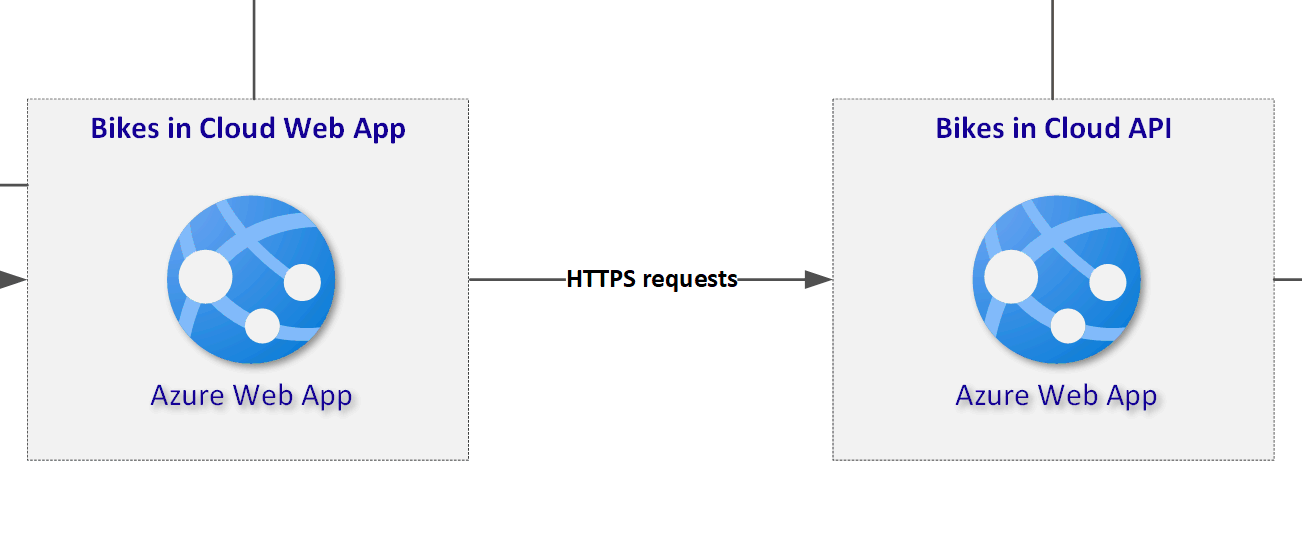
To make sure that we understand some concepts, I decided to prepare this reference solution architecture:

We will focus on the part marked with a red rectangle. As we can see there are four components:
- Azure Front Door
- Azure Web Application Firewall (WAF)
- Azure Web App (front-end web application)
- Azure Web App (backend API application)
Enhance Security with Azure Front Door and Web Application Firewall
We want to secure access to our web applications (in this case front-end, and API applications mentioned above). To do it, we will set up Azure Front Door with Azure Web Application Firewall (WAF), and we will configure access restrictions for Azure Web Apps.
Azure Front Door
Azure Front Door is a global, scalable entry-point that uses the Microsoft global edge network to create fast, secure, and widely scalable web applications. If you want to learn more about Azure Front Door I encourage you to check the Microsoft Learn module called Introduction to Azure Front Door.
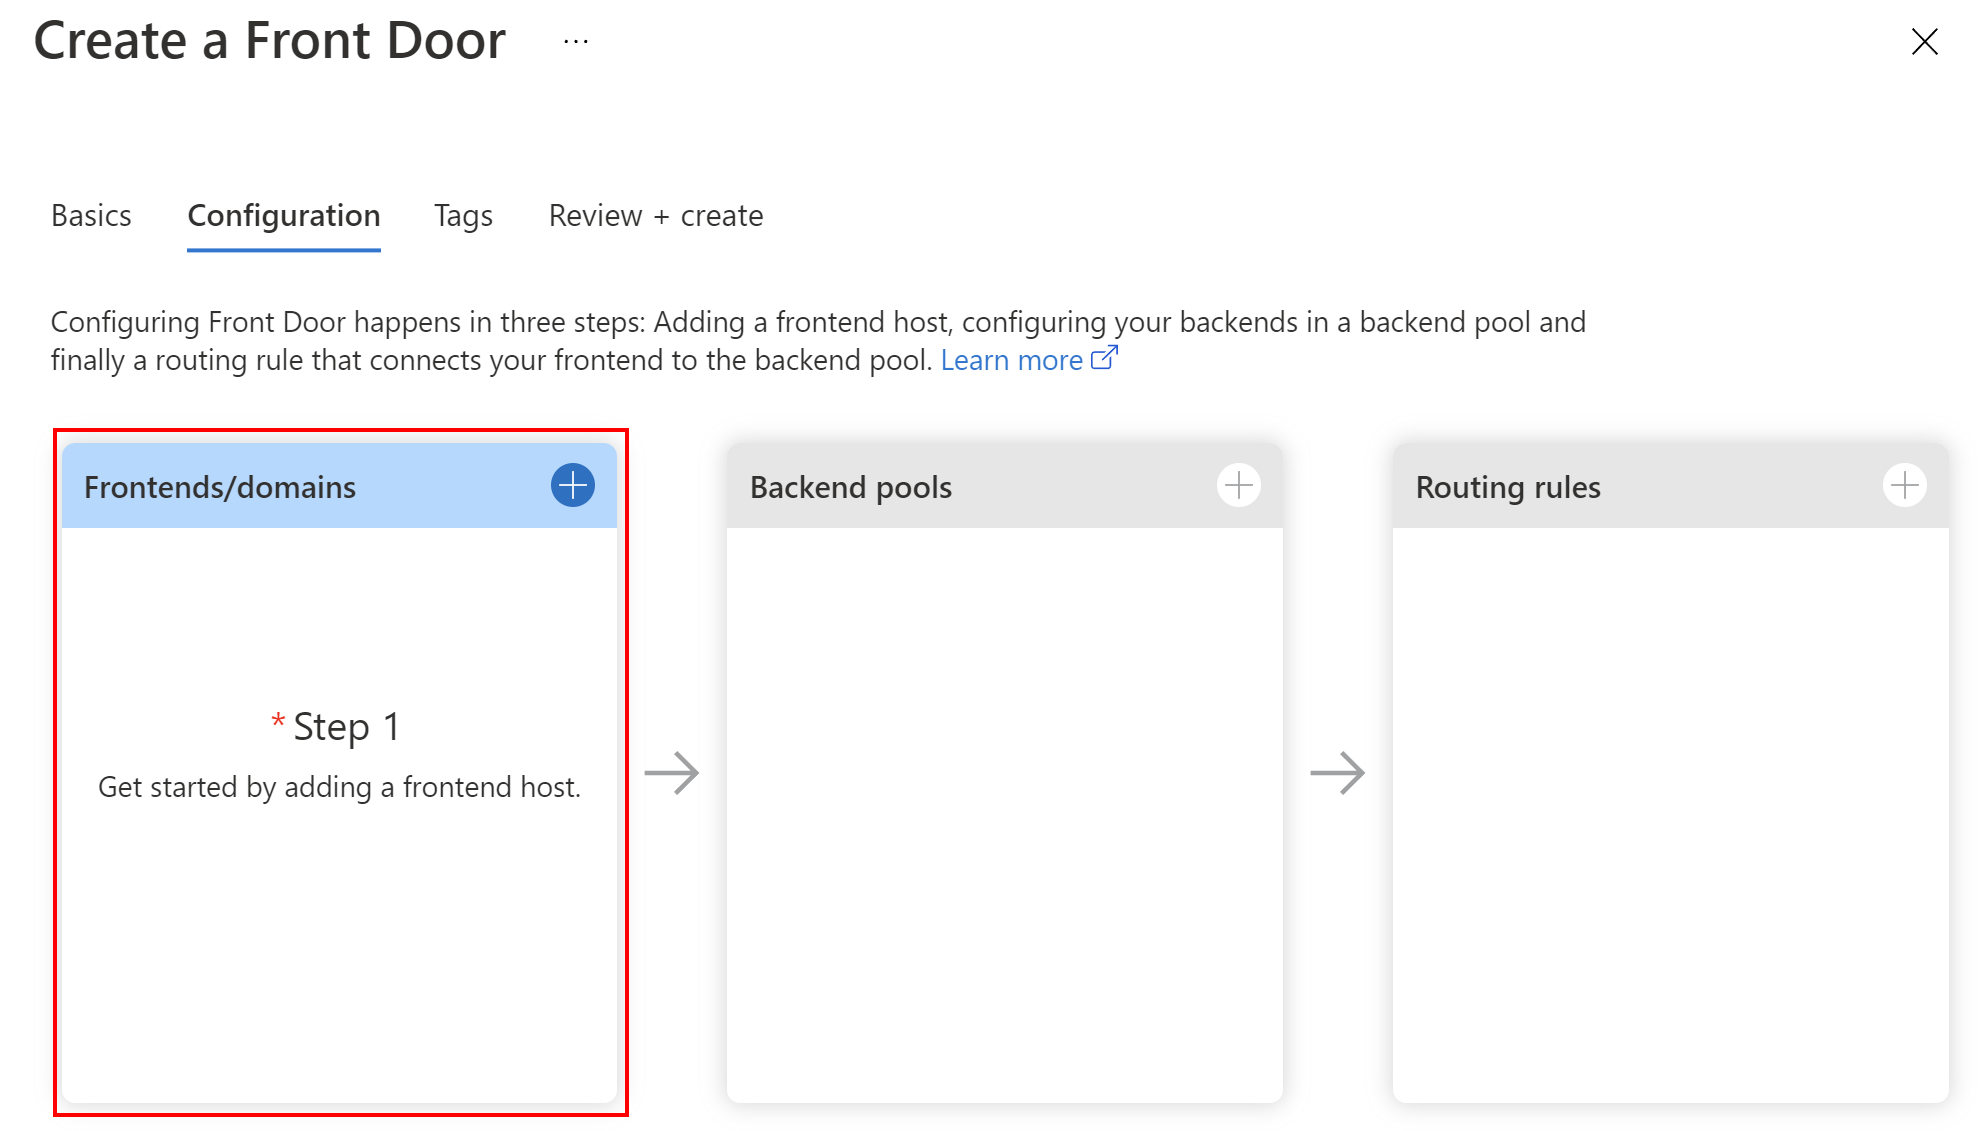
Azure Front Door setup
Once we choose the Azure Front Door resource to be created in the Azure portal, we have to provide configuration details. First, we have to specify the front-end host. The frontend host specifies the desired subdomain on Front Door’s default domain. In my example, this is https://bikes-in-cloud.azurefd.net. We can also enable session affinity to direct subsequent traffic from a user session to the same application backend for processing using Front Door generated cookies.
As we can see, there is also WEB APPLICATION FIREWALL section. For now, we will set it to Disabled because we will integrate WAF later in this article. Once all is set, we can click Done button.
The next step is to add a backend pool. A backend refers to a web application deployment in a region.
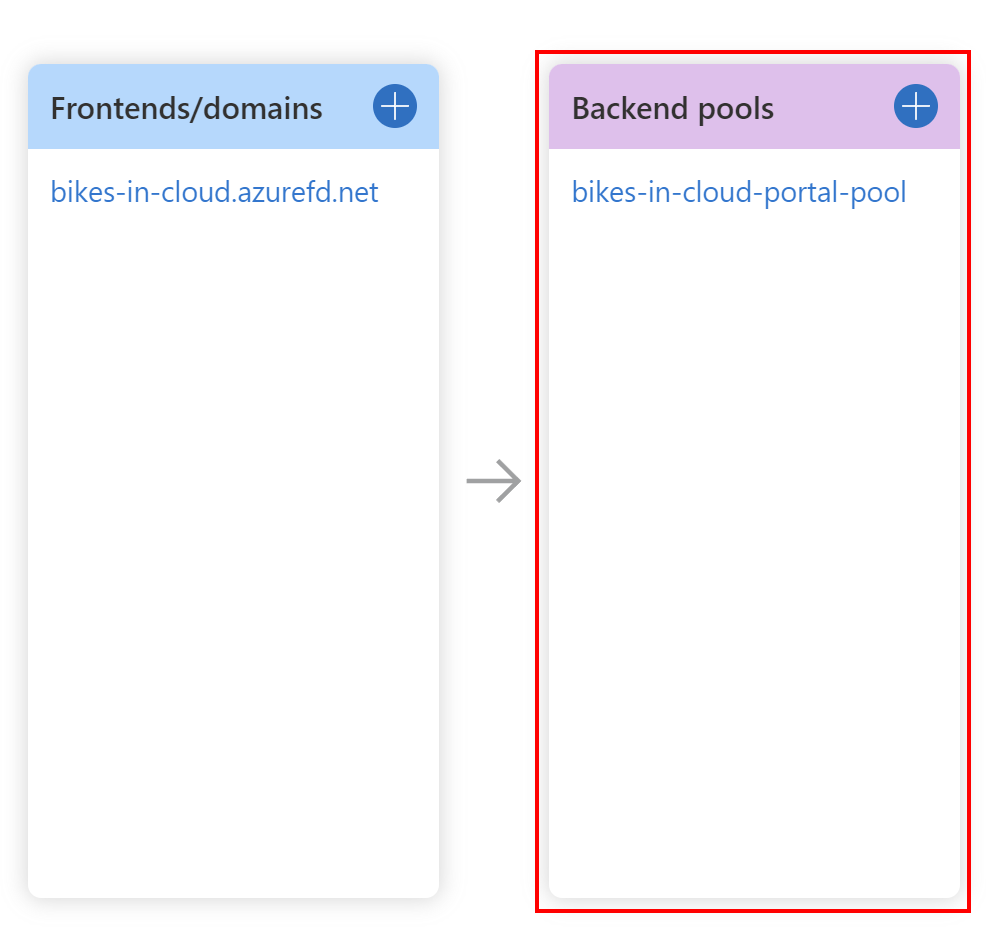
Once we have our Azure Web Apps created, we can send the requests to them through the Azure Front Door. To do it, we have to select backend pools, and indicate Azure Web Apps, by selecting Add backend.
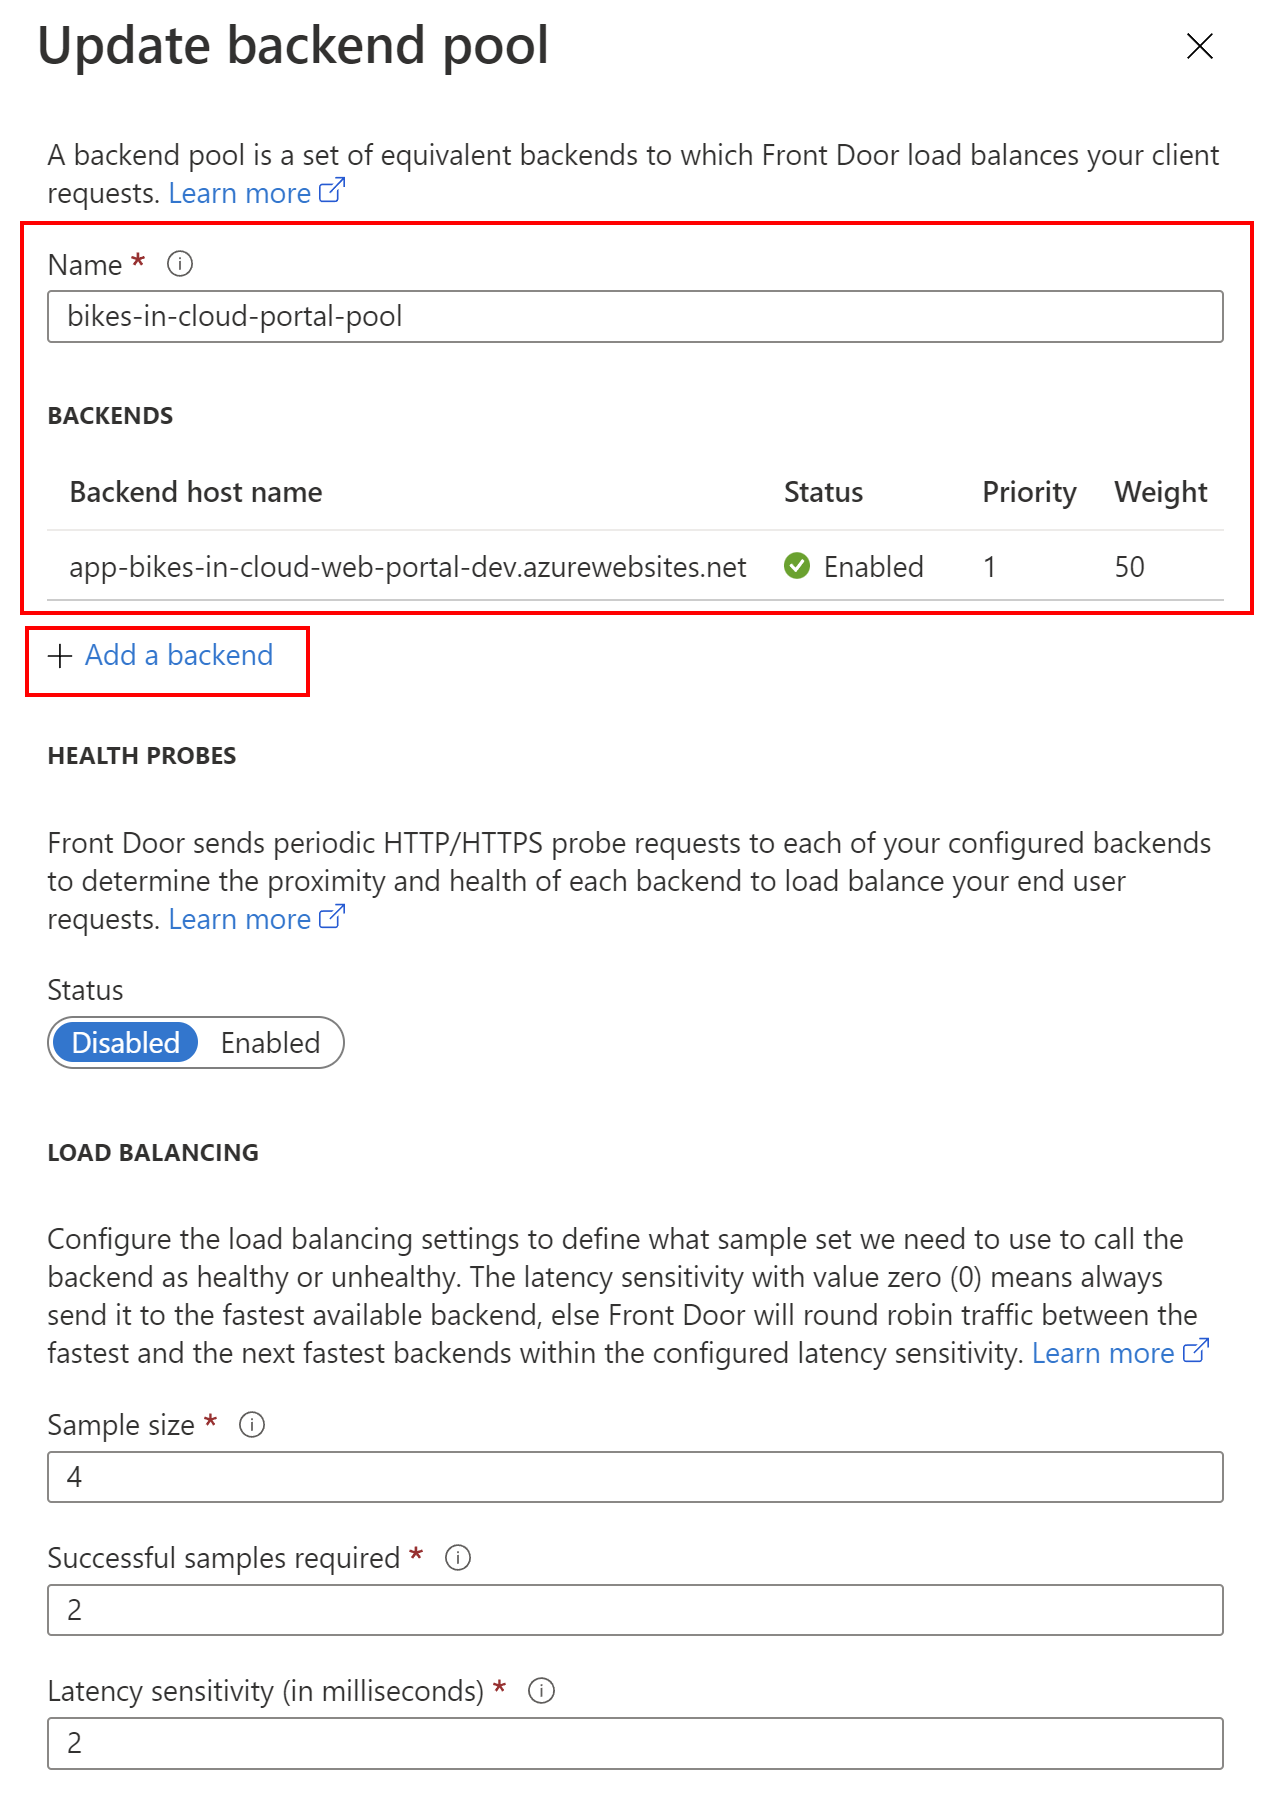
For a backend host type we should select App service, and we should directly indicate the Azure Web App:
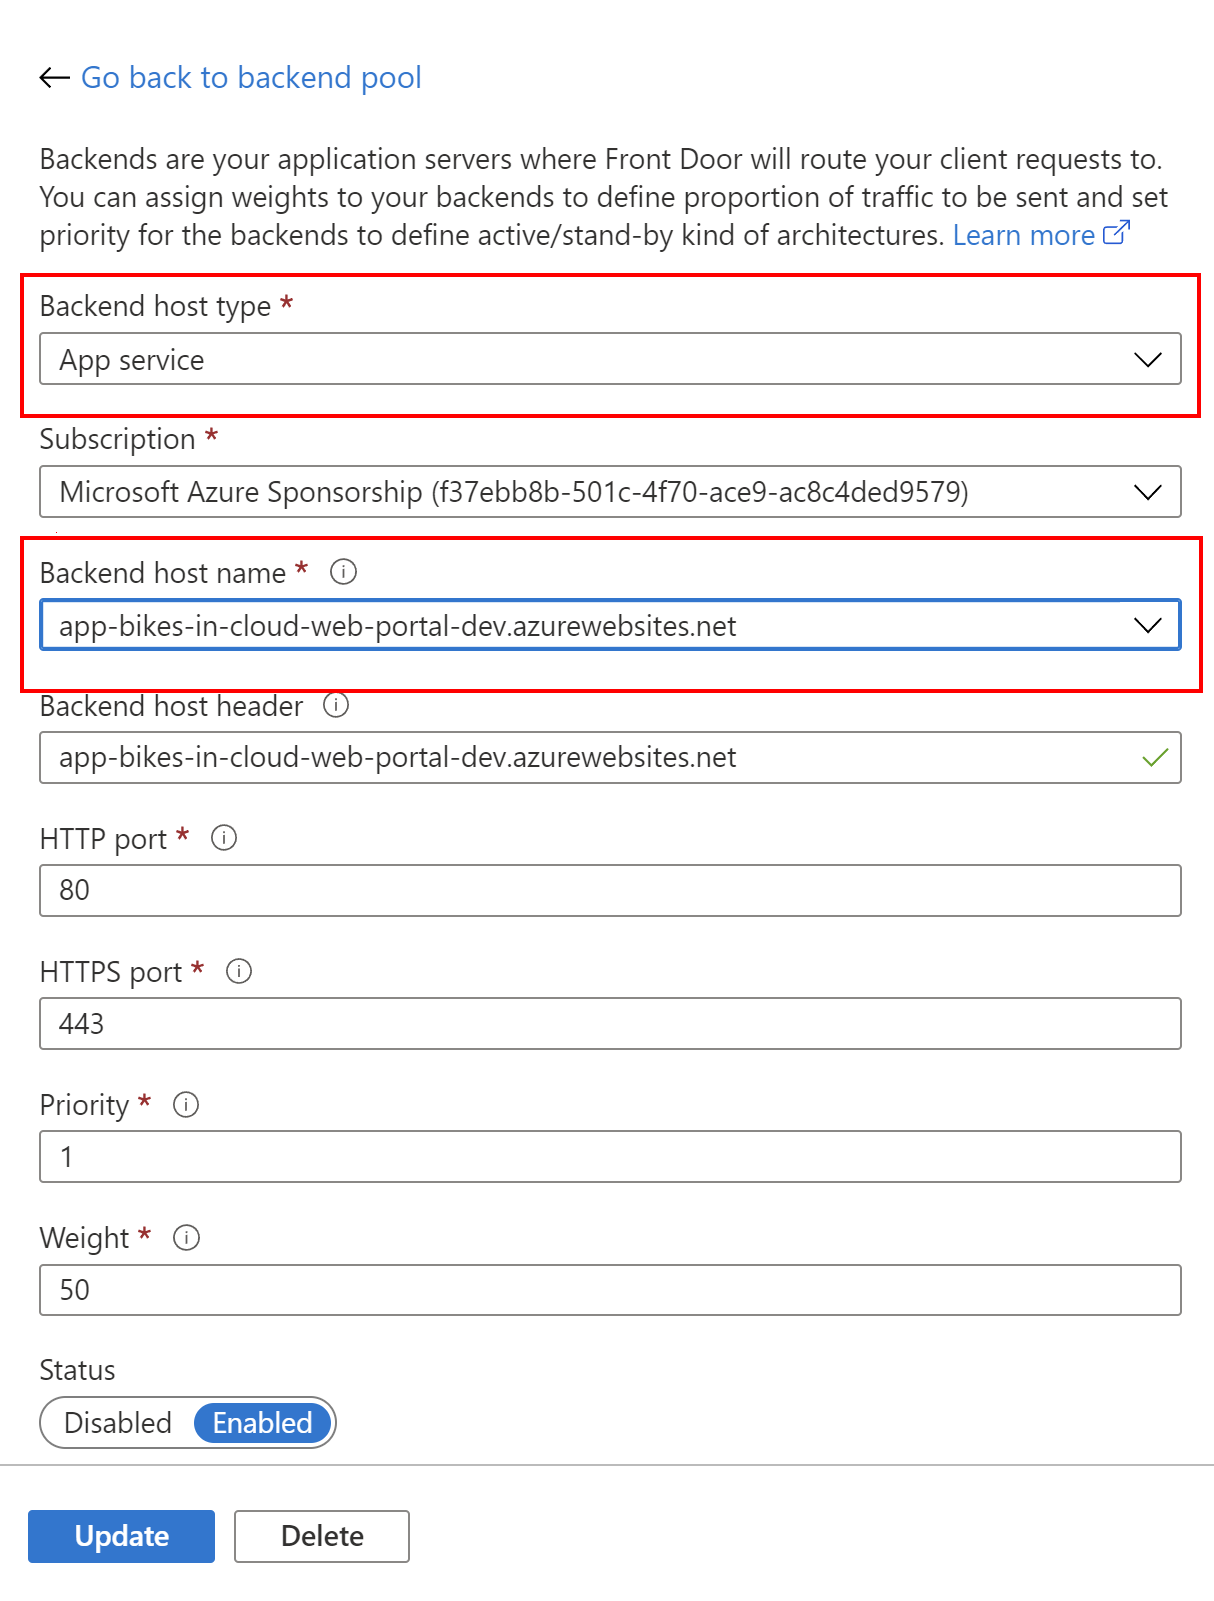
Please note that we indicate HTTP and HTTPS ports. Don’t worry, we will enable HTTPS redirection below using rules. Once we add the front-end application to the backend pool, we can move forward with the routing rules setup.
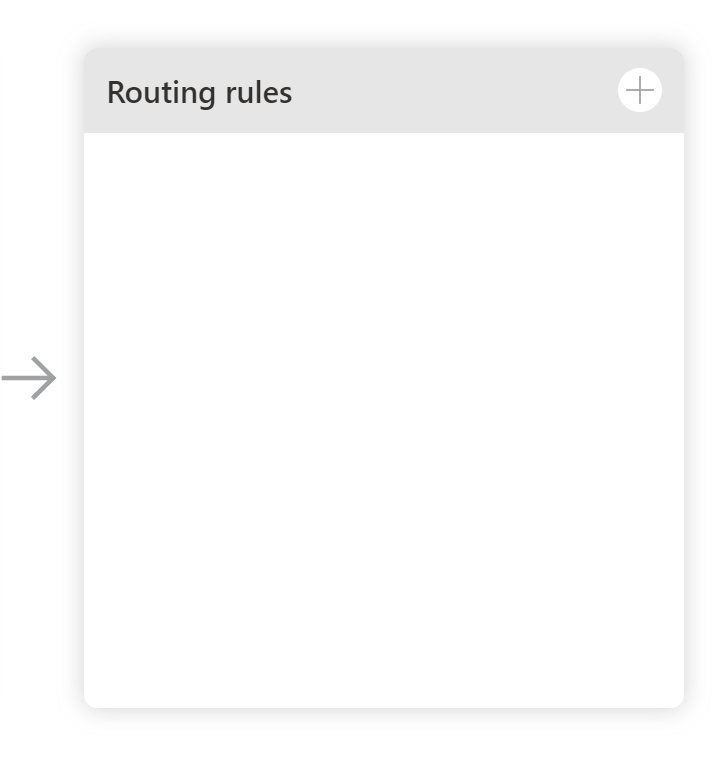
In this specific scenario, we will add two routing rules. First will be responsible for forwarding the HTTPS requests to the front-end application hosted on the Azure Web App. The second routing rule will be responsible for redirecting HTTP traffic to the backend using HTTPS.
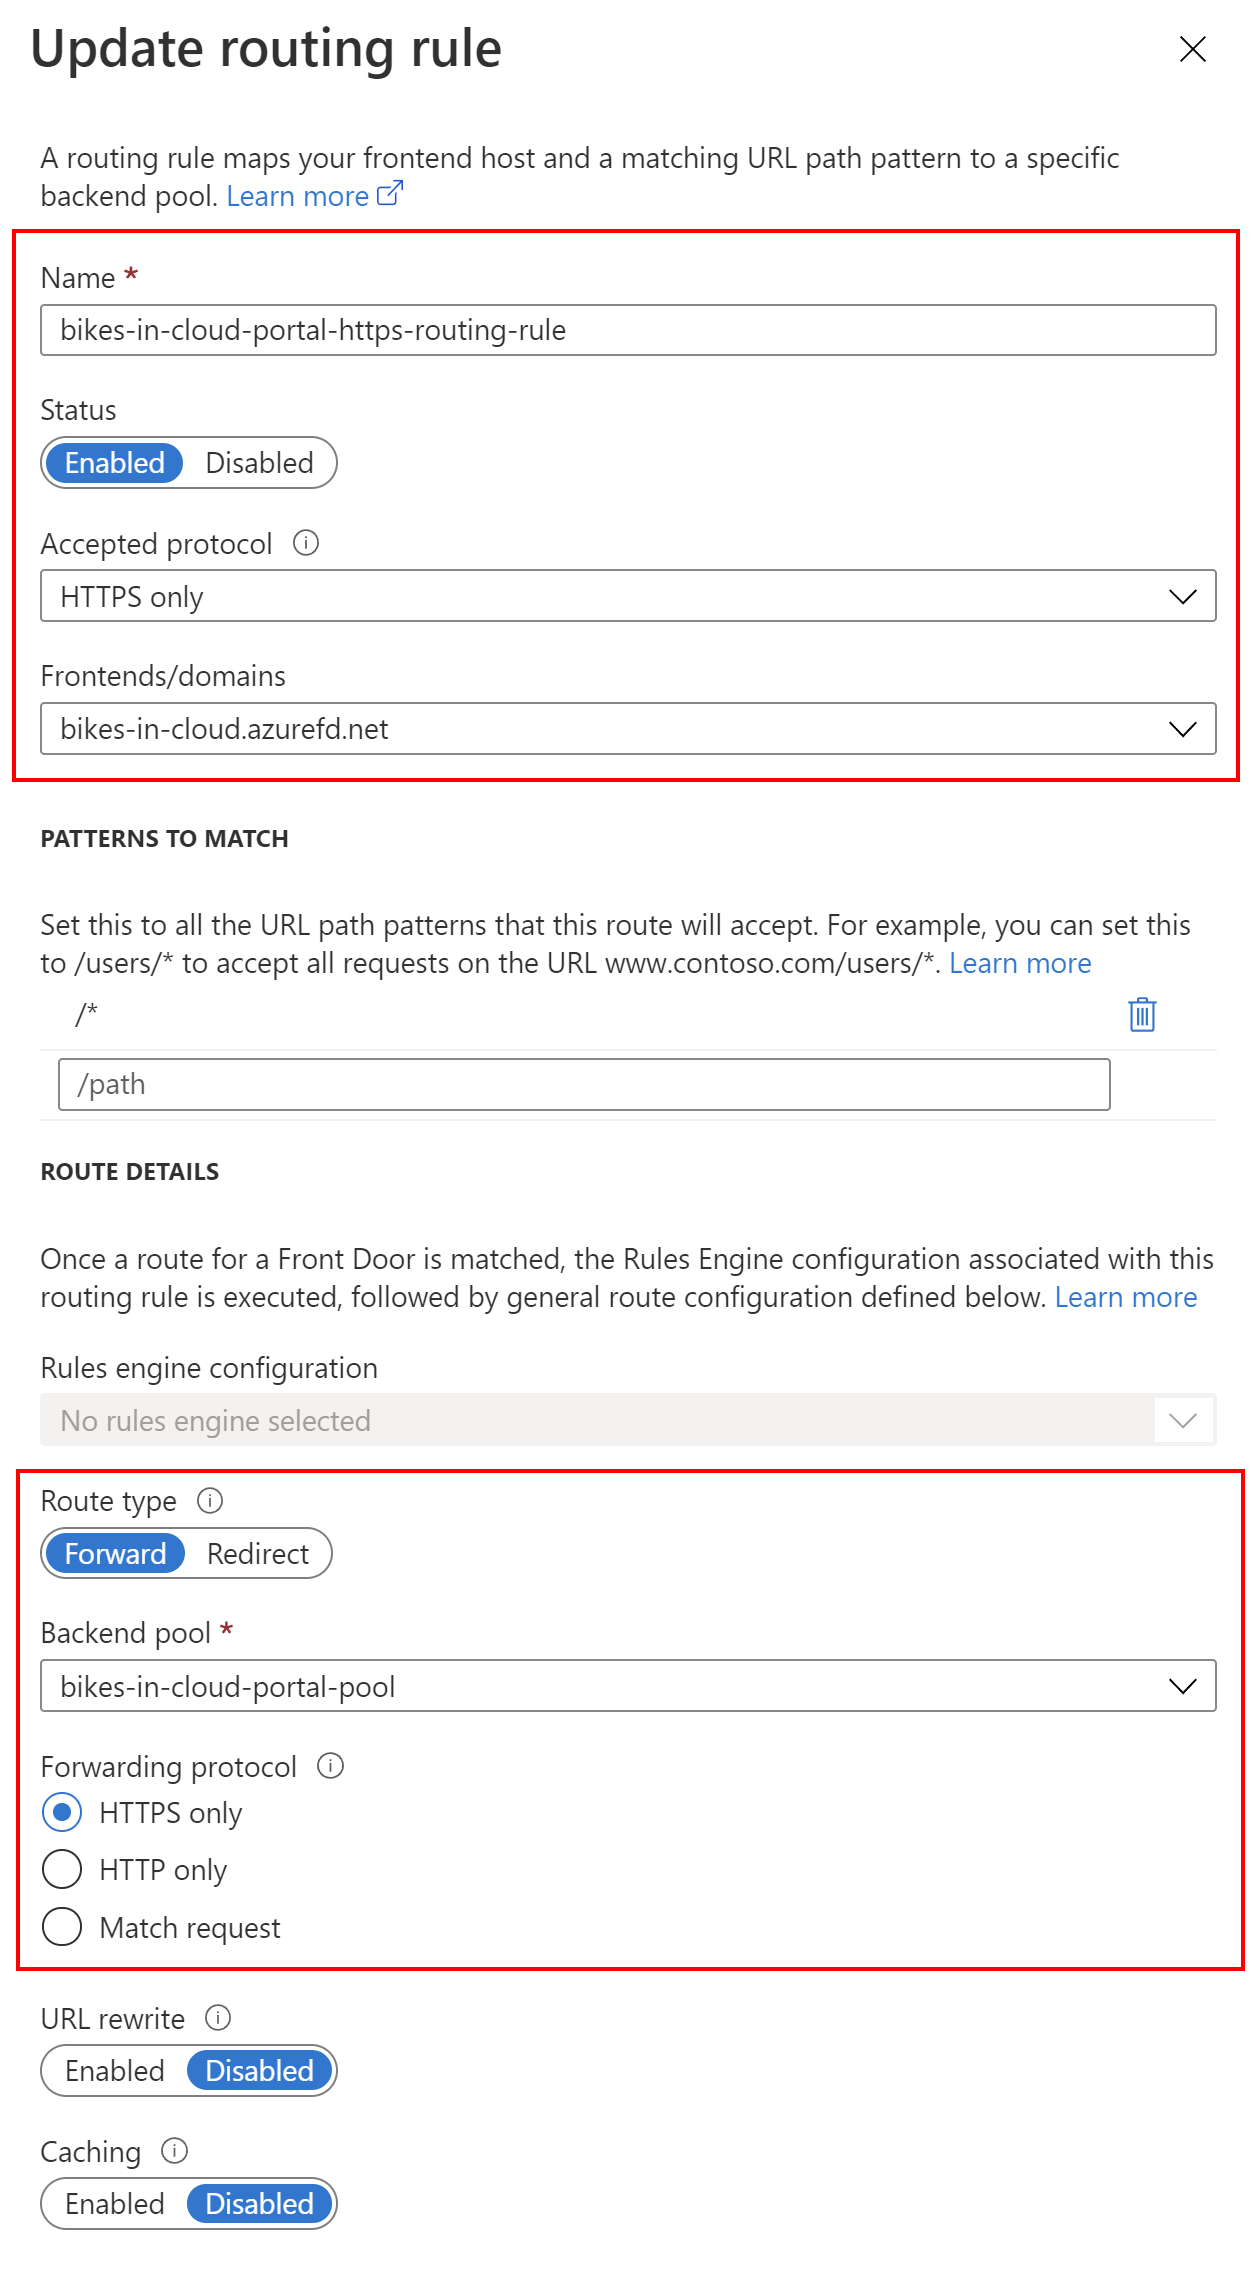
This is definition of the bikes-in-cloud-portal-https-routing-rule rule:
This is definition of the bikes-in-cloud-portal-http-routing-rule rule:
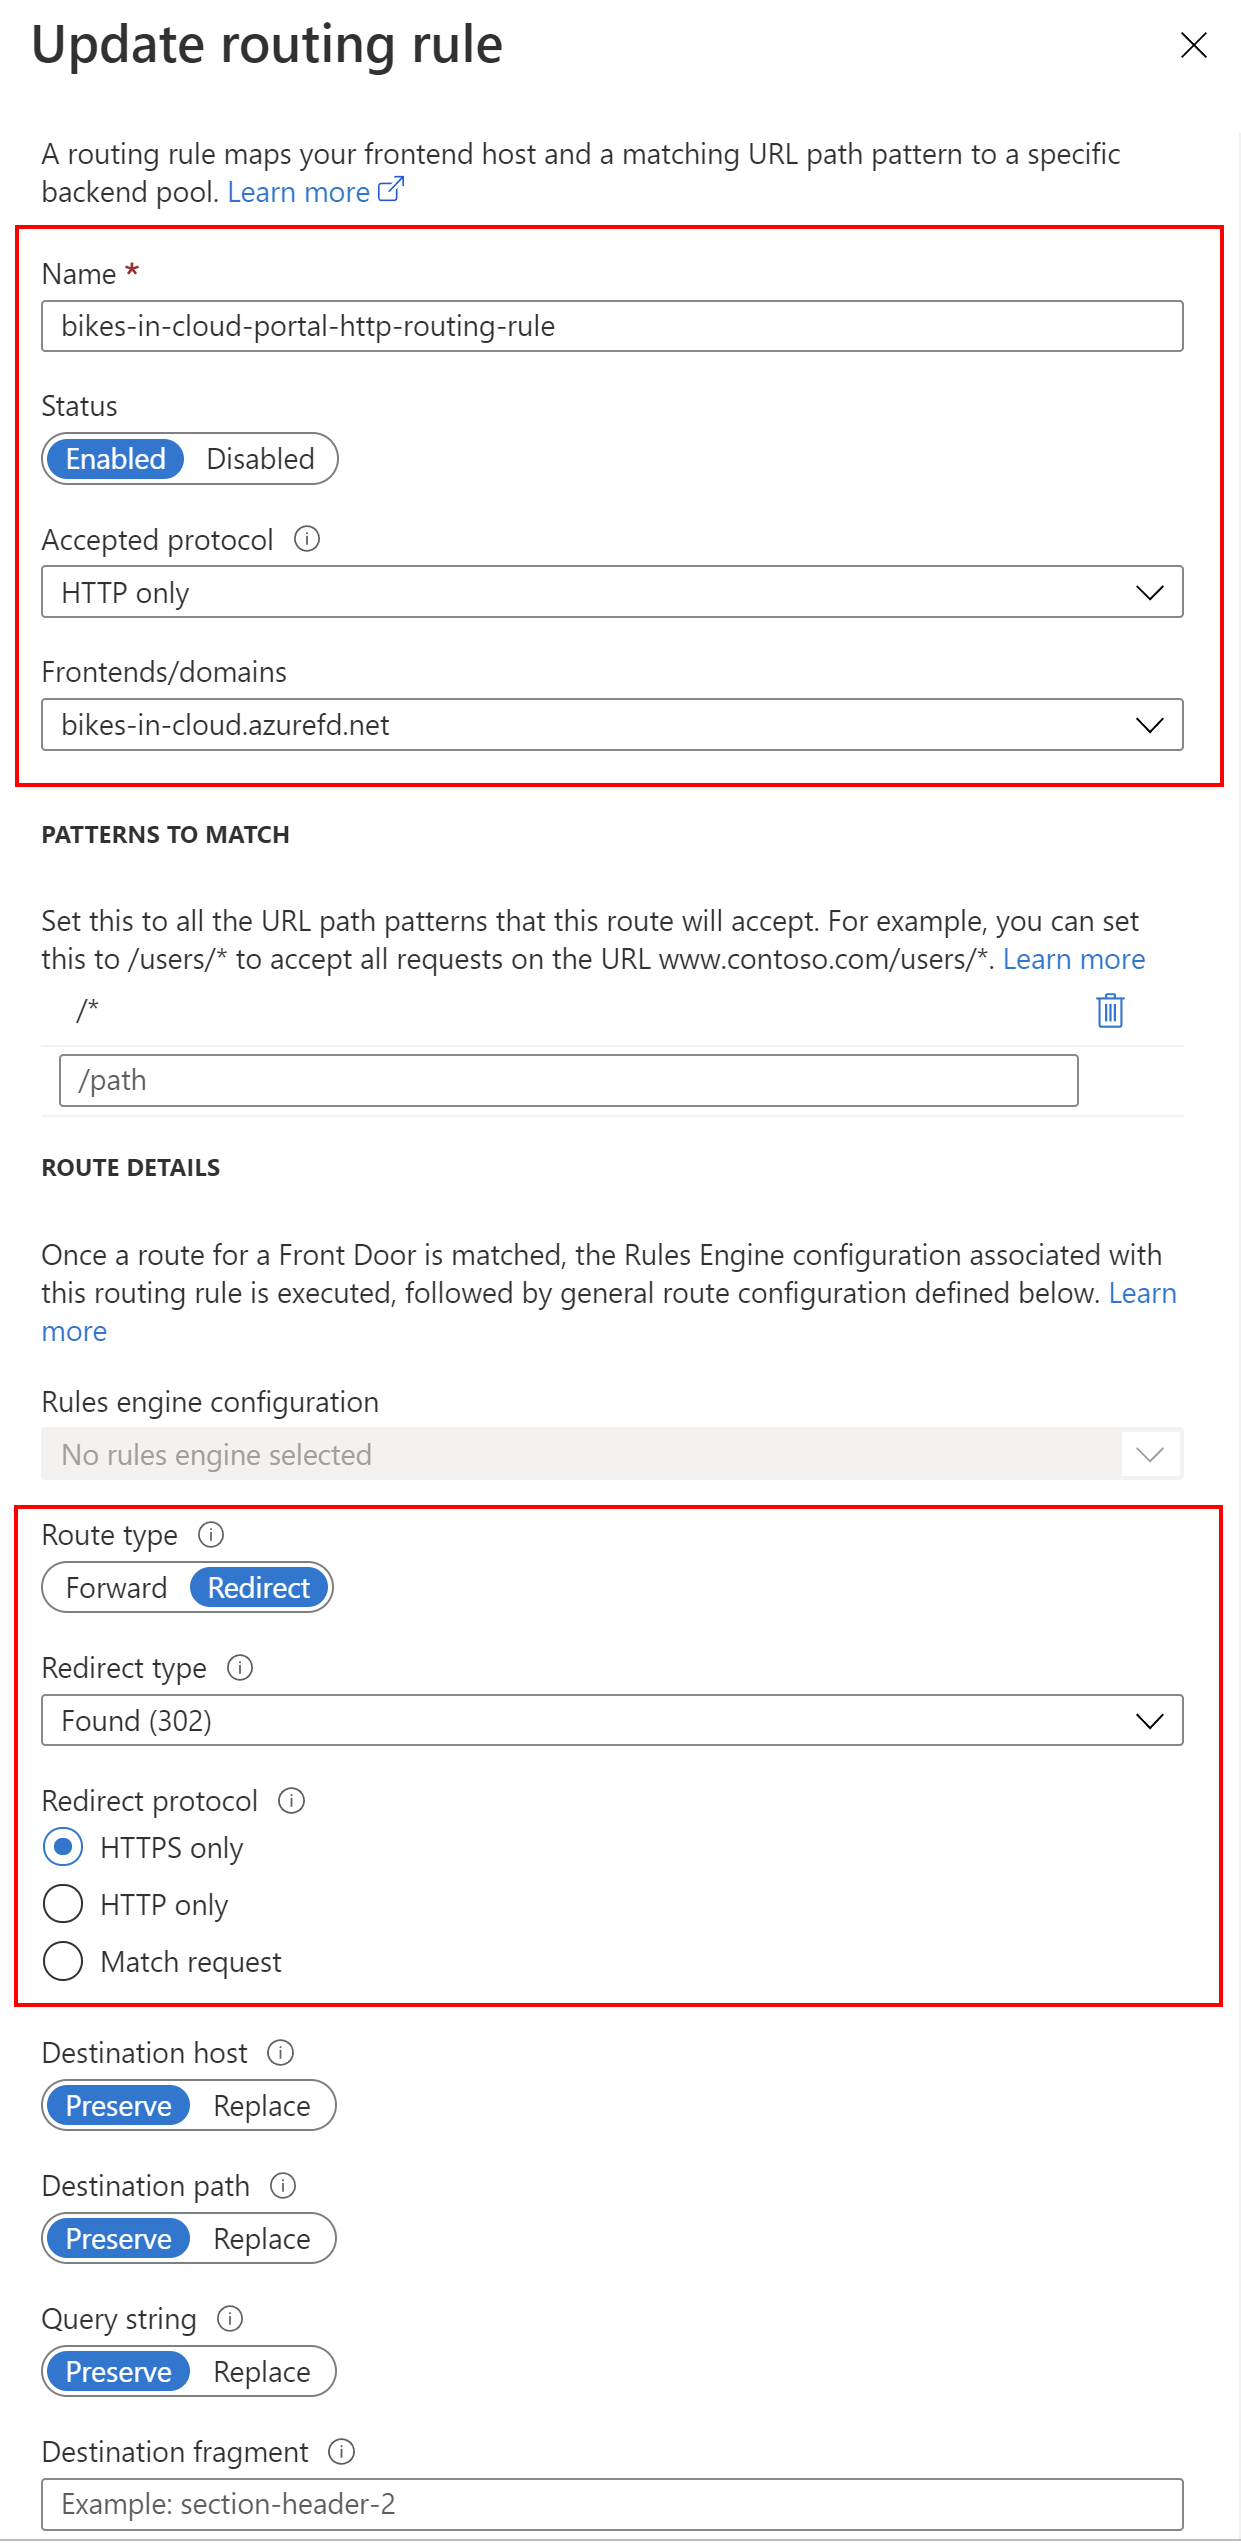
Please note that Route type is different for these two routing rules. Great, now if we call the Azure Frond Door front end domain, traffic should go to our Azure Web App:
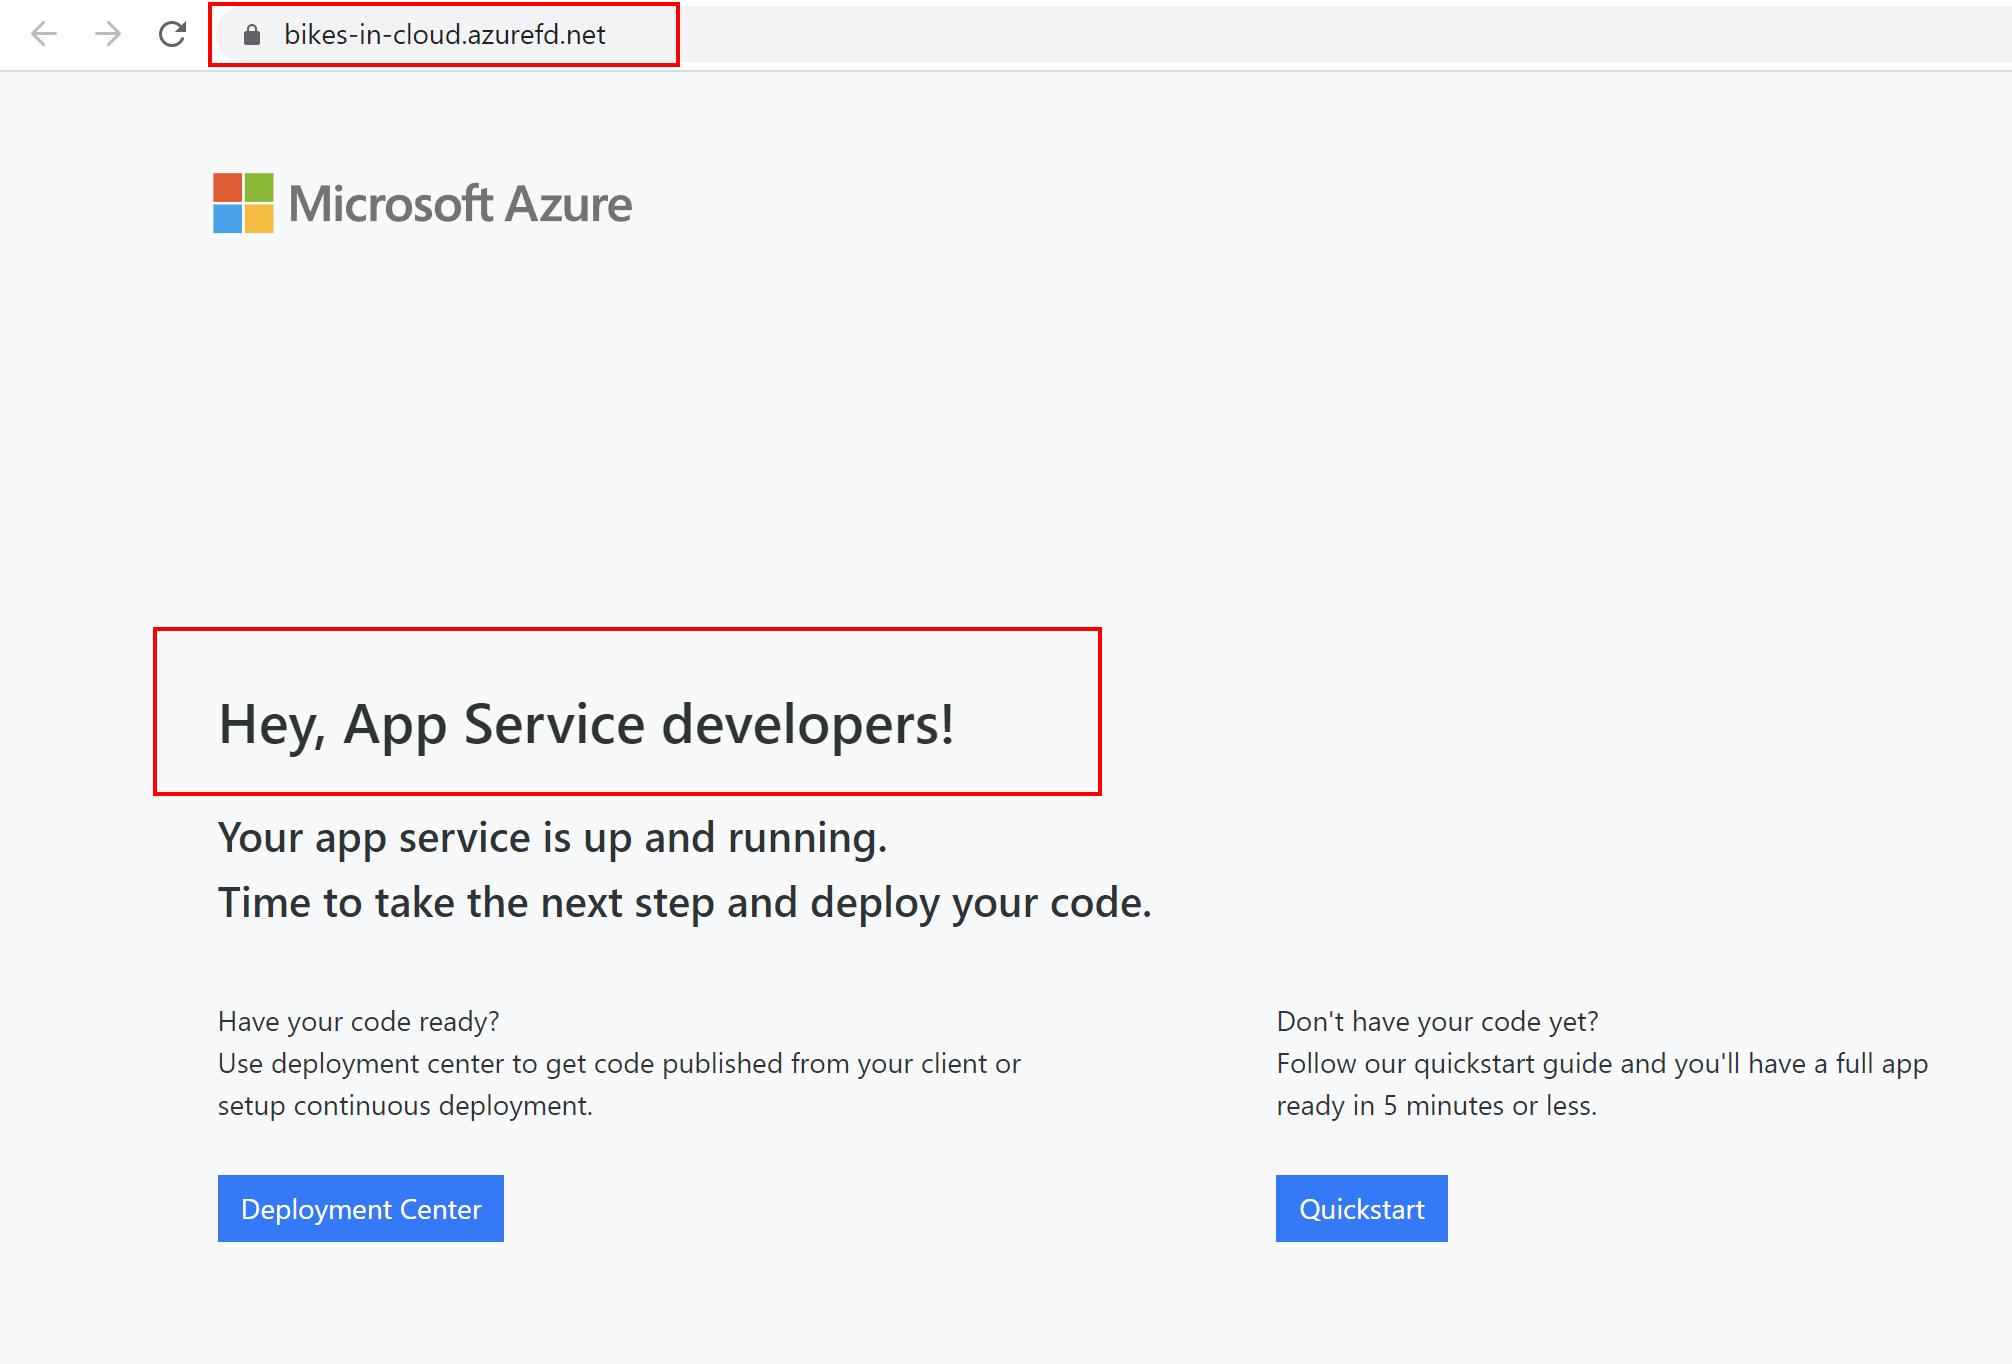
This is great but! Still, if we call Azure Web App using its direct URL, it will be displayed. This is the situation we want to avoid. We want to be sure that all the requests will go through the Azure Front Door interface. This is where App Service access restrictions can help.
Azure App Service access restrictions
By setting up access restrictions, we can define a priority-ordered allow/deny list that controls network access to your app. The list can include IP addresses or Azure Virtual Network subnets. When there are one or more entries, an implicit deny all exists at the end of the list. We can decide for instance from which range of IP addresses we can call our web app. We can also decide from which Azure services we can call it. You can read more about restrictions types in the official documentation.
Azure App Service access restrictions setup
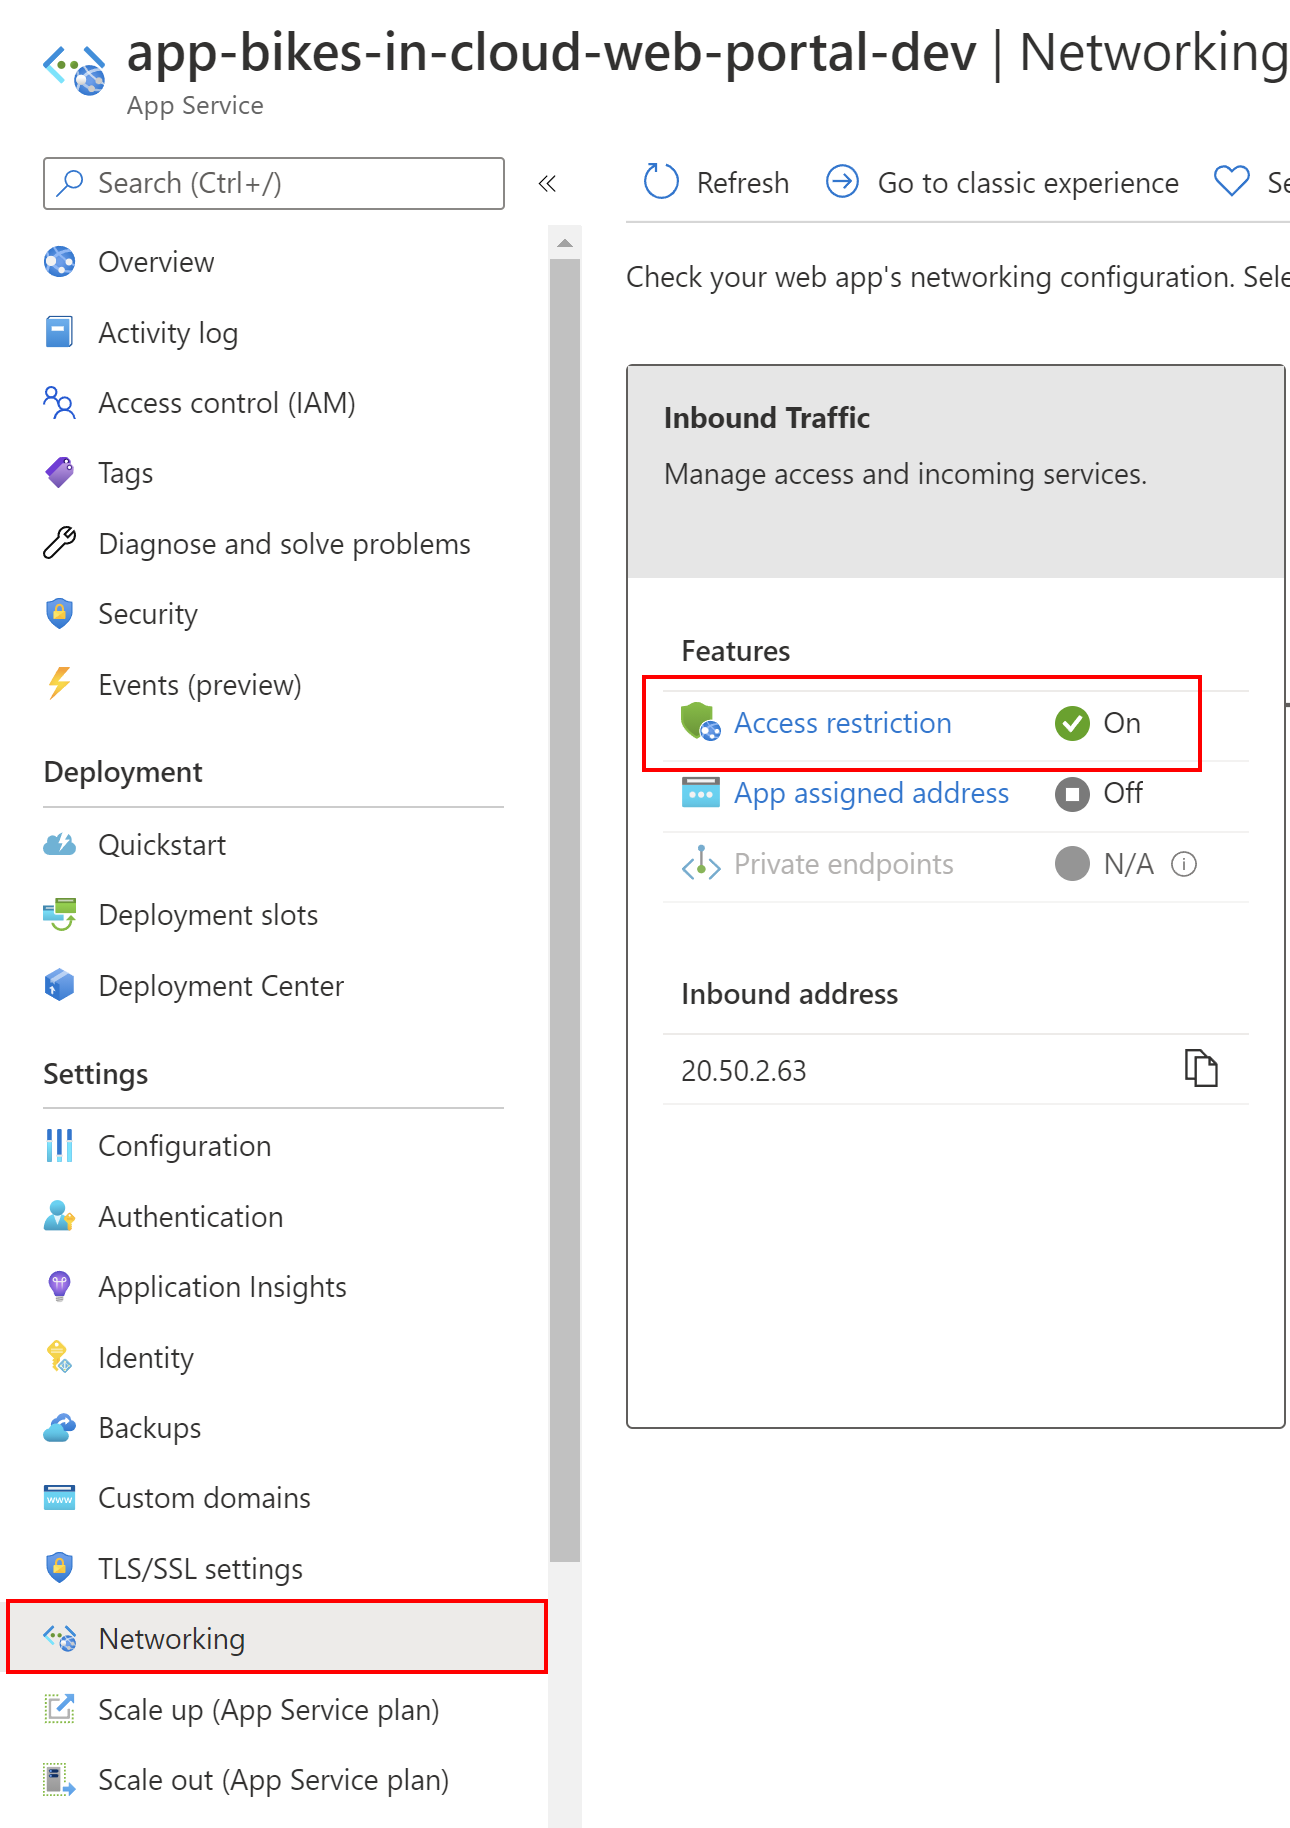
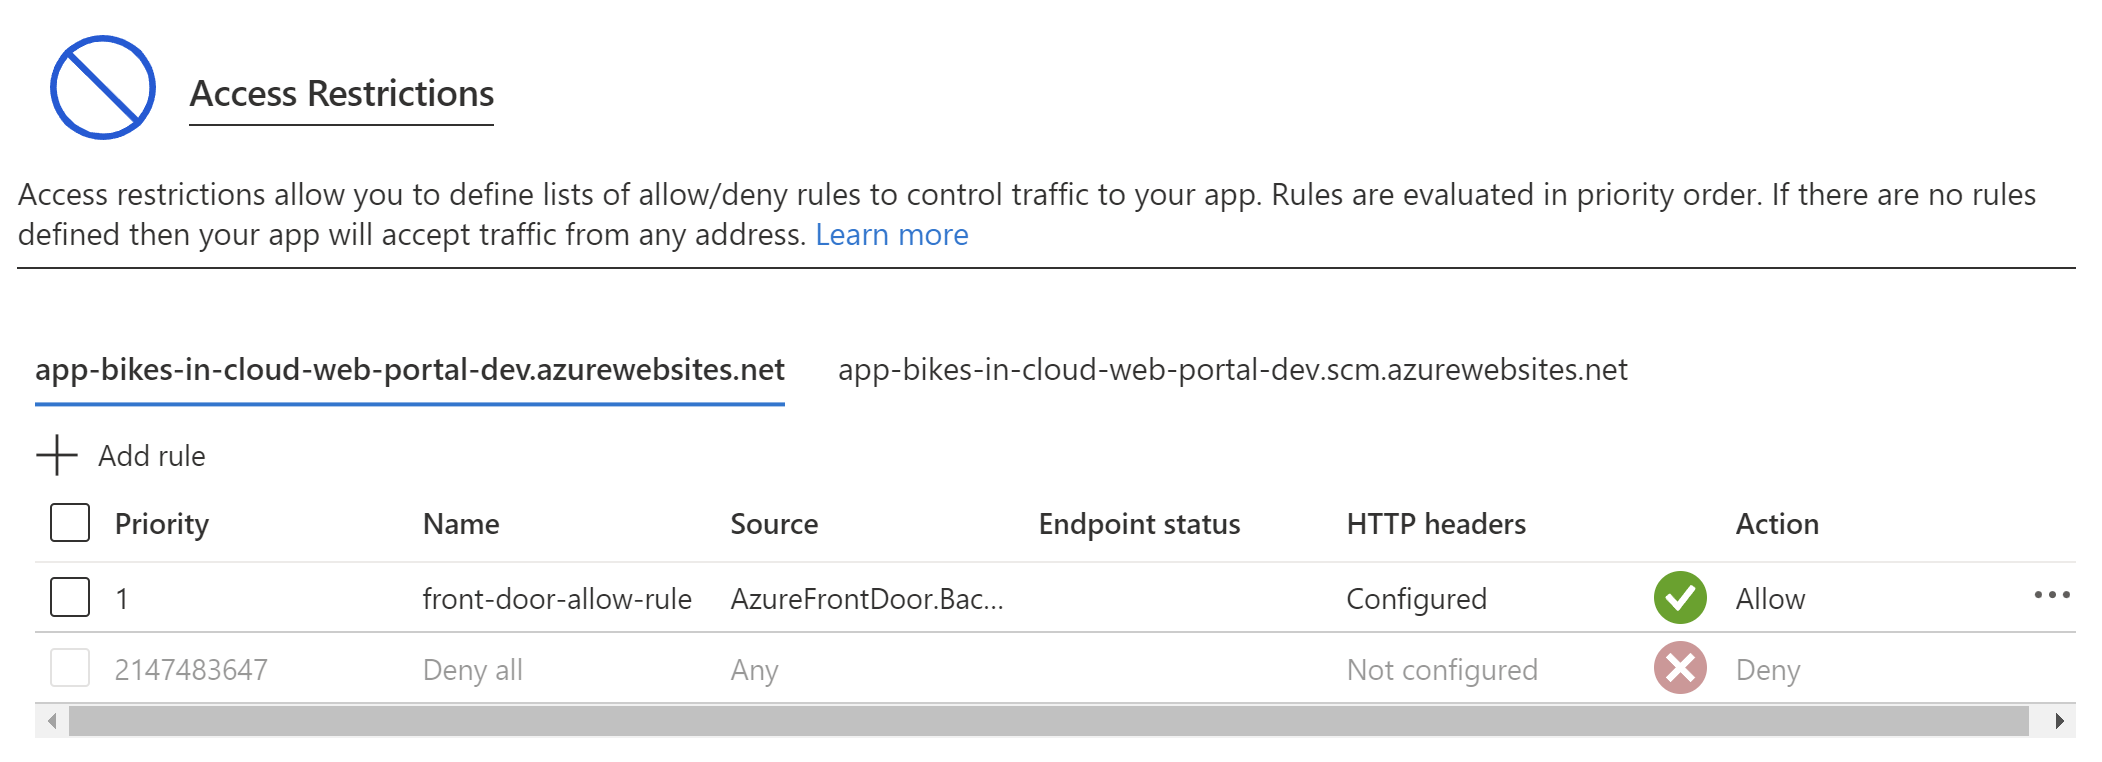
In this specific scenario, we want to restrict access to our Azure Web App which hosts our front-end application to accept requests sent only from the Azure Front Door interface. Under Networking section of our Azure Web App, we have to select Access restriction.
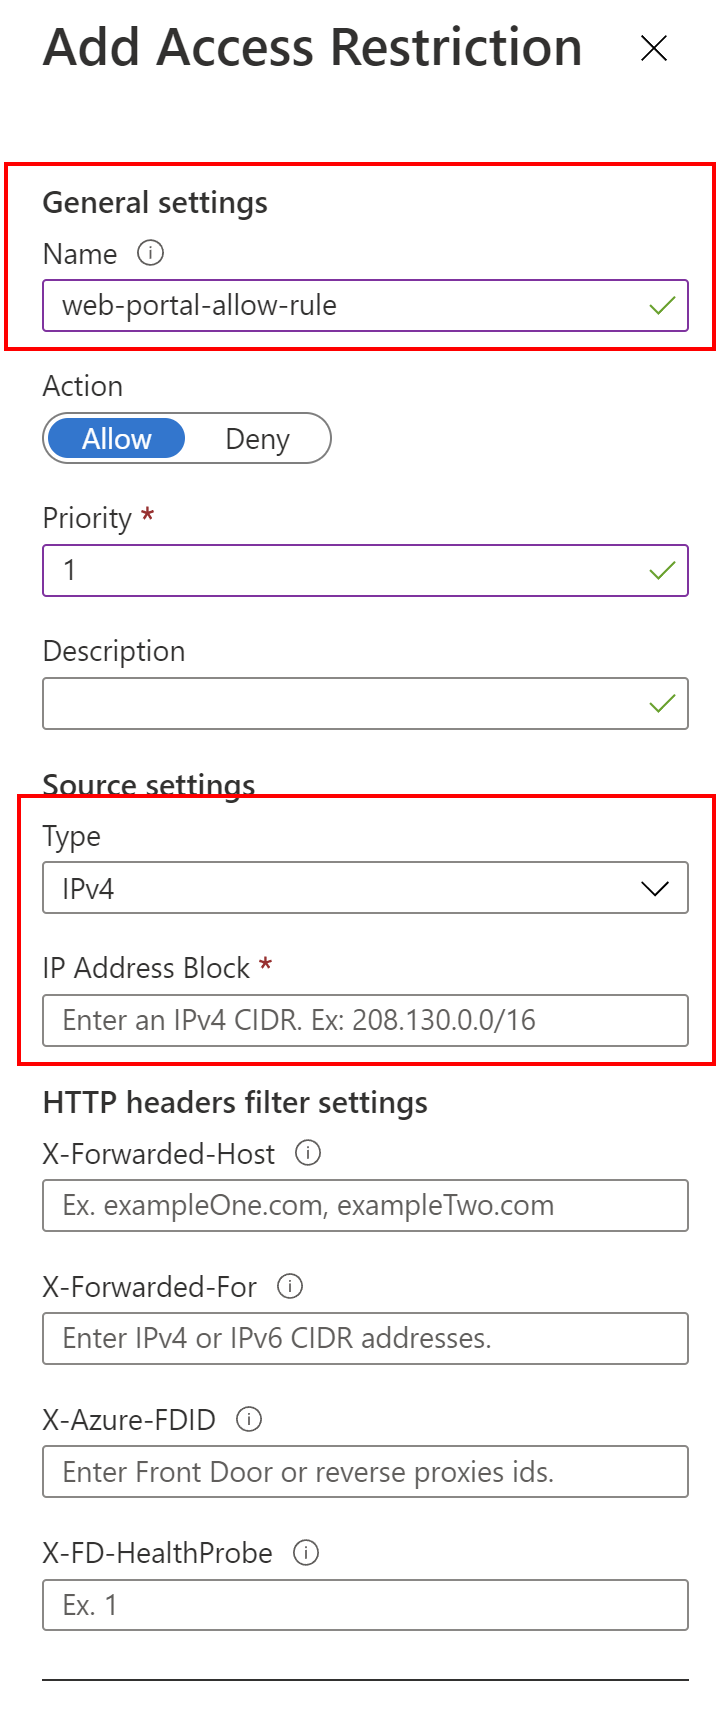
Then, we can add a new restriction rule by clicking +Add rule:
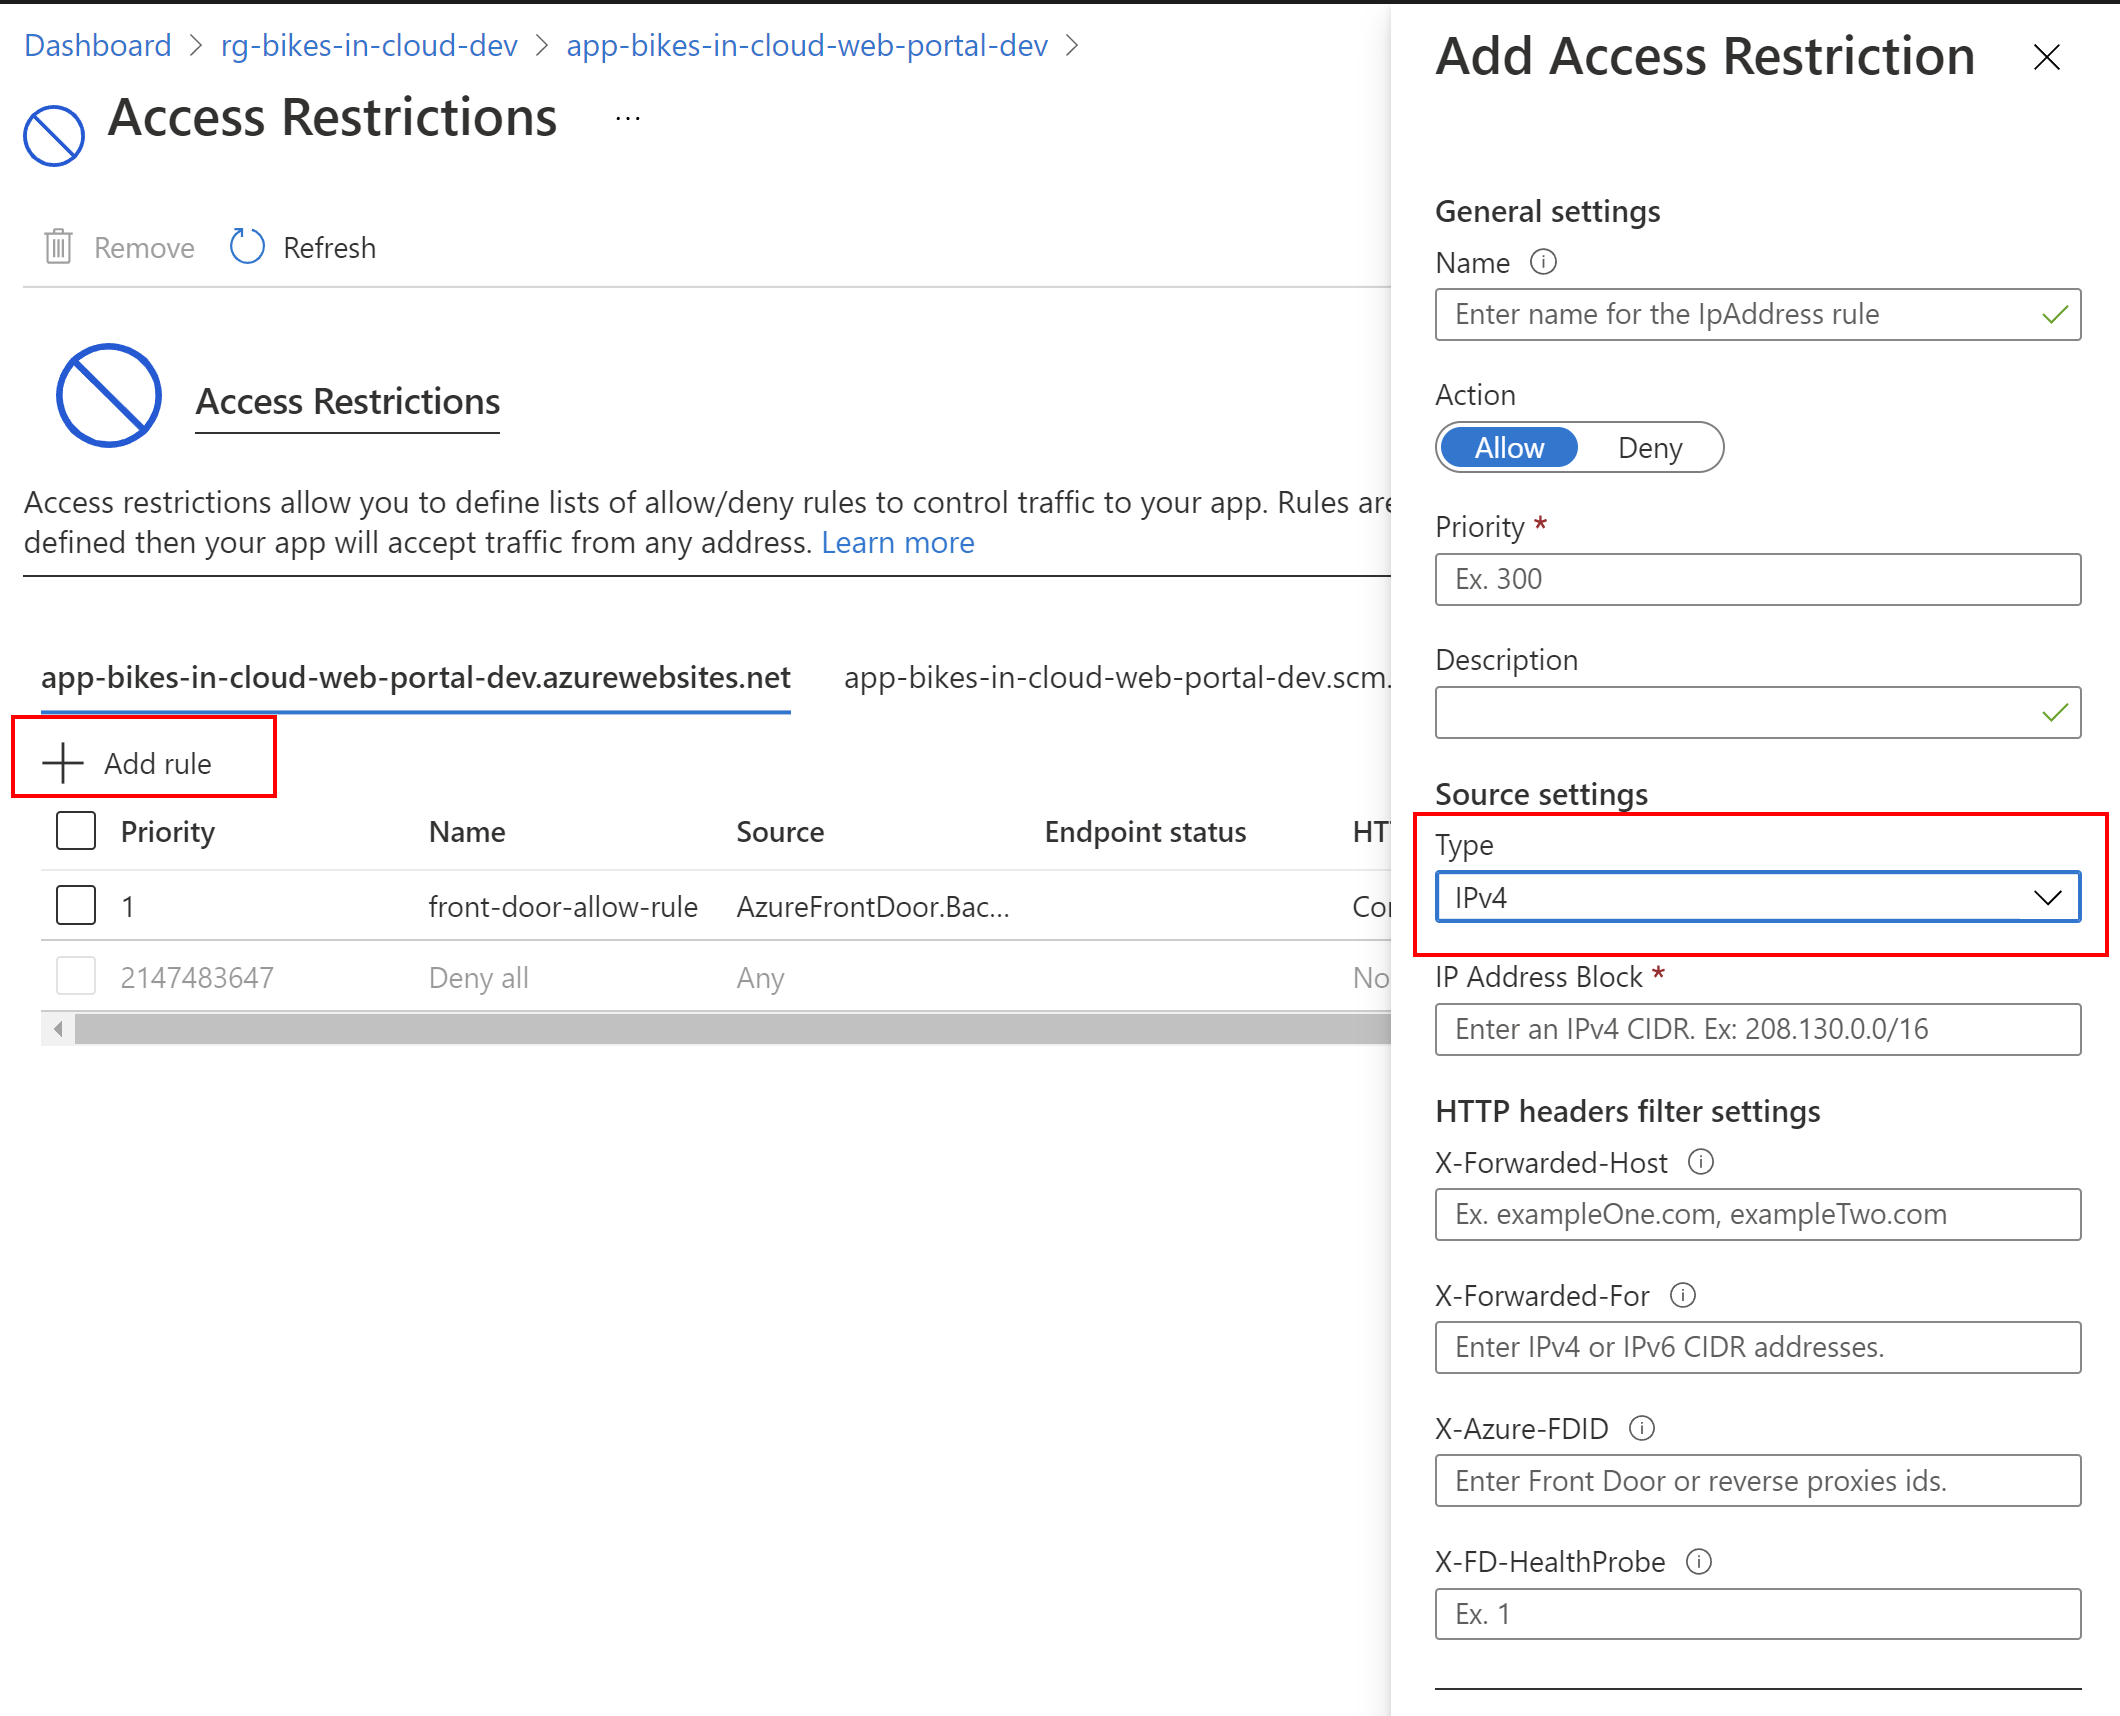
In our case, we want to make sure that our web application is called only from the Azure Front Door interface. In this case, we have to select the rule type to be Service Tag, and Service Tag should be set to AzureFrontDoor.Backend:
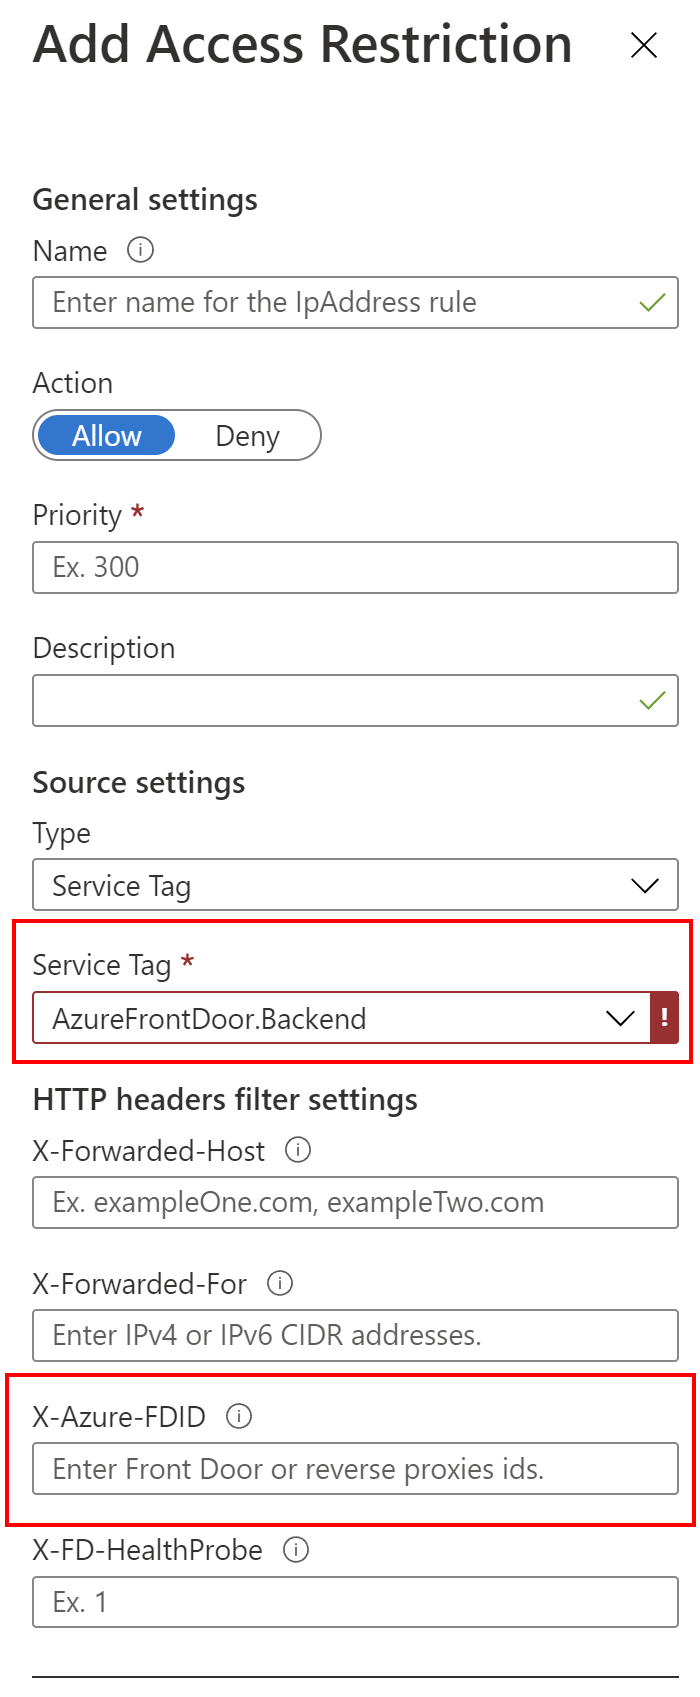
With this setting Azure Web App will be reachable only from the Azure Front Door backend interface. This is great but we want to also make sure our Azure Web App can be accessed only from our Azure Front Door instance. In this case, we also need our Azure Front Door instance ID. To obtain it, we can use the PowerShell script below:
Connect-AzAccount -Tenant <<yout-tenant-id>>
$context = Get-AzSubscription -SubscriptionId <<your-azure-subscription-id>>>> Set-AzContext $context

$afd = Get-AzFrontDoor -Name "<<your-front-door-instance-name>>"
$afd.FrontDoorId
This will display the unique ID of our Azure Front Door instance. We have to copy it and paste it into the X-Azure-FDID section. Once we add this rule, our Azure Web App can be reached only from our Azure Front Door instance:
Now we can also decide how our backend application (hosted on another Azure Web App instance) can be accessed. In this case, we want to be sure that it can be called only from the front end application hosted on a specific Azure Web App:
In this case, we can set IP restrictions. We will enable calling our backend Azure Web App only from the outbound IP addresses assigned to the Azure Web App which hosts our front-end application. Still, in the Networking tab, we can copy Outbound addresses:
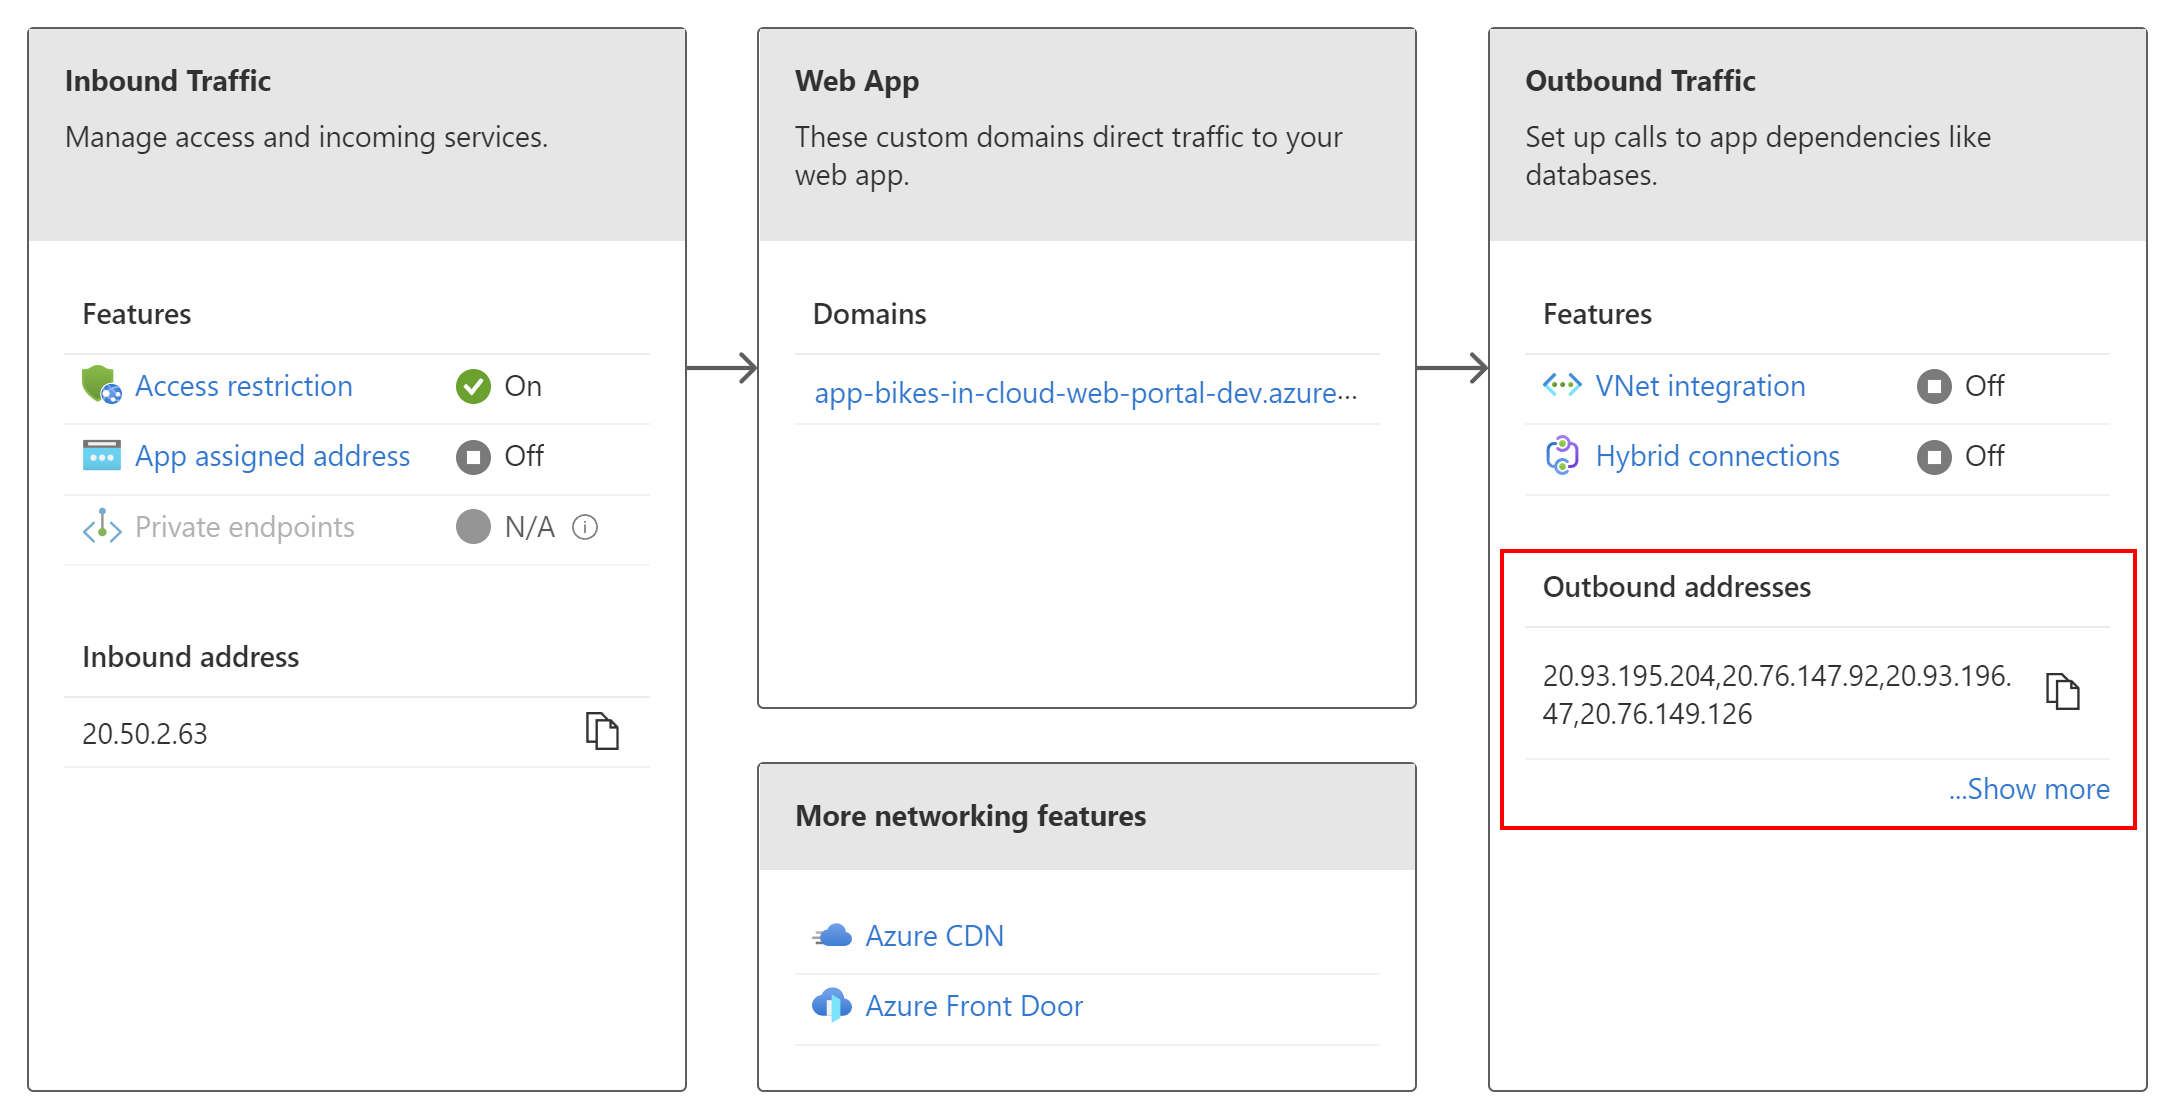
Then we have to open Networking tab of our Azure Web App which hosts the backend application. Then, we have to add rules for all the copied IP addresses from above:
This is the final list of IP addresses used in my solution:

In this case, my backend application cannot be accessed directly:
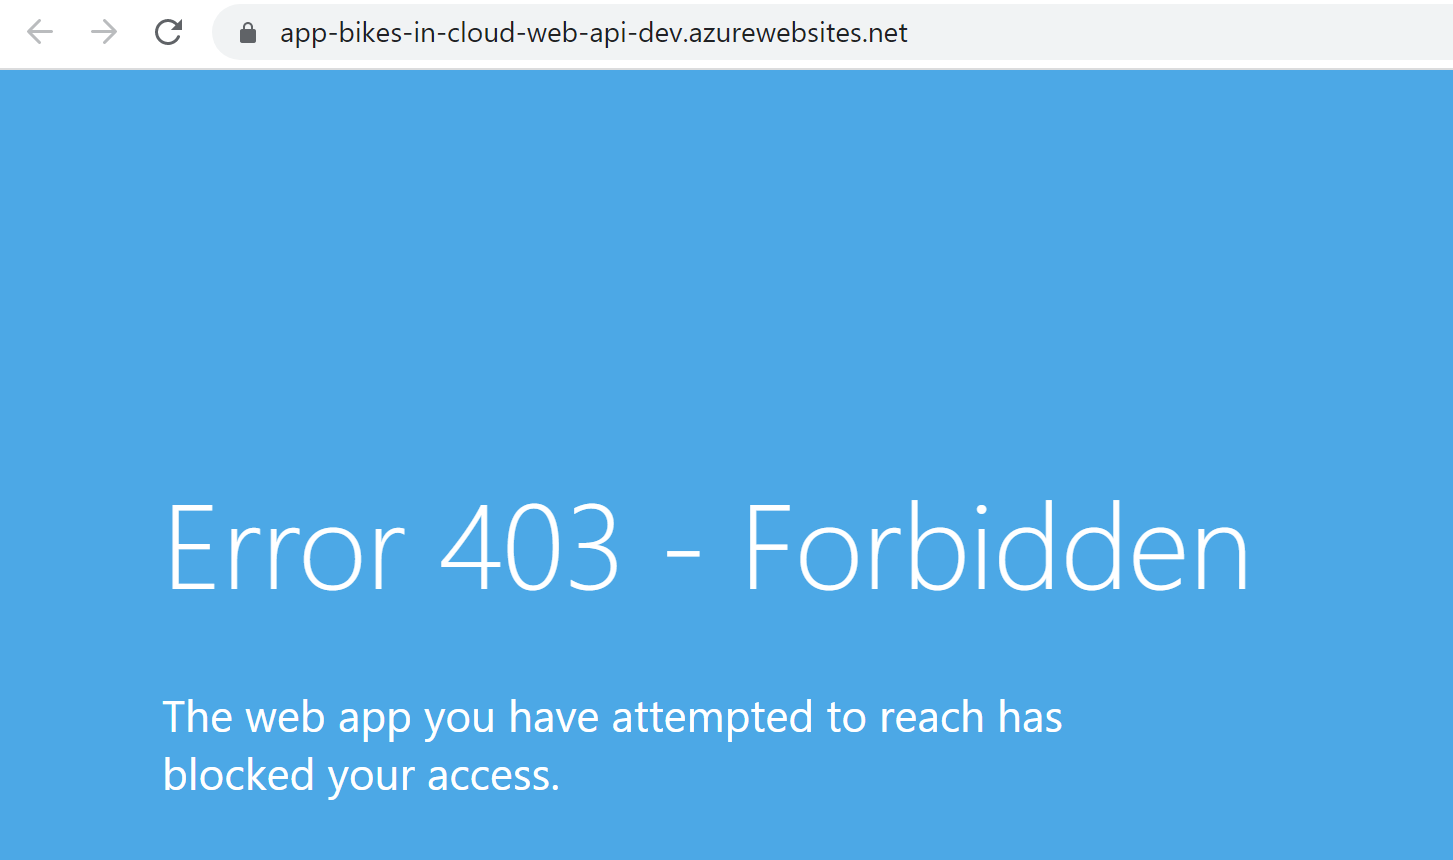
When there are one or more entries, an implicit deny all exists at the end of the list. Great, now it is time to set up Azure Web Application Firewall policy and connect it with our Azure Front Door instance.
Azure Web Application Firewall (WAF)
Azure Web Application Firewall (WAF) on Azure Front Door provides centralized protection for our web applications. WAF defends your web services against common exploits and vulnerabilities. We can configure a WAF policy and associate that policy to one or more Front Door front-ends for protection. A WAF policy consists of two types of security rules:
-
custom rules that are authored by the customer
-
managed rule sets that are a collection of Azure-managed pre-configured set of rules
In our scenario, we will use a collection of Azure-managed pre-configured set of rules. WAF policy can be configured to run in the following two modes:
-
Detection mode - WAF doesn’t take any other actions other than monitors and logs the request and its matched WAF rule to WAF logs. You can turn on logging diagnostics for Front Door. When you use the portal, go to the Diagnostics section
-
Prevention mode - WAF takes the specified action if a request matches a rule. If a match is found, no further rules with lower priority are evaluated. Any matched requests are also logged in the WAF logs
Azure Web Application Firewall (WAF) setup
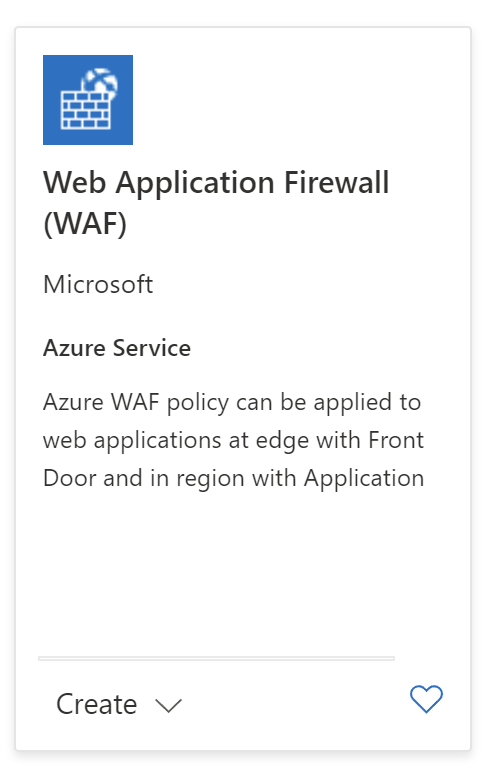
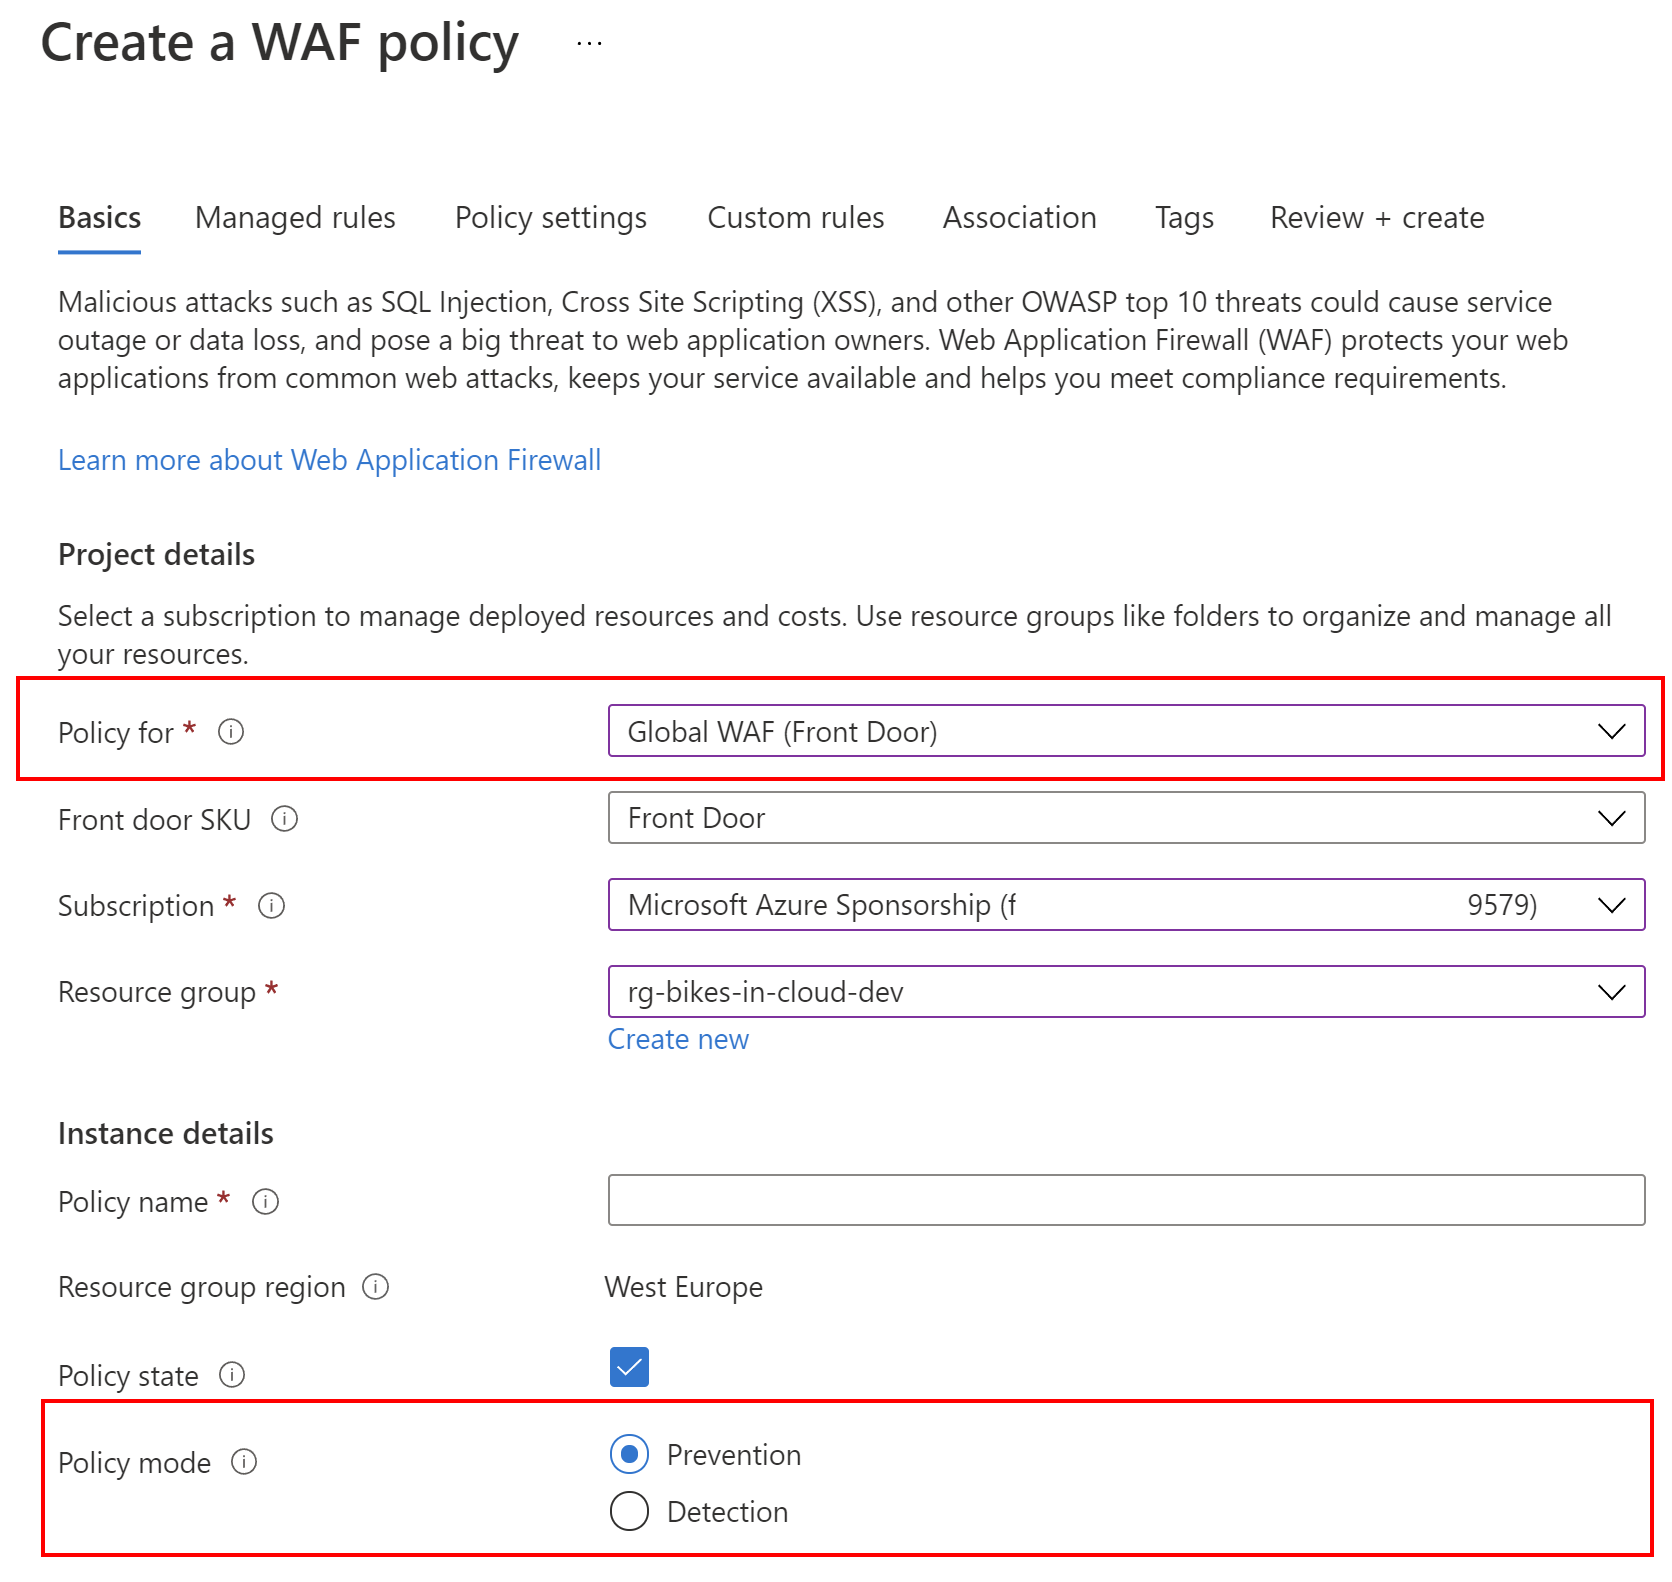
We have to first create an Azure Web Application Firewall policy. We will do it and configure it in the Azure portal:
First, we have to indicate the resource type to protect with the use of a WAF policy. In our case, this is Azure Front Door. Policy mode should be set to Prevention because we want to be sure that WAF takes the specified action if a request matches a rule. The name of the rule in my case is wafPolicyForFrontDoor:
Then, we have to select the rules set. This ruleset protects our web application from common threats defined in the top-ten Open Web Application Security Project (OWASP) categories:
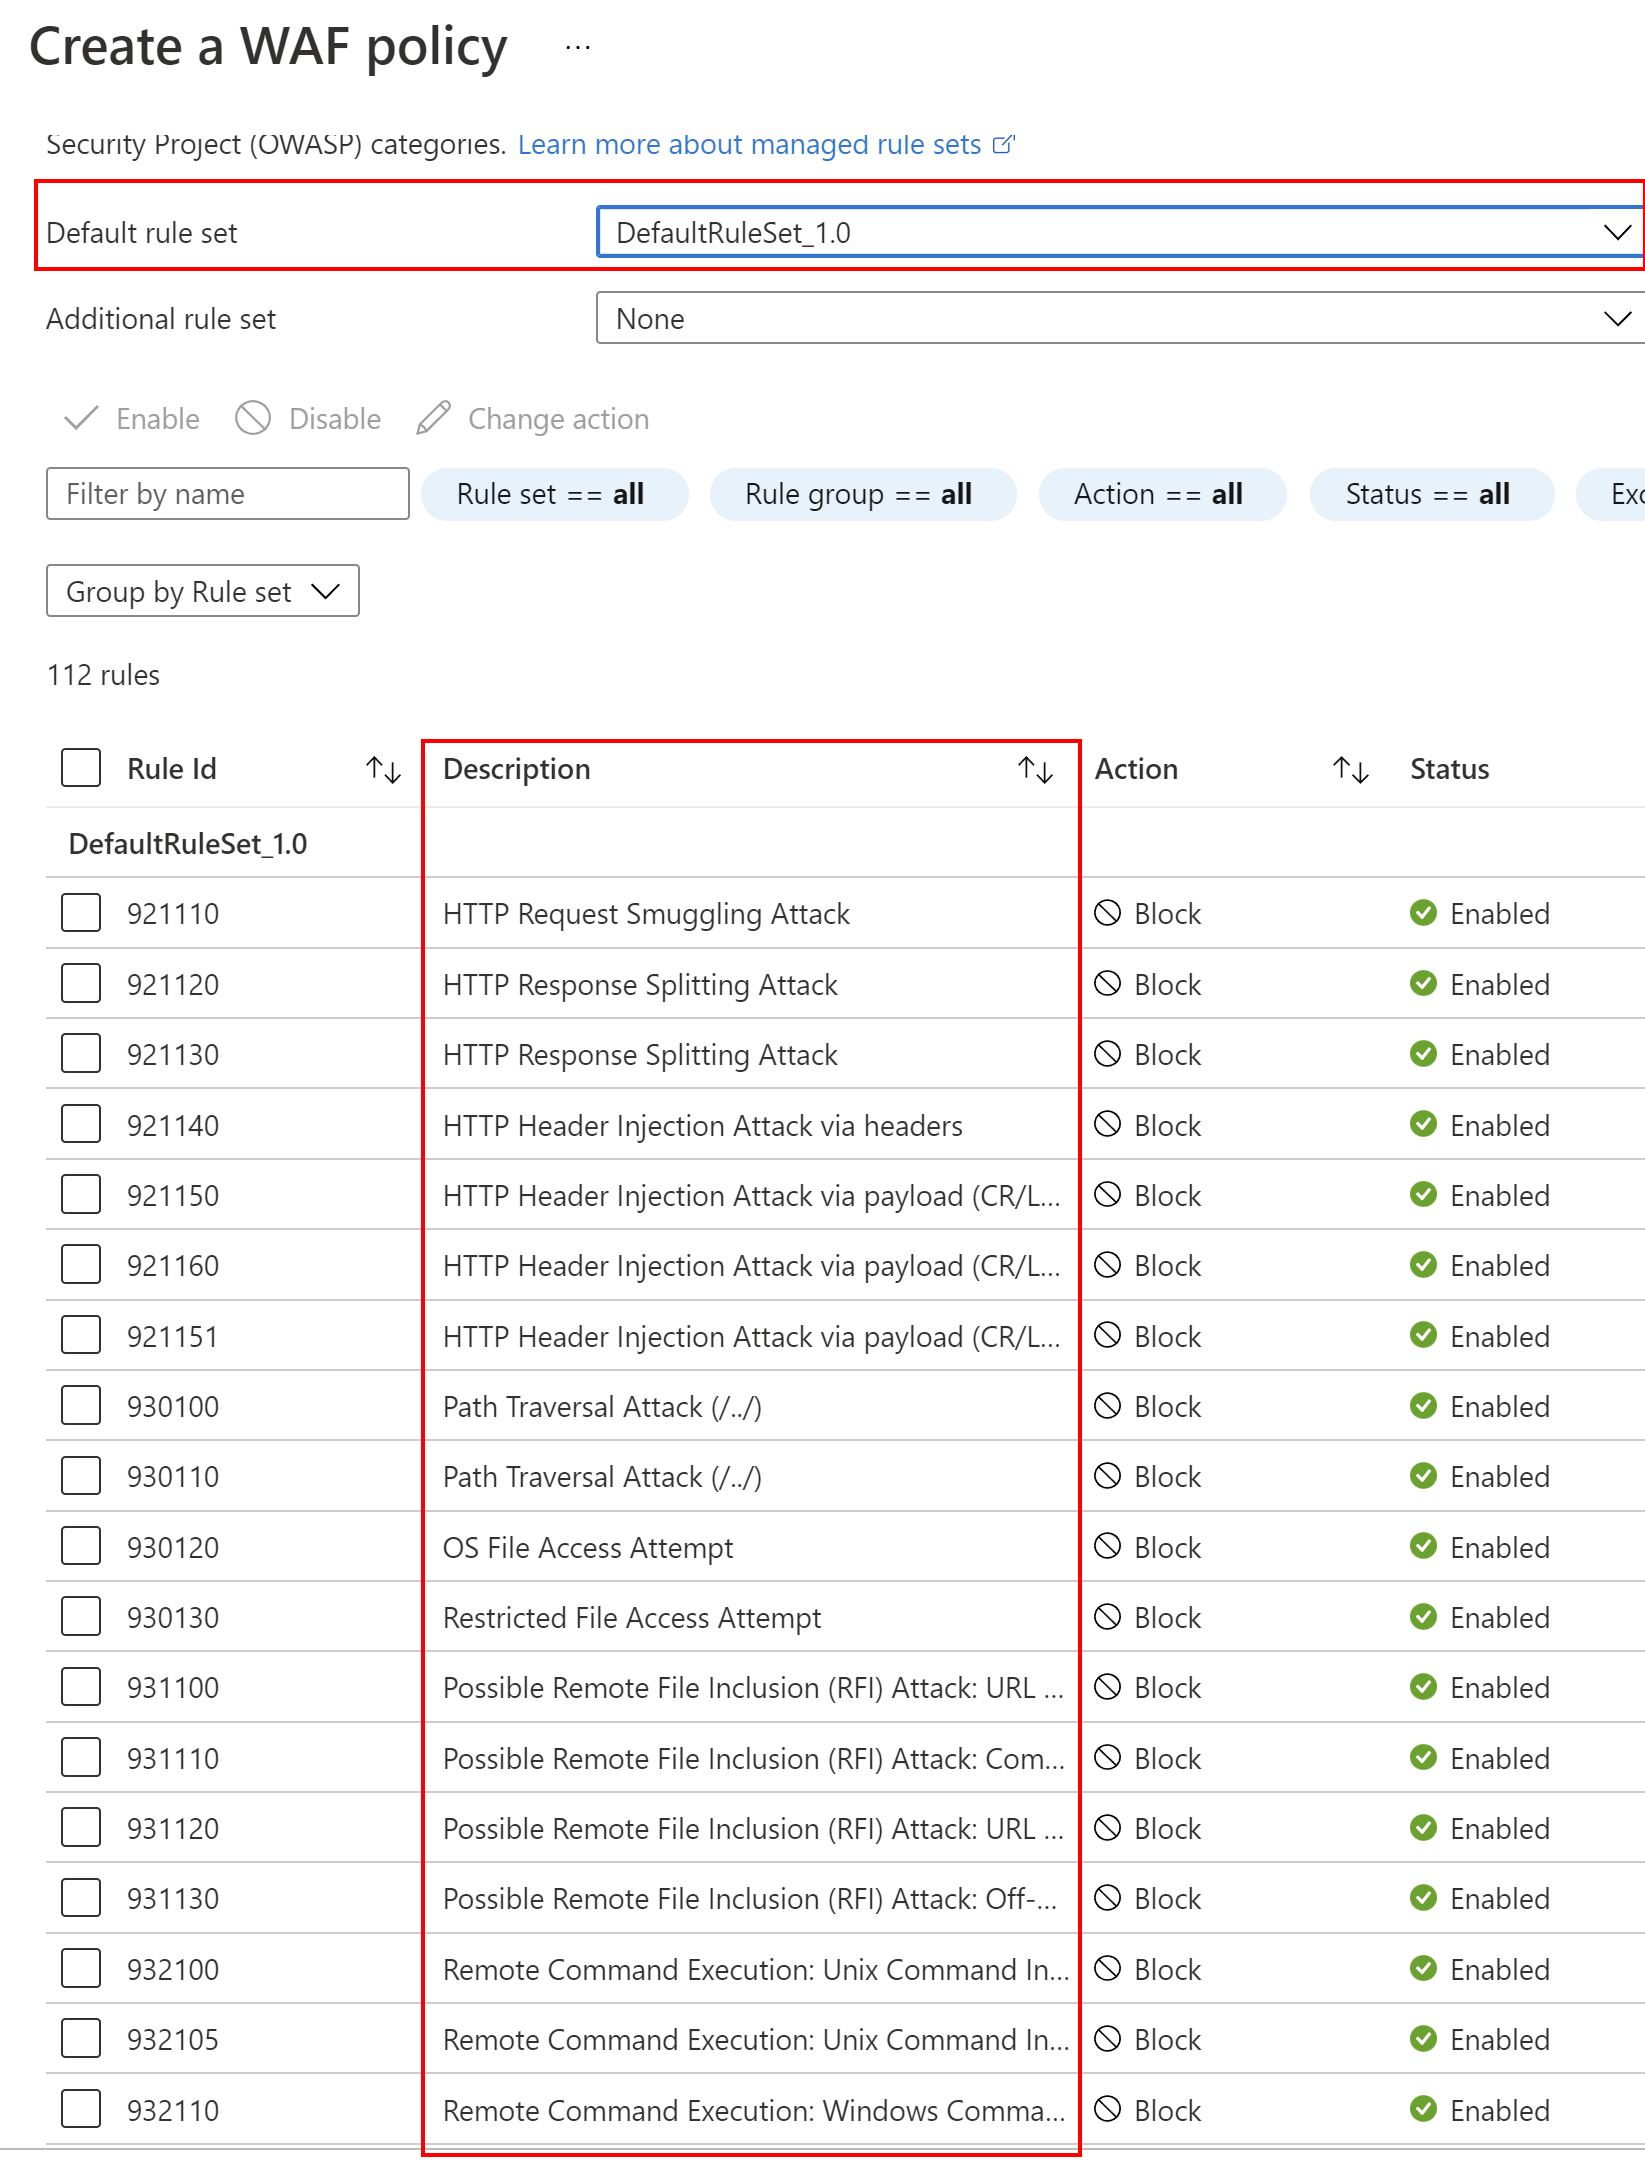
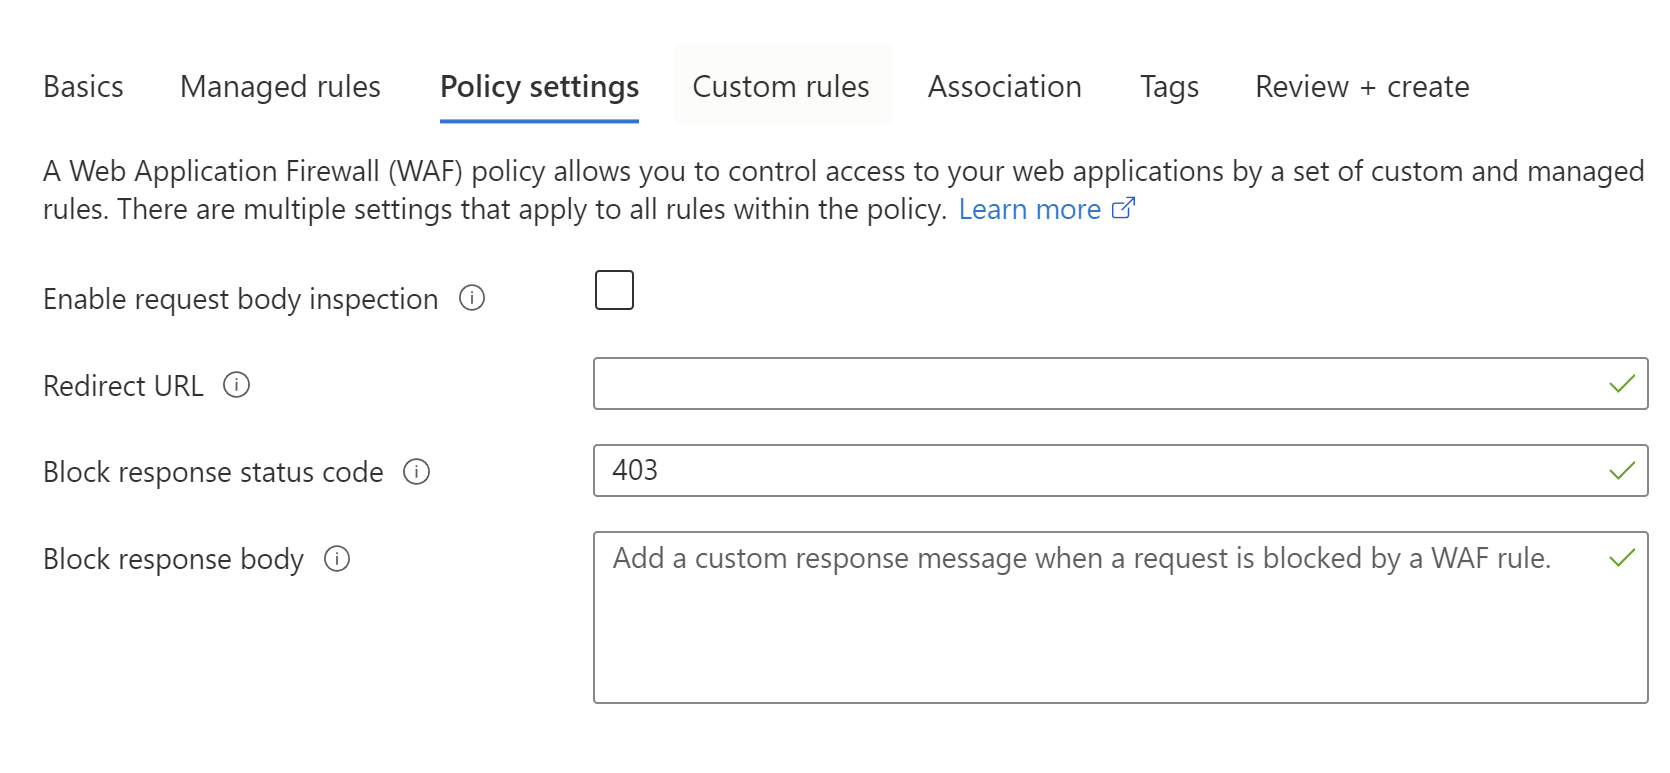
Next, we can customize the response status code sent by WAF when a request is blocked. In this case, let’s leave it as 403 forbidden:
We can also add our custom rules. Once a rule is matched, the corresponding action defined in the rule is applied to the request. In this scenario I did not specify any custom rules:

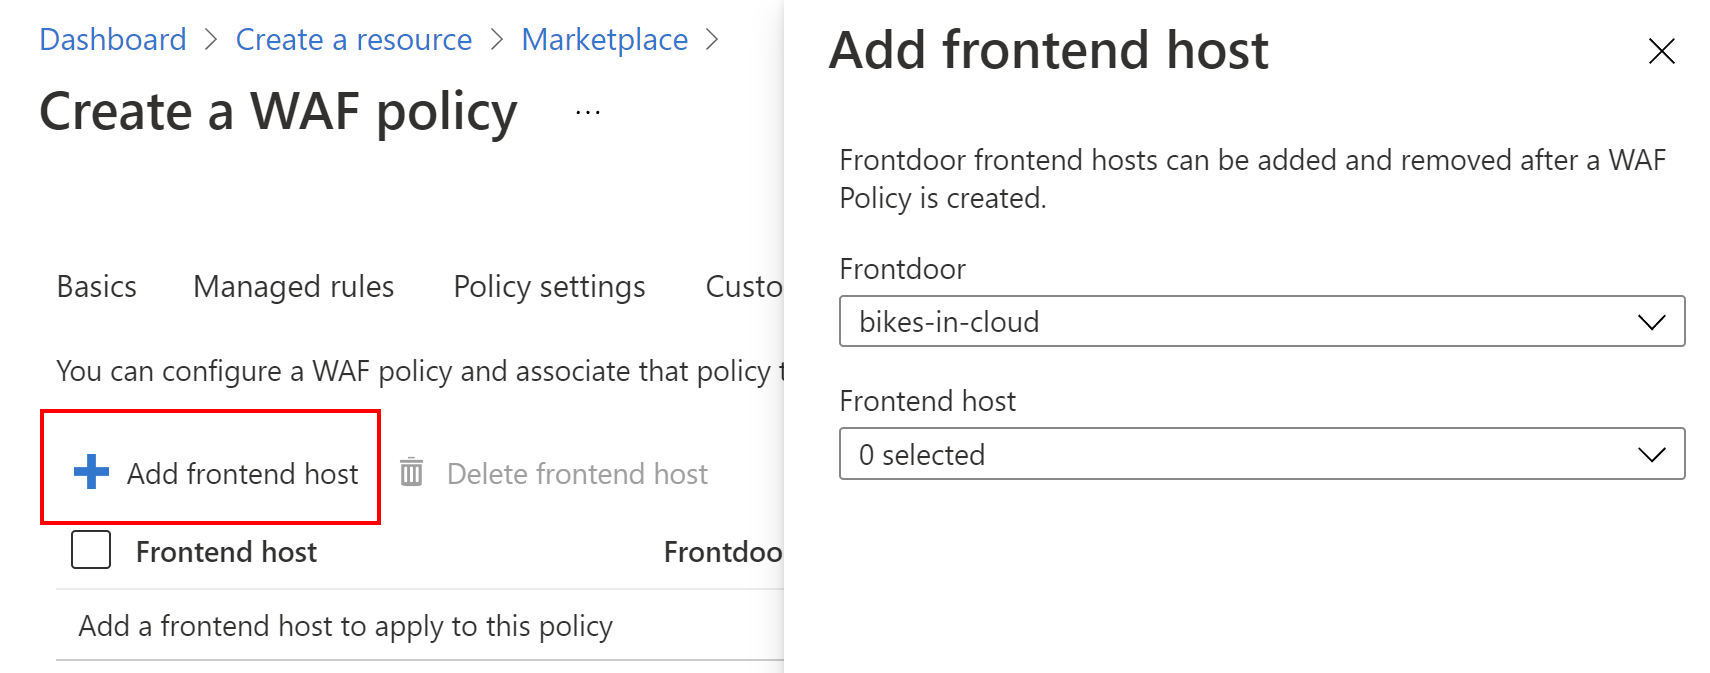
Next, we have to associate WAF policy with our current Azure Front Door instance by selecting front end host:
Once we do it, we can create a new WAF policy by clicking Create button. After few minutes we should see that WAF policy was successfully integrated with our Front Door instance:
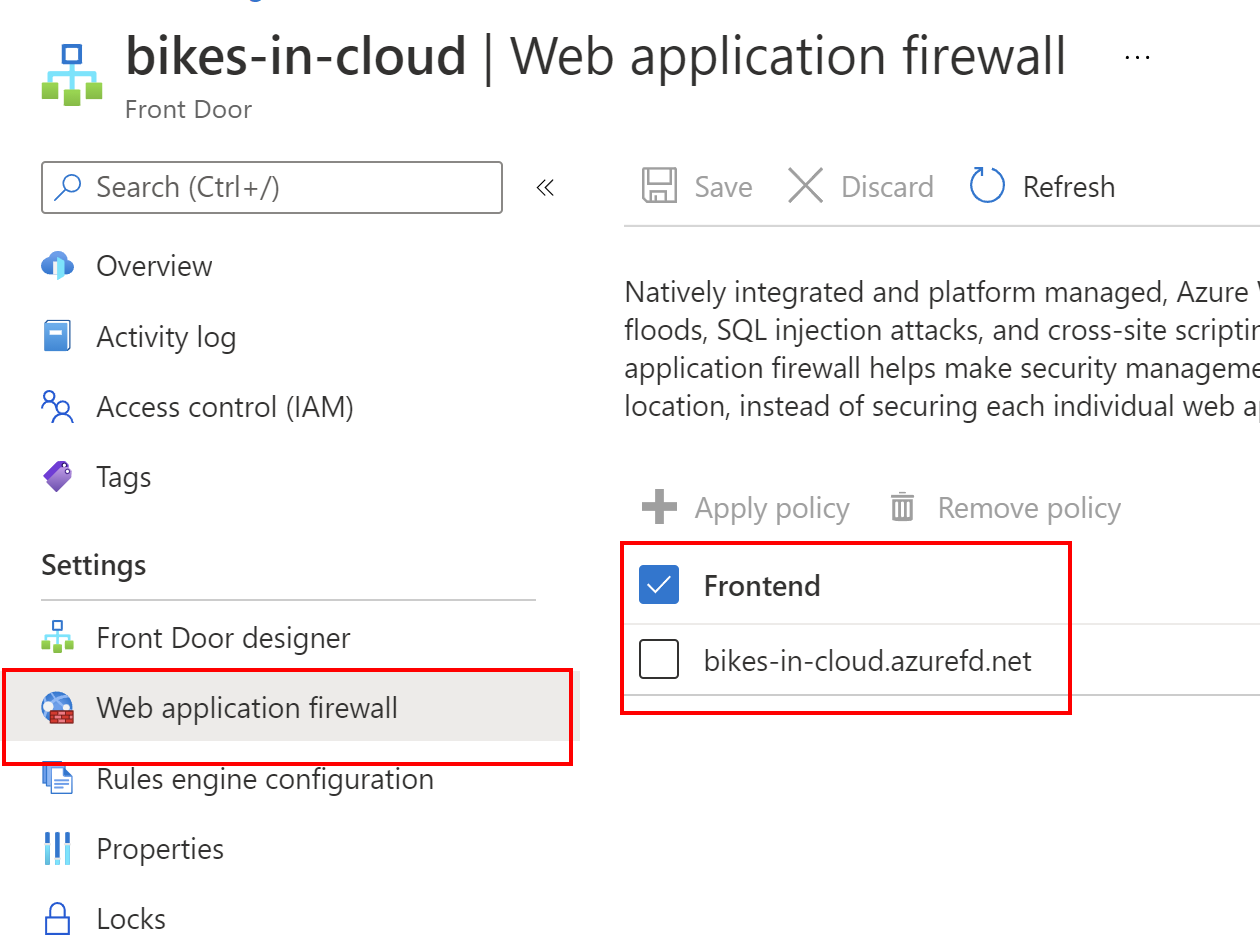
Now if anyone wants to use our application, all requests must be sent through the Azure Front Door front end interface.
Summary
In this article, we discussed how to secure our applications with Azure Web Apps access restrictions, Azure Front Door, and Azure Web Application Firewall (WAF) policy. As mentioned at the beginning of this article, even if we do not use App Service Environment (ASE), we can still make sure that our web apps are secure.