Microsoft Bot Framework – part 1
Short introduction
Microsoft Bot Framework enables developers to create intelligent applications to communicate with users. In this article I would like to describe what exactly Microsoft Bot Framework offers and what are its key concepts and present how to create simple Bot in Azure portal.
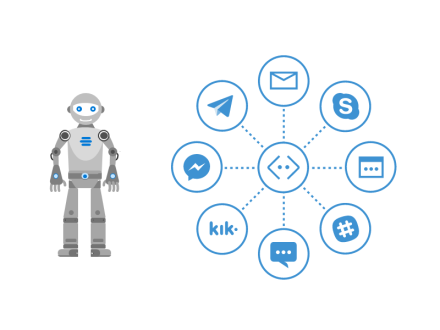
Bot is an application which enables users to communicate with it with text, cards or speech.
Basically there are two types of bots:
a. Simple bot with pattern matching – user sends message, bot analysis request and check whether there is a possible response
b. More sophisticated bot which is using artificial intelligence including advanced connections and state tracking
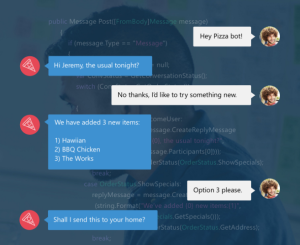
Sample conversation can look like:
Dictionary
Microsoft Azure
Microsoft Cloud Platform which enables set of cloud services that developers and IT professionals use to build, deploy, and manage applications through our global network of datacenters. One of available services is Bot Service described below.
Microsoft Azure Bot Service
Microsoft Azure Bot Service provides what you need to build, connect, test, deploy, monitor, and manage bots. Bot Service provides the core components for creating bots, including the Bot Builder SDK (described below) for developing bots and the Bot Framework for connecting bots to channels.
Bot Service provides an integrated environment purpose-built for bot development. You can write a bot, connect, test, deploy, and manage it from your web browser with no separate editor or source control required. Simple bots may not need to write code at all.
Bot Service provides two possible hosting plans:

With the App Service plan, a bot is a standard Azure web app you can set to allocate a predefined capacity with predictable costs and scaling.

With a Consumption plan, a bot is a serverless bot that runs on Azure Functions and uses the pay-per-run Azure Functions pricing.

Bot Builder
The Bot Builder provides an SDK, libraries, samples, and tools to help you build and debug bots. When you build a bot with Bot Service (described above), your bot is backed by the Bot Builder SDK. You can also use the Bot Builder SDK to create a bot from scratch using C# or Node.js
Bot REST API
Developers can create a bot with any programming language by using the Bot Framework REST API.
Three REST APIs in the Bot Framework are available:
a. The Bot Connector REST API (documentation) enables your bot to send and receive messages to channels configured in the Bot Framework Portal.
b. The Bot State REST API enables your bot to store and retrieve state associated with the conversations that are conducted through the Bot Connector REST API. IMPORTANT note from official documentation:
The Bot Framework State Service API is not recommended for production environments, and may be deprecated in a future release. It is recommended that you update your bot code to use the in-memory storage for testing purposes or use one of the Azure Extensions for production bots.
c. The Direct Line REST API (documentation) enables you to connect your own application, such as a client application, web chat control, or mobile app, directly to a single bot.
Bot Framework Emulator
The Bot Framework Emulator is a desktop application that allows you to test and debug you bots, either locally or remotely. Now when you know what is Bot, Bot Service and Bot Builder it is time to discuss two possible options to create your Bot.
There are two possible ways to create the Bot:
a. Using ready-to-go template available in Azure portal – with this approach you need to setup new Bot Service in Azure portal and at the end you have access to Bot source code for further modifications (if needed) b. Writing your Bot from scratch in Visual Studio using Bot Builder SDK and then publish it to Azure
Create Bot with Bot Service available through Microsoft Azure portal
In this section I would like to present how to create Bot through Microsoft Azure portal using Bot Service and App Service Plan.
a. Sign in to Azure portal with your Microsoft Account (Azure subscription is required here) b. Click “new” and select “AI + Cognitive Services” c. Select “Web App Bot”

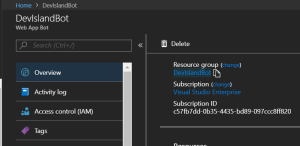
d. Type the unique name of your bot, select subscription, resource group, location and pricing tier. Type the name of web application (it can be the same as Bot name from first field).

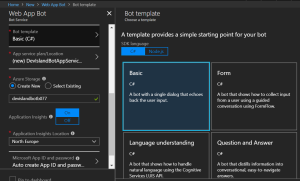
e. In the next section you can select bot template. Template is start point for your bot. Basing on your choice selected source code is selected for bot which you can develop further with Bot Builder SDK. Select “basic” template.
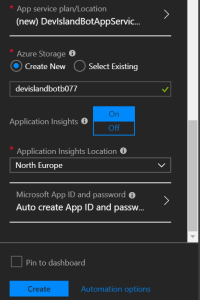
f. Last thing is to setup App Service plan, create new Azure Storage (to store Bot data) and select location for Application Insights (to monitor performance of the Bot). At the end click “Create” button.
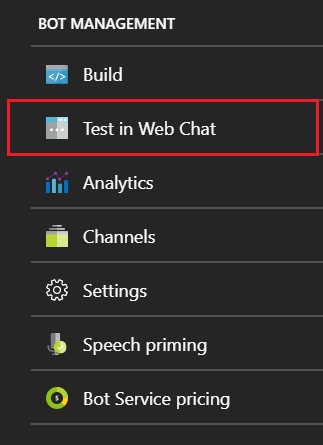
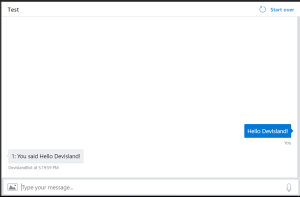
g. Bot is ready for tests. Select “Test in Web Chat” section.
Of course you have full access to Bot source code. Select “Build” tab.
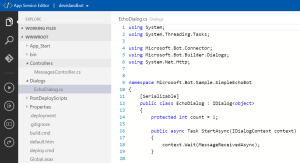
a. You can open code in online editor:
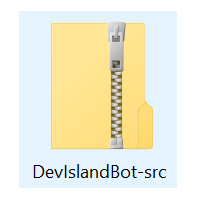
b. Another option (more powerful) is to download Bot source code and edit it in Visual Studio:
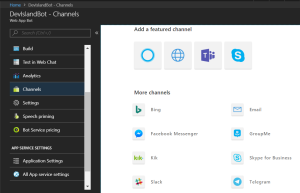
You can also configure additional channels to communicate with your Bot like Microsoft Teams, Facebook Messenger or Skype.
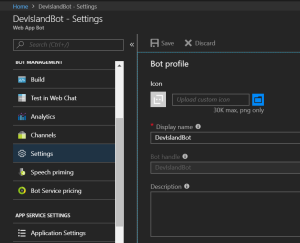
Another nice feature is configuration where you can set Bot icon, title and description.
Wrapping up
Microsoft Bot Framework enables creating smart applications which can communicate with users with natural conversation flow. Developers are able to write specific functionality of bots using Bot Builder SDK available for NET C# and Node.js and host their bots on Microsoft Azure platform. If you would like to read more please refer to official documentation.
In the next part I will show how to extend bot functionality and discuss bot’s source code opened in Visual Studio.