Microsoft Azure DevOps for ASP .NET Core Web apps
Short introduction
Before we start with Microsoft Azure DevOps service lets explain what DevOps is. “DevOps is the union of people, process, and products to enable continuous delivery of value to your end users.” As you can see this is not one specific thing. Azure DevOps is a solution created to support this “union”. It provides tools to manage team work collected in the backlog, it provides GIT repositories to store the code, it provides automatic builds and releases once there is new feature commited. In this article I would like to present how to use Azure DevOps to provide continuous integration and delivery for ASP .NET Core Web Apps. If you want to read more about Azure DevOps visit official website.
Project structure and setup
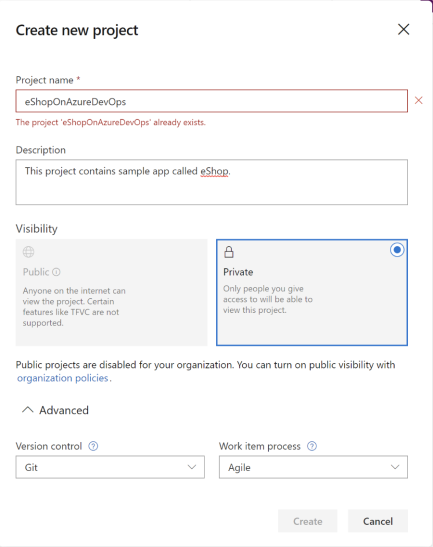
Creating account in the Azure DevOps is free. You can create one using this link. Once you sign in you should see main panel where you can manage your organization settings and projects. Lets start from creating new project. Click “Create project” button. Provide the name for the project and short description. Below select GIT version control and Agile work items process. Click “Create” button:
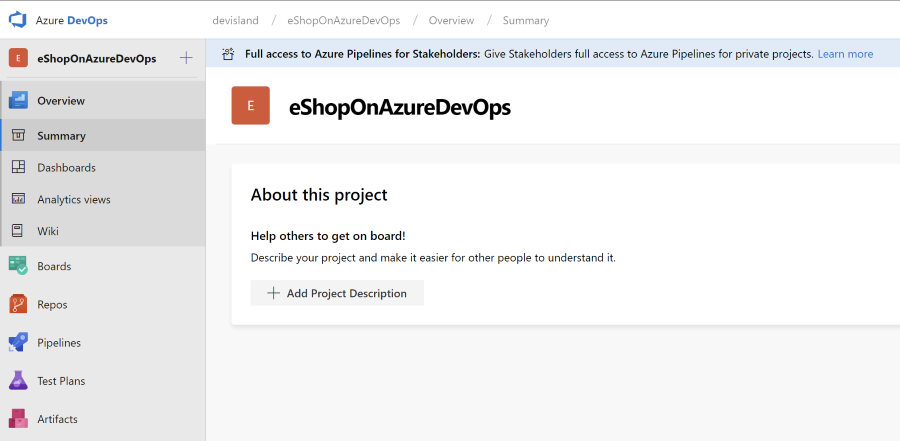
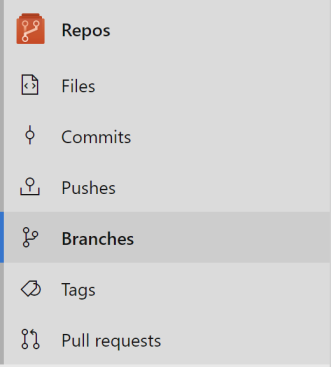
Once project is created you should see navigation panel:
Repository setup
In this section we will commit project’s code to the GIT repository in the Azure DevOps. For this article I used already created, open source project called “eShopOnWeb”. Download its code from GitHub here.
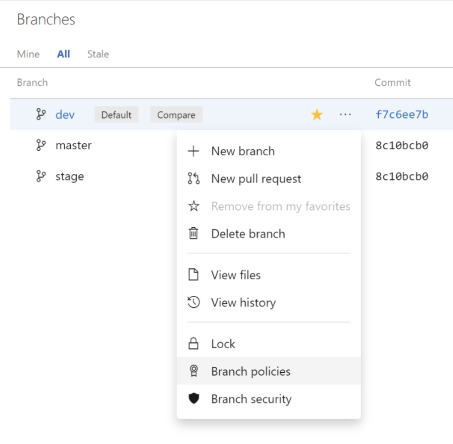
Open “Repos” tab and select “Branches”. In the right top corner click “New branch” button. Create two more branches so in total there will be three of them: master, stage and dev:
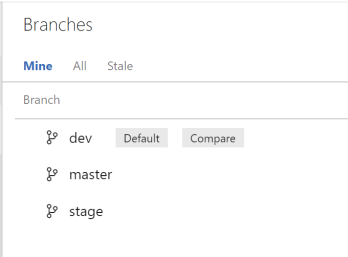
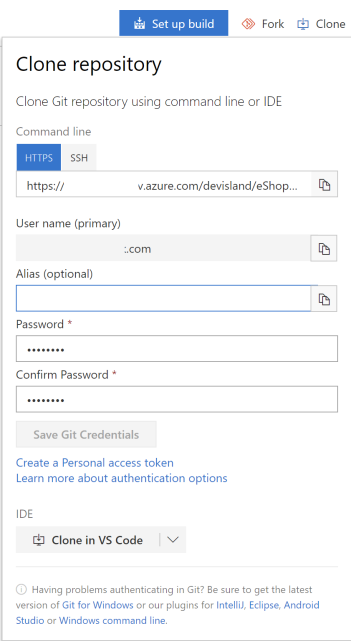
Once you have branches ready there is one more thing to do - set “dev” branch as default one. Click “Project setting” on the bottom and go to the “Repositories” tab. Click on the “dev” branch and select three dots on the right - select “Set as default branch”. Once we have branches ready it is time to commit the code to the “dev” branch. Download code from GitHub first. Then it is time to map our GIT repository. Open “Repos” tab and click “Clone” button. Generate GIT credentials here. I am not sue which tool you prefer to use so lets ommit the part with commits - the only thing here is that source code from GitHub should be committed to the Azure DevOps GIT repository.
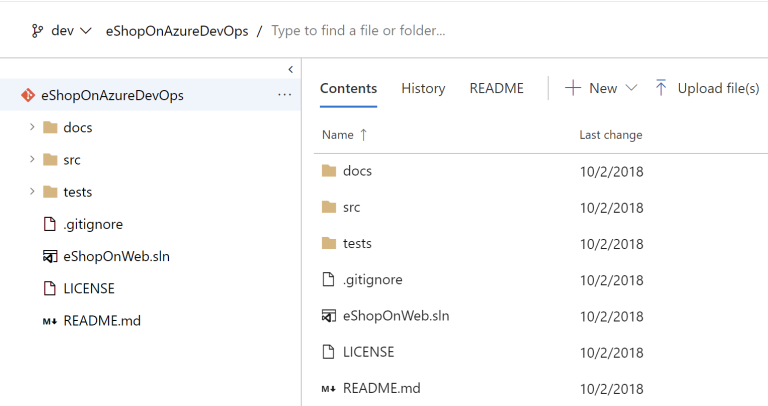
Once you commit the code it should appear in the AzureDevOps portal:
There is great feature for branches called “Branch policy”. We can set few different policies for the branch - for instance you cannot complete pull request if you did not set tasks related with it or you cannot complete pull request if the code from your branch cannot be built. Below I presented how to setup policy for “dev” branch. In the “Branches” section click three dots next to “dev” branch and select “Branch policies”:
Select “Require a minimum number of reviewers”. If you save this policy you will not be able to merge changes before two specified reviewers will do the code review of your proposed changes:
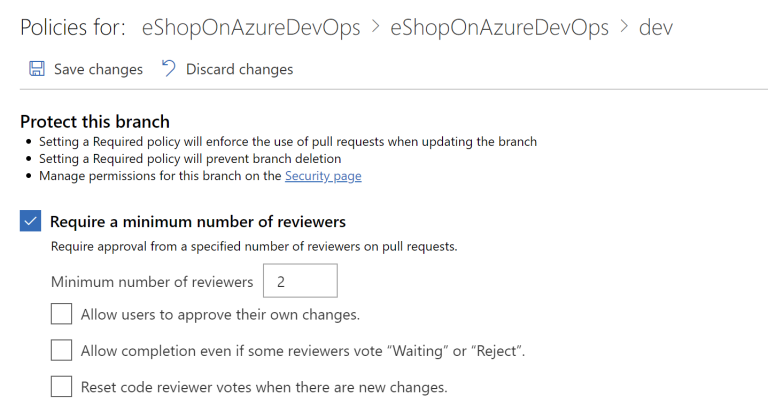
This will also enforce the use of pull requests when updating the branch.
Board setup
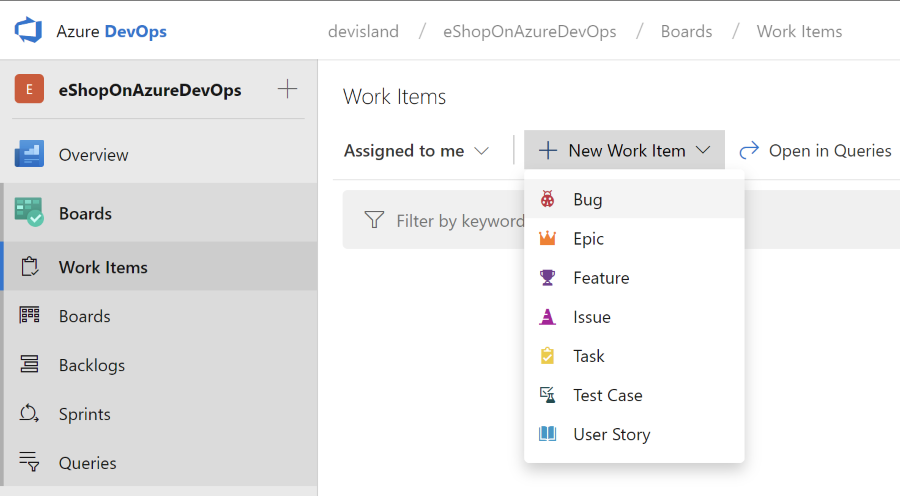
With Azure DevOps boards you can plan the team work and create backlog for your product. You can create tasks, issues, bugs, user stories and features:
If you want to read more about backlog configuration with Azure DevOps please refer to this documentation.
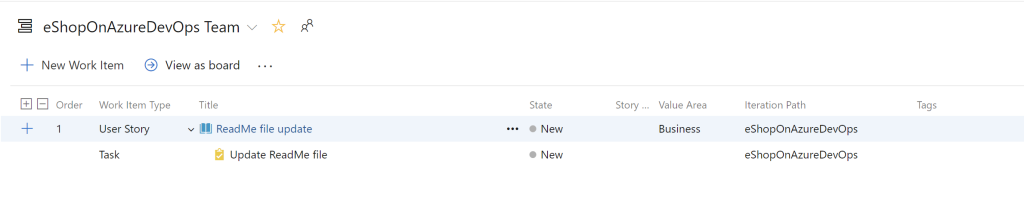
For now we will create one user story and one task inside it. User story and task will be related with updating ReadMe file:
Of course you can add as many stories as you need for the project.
Build pipeline setup
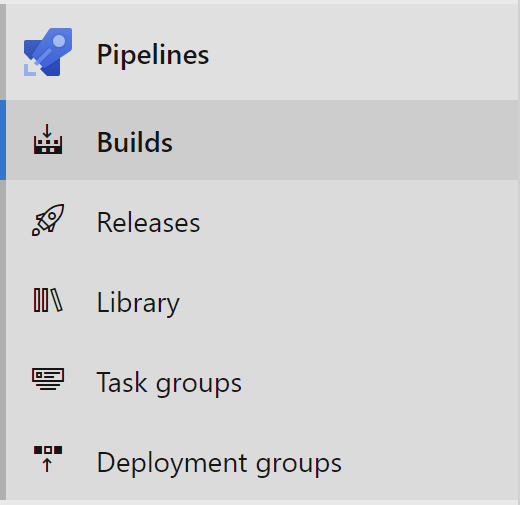
In this section we will setup build pipeline for our web app project. We want to build the code each time when there is an update on the source code from “dev” branch. To configure automatic build open “Pipelines” tab and open “Builds” section:
Click “New pipeline” button and then select “Use the visual designer to create a pipeline without YAML.”
There are few steps:
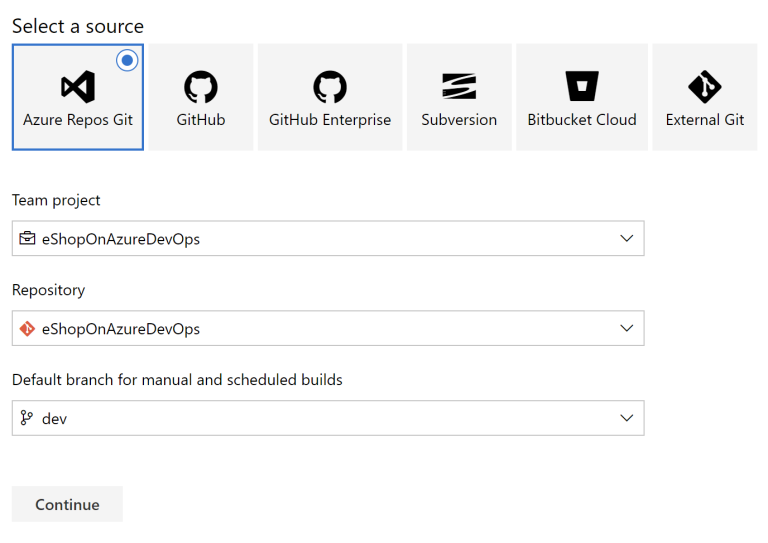
- Location -we have to indicate where the code is located - in our case this will be “Azure Repos GIT”:
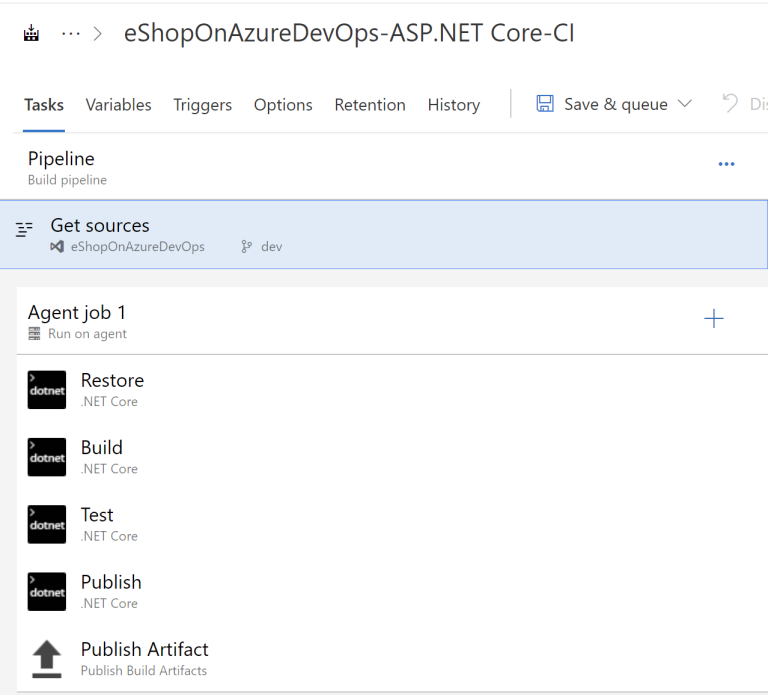
- In this step we can select template for our build - this is very convenient because we do not have to define everything from scratch. Select “ASP .NET Core” template:

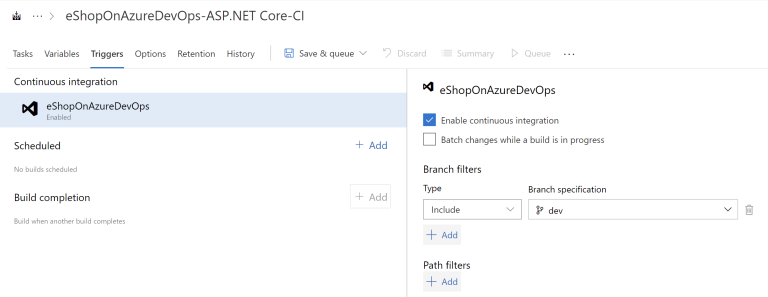
- There will be pre-configured steps displayed. We want to build our code each time new merge is done. To do this select “Enable continuous integration” in the “Triggers” section:
-
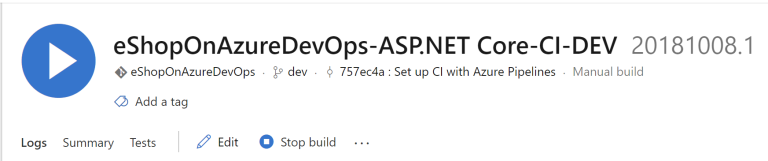
Lets change build definition name to “eShopOnAzureDevOps-ASP.NET Core-CI-DEV” - just click on the text on top.
-
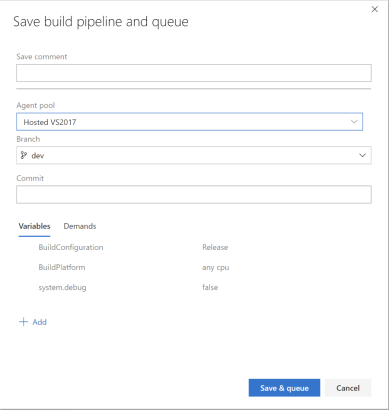
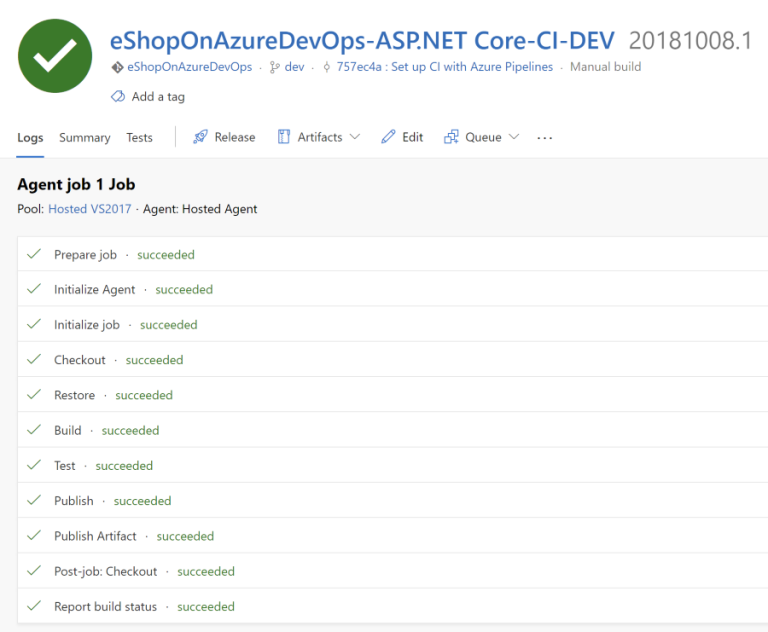
Click “Save & queue” button. Select “Hosted VS2017” as build agent. New build should be scheduled:
- Once build if finished we can check the result:
We can move forward to the next section.
Release pipeline setup

We will host our application using Microsoft Azure Web App service. In this section I would like to present how to use Azure Web App deployment slots so you can deploy two (or more) versions of the application so its available under different URL addresses. You can read more about deployment slots here. As a result of below setup we will configure two different release pipelines: one for demo and one for production.
Create web application in Azure portal
Login to the Azure portal and create new Web App service inside new resource group:
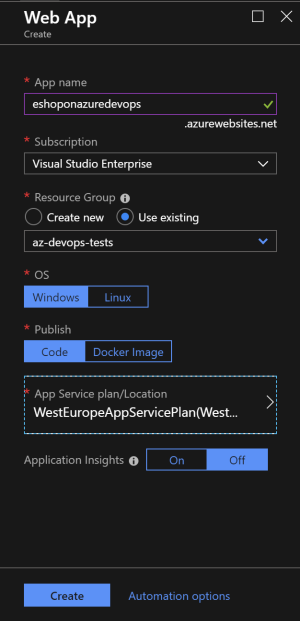
Please remember to select S1 App Service Plan because it provides deployment slots feature. Once Web App is created open it and go to the “Deployment slots” tab:
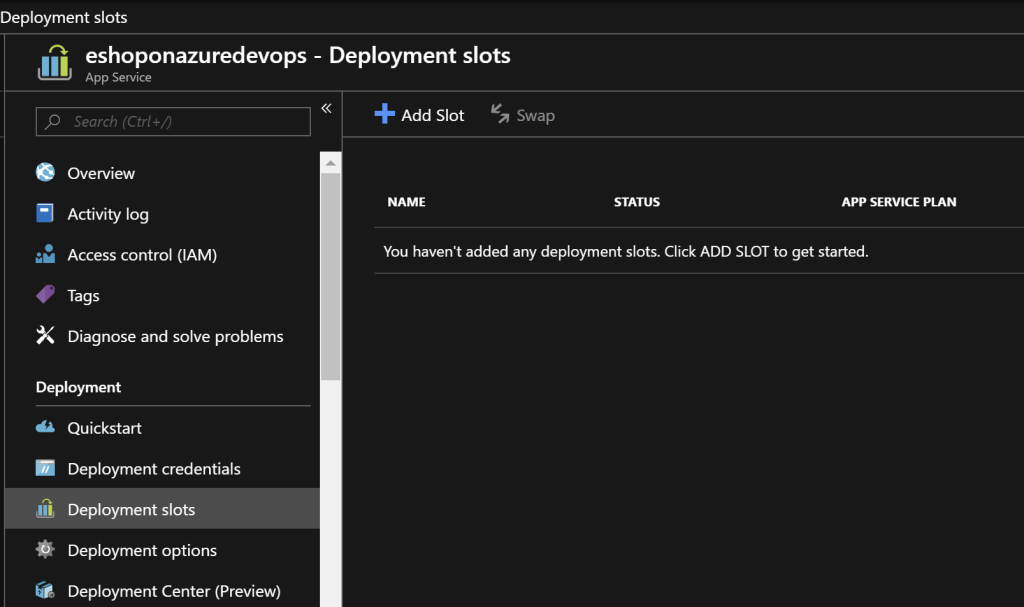
Click “Add Slot” button and add new slot called “demo”. Copy configuration from production slot:

Once deployment slot is created click it. Note that there is new URL created:
https://eshoponazuredevops-demo.azurewebsites.net
Production app URL looks like below:
https://eshoponazuredevops.azurewebsites.net
Now we can connect Azure DevOps with Azure subscription to configure release pipeline.
Setup connection between Azure and Azure DevOps
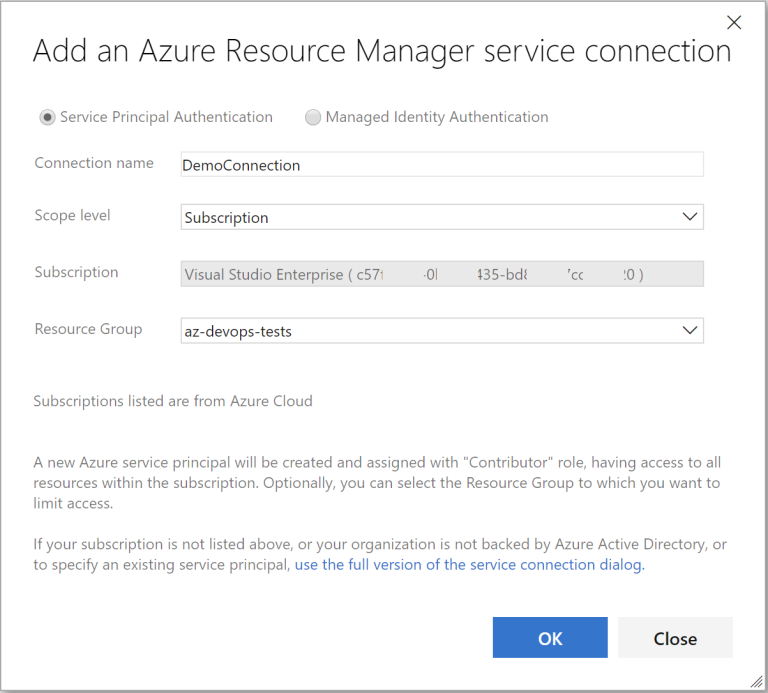
Click “Project settings” on the bottom of AzureDevOps page. Go to “Service connections” under “Pipeline” section. Click “New service connection” and select “Azure Resource Manager”:

Type connection name, select Azure subscription and resource group. Then click “OK”:
Connection should be visible on the list. Now we can configure release pipeline.
Configure release pipeline
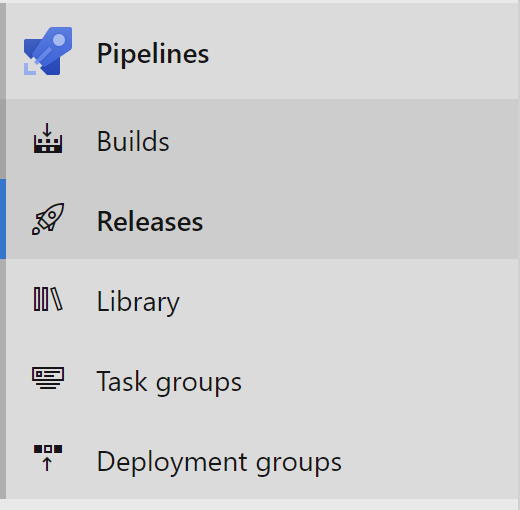
Open “Releases” tab in the “Pipelines” section:
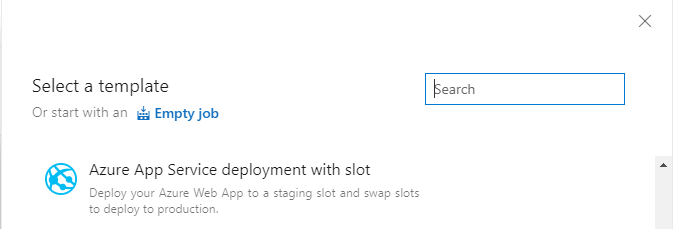
Click “New pipeline” button. On the right side please find and select “Azure App Service deployment with slot”:
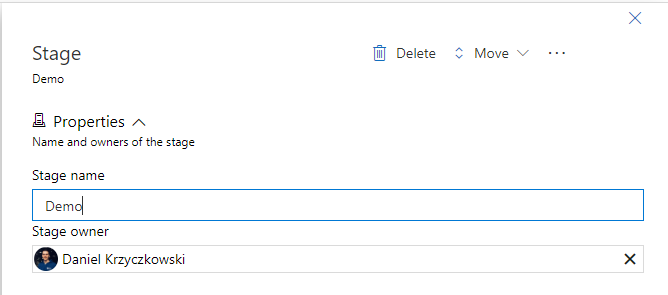
Type “demo” in the “stage name” field and click “X” icon to close the tab:
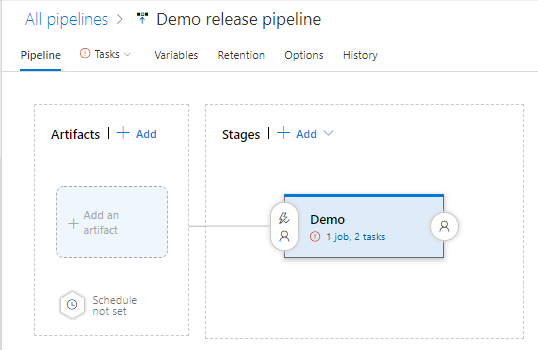
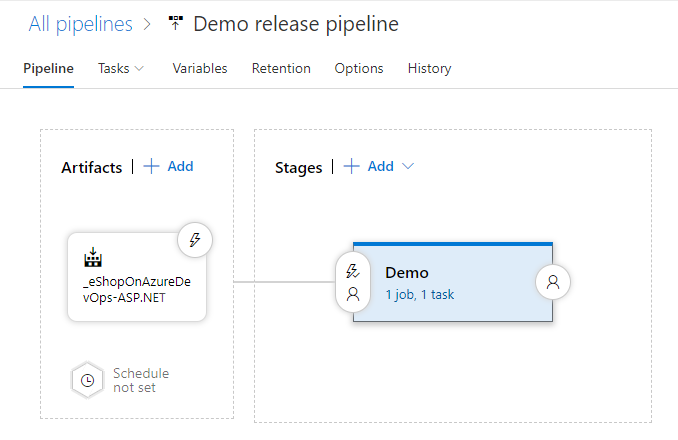
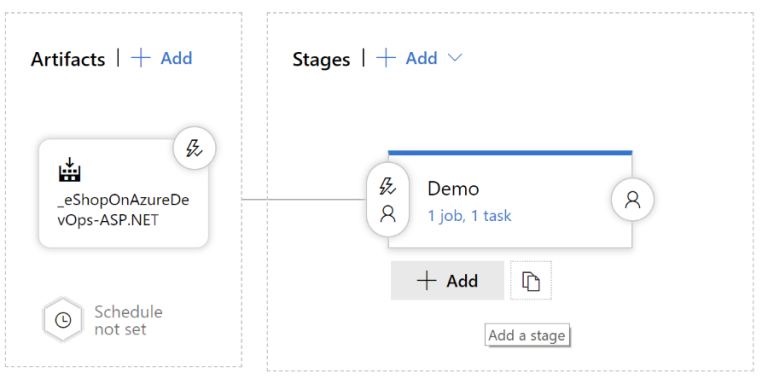
Now change the name of the release to: “Demo release pipeline” and after that click “Add an artifact”:
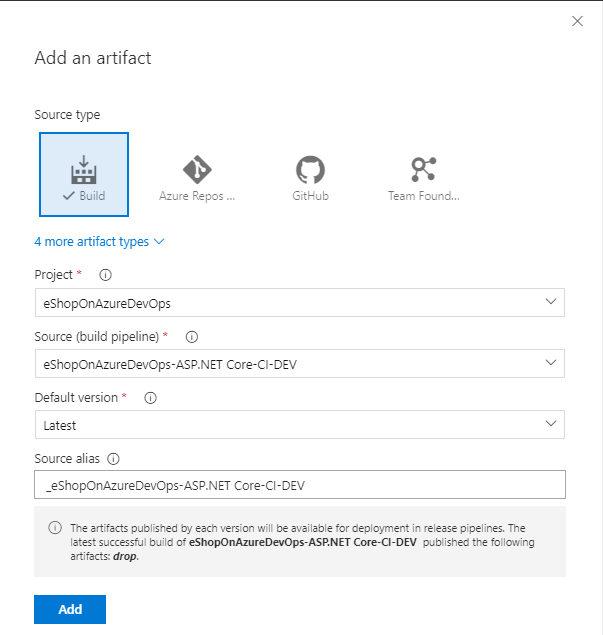
Select project and then set “default version” to “latest”. “Source alias” should be set to “_eShopOnAzureDevOps-ASP.NET Core-CI-DEV” - our build definition we created earlier in the article:
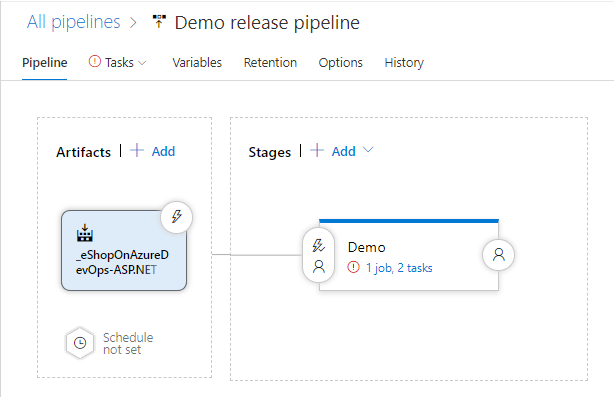
Once you click “Add” button you should see configured artifact for our release pipeline definition:
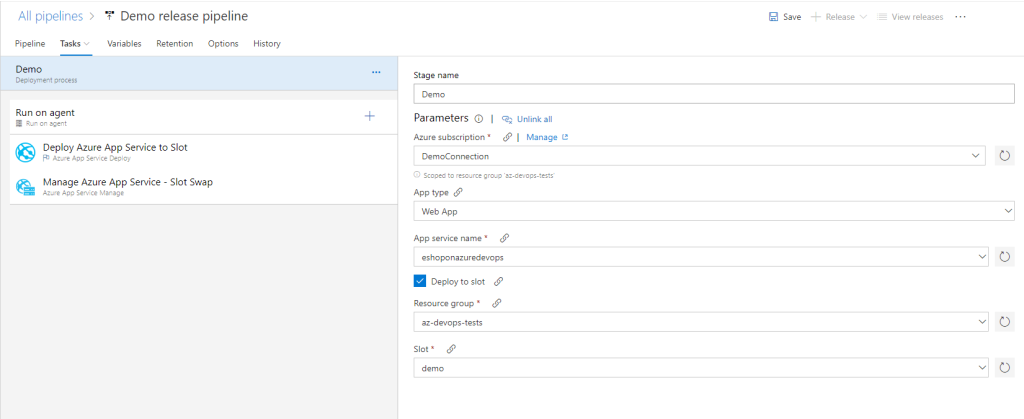
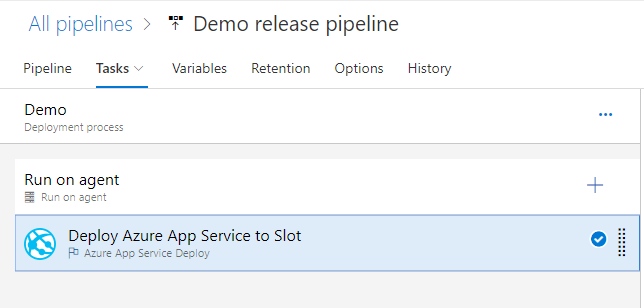
Now we have to integrate our release pipeline with the Azure Web App created earlier in the article. Click “1 job, 2 tasks” under “Demo”stage. In this step you have to provide name of the azure subscription, app type, Azure service name, resource group and slot (in this case “demo”):
For now we can remove next step called “Slot swap”. Click remove in the right top corner to remove this step from the release pipeline. Only deploy to slot should remain:
Click “Save” and then “OK” buttons. Our final pipeline looks like presented below:
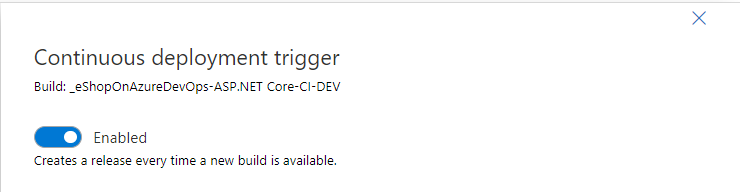
One more thing - we need to enable trigger for this release pipeline each time there is new build. Click lightning icon in the “Artifacts” and enable below trigger. Then click “Save” and “OK” buttons:
Test release pipeline for demo slot
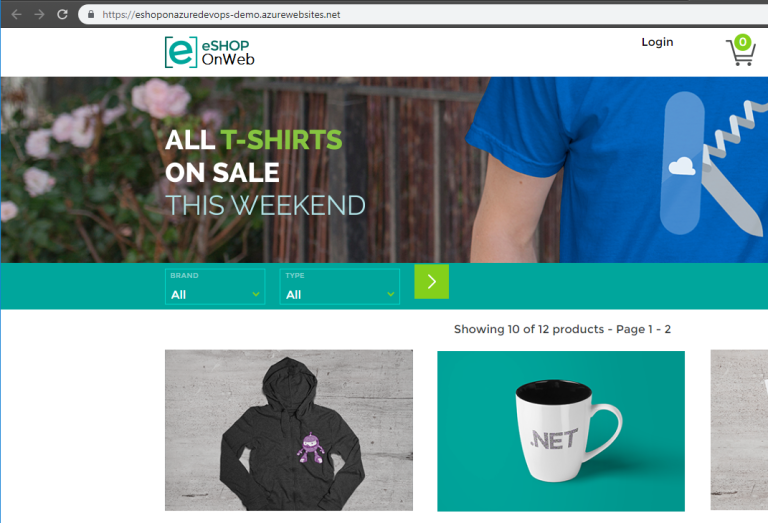
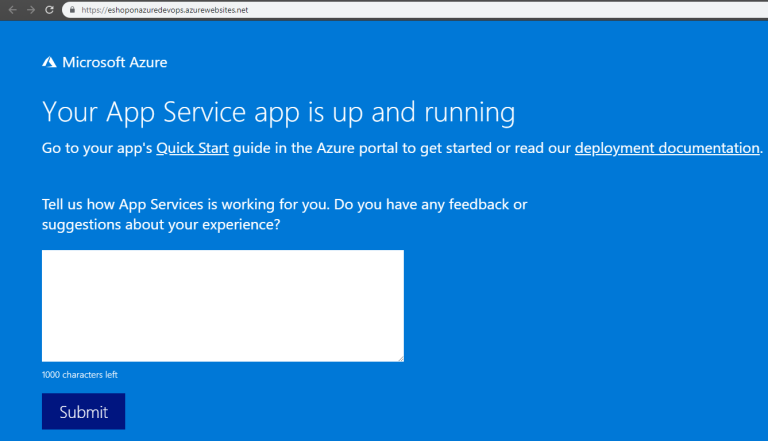
Now we can try to test whether we configure everything properly. Try to commit some changes to the dev branch and see if build was scheduled and if release was completed successfully. If everything went ok you should access web app under demo URL address:
https://eshoponazuredevops-demo.azurewebsites.net
Please note that under production URL (https://eshoponazuredevops.azurewebsites.net) there is no app available:
Configure slot swap in the release definition
Once demo environment is ready we can use “slot swap”. This step in release pipeline enables moving application from the “demo” slot to the production slot.
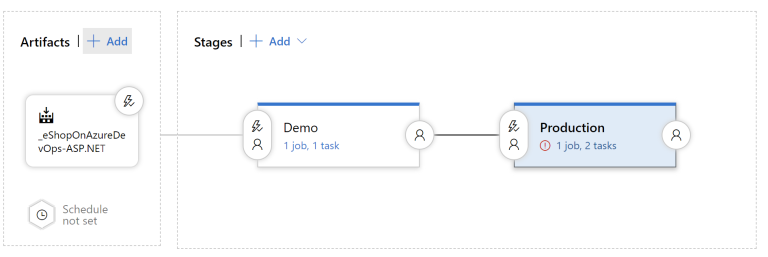
Click “Add” button under “Demo” stage:
Again search for “Azure App Service deployment with slot” template and type “Production” as stage name. Click “X” button in the right corner. Now our pipeline look like below:
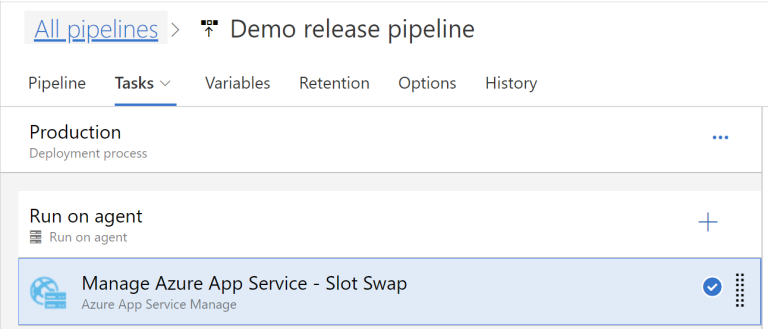
Now click “1 job, 2 tasks” on the Production stage. This time remove “Deploy Azure App Service to Slot” and in the “Manage Azure App Service - Slot Swap”. Again select Azure subscription, app service name, resource group and slot:
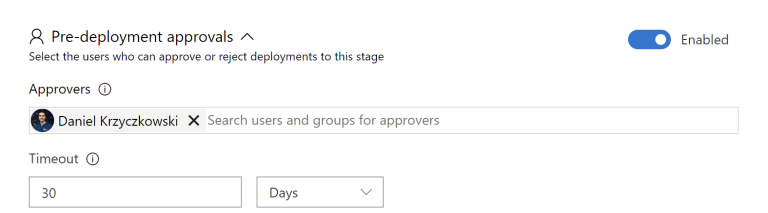
Click “Save” and then “OK” button. Now we want to have approval before demo app is moved to production. It means that someone has to confirm this slot swap. We have to set pre-deployment conditions. Click lightning icon on the Production stage and then set “Pre-deployment approvals” to enabled:

Then set one of the approvers - person (or people) who will accept deployment to Production stage:
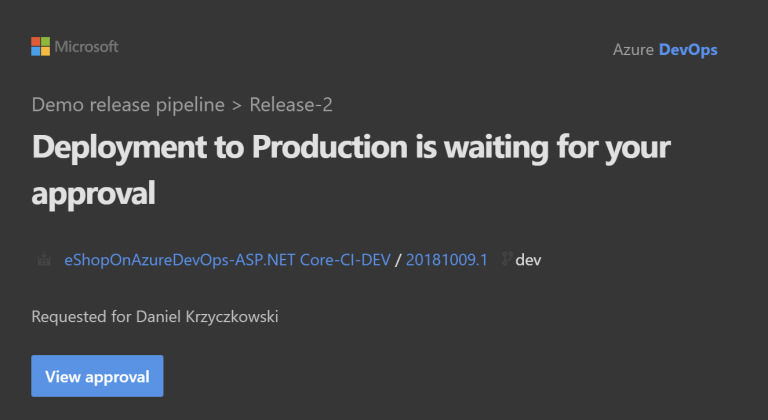
Click “Save” and then “OK” button. Now try to commit some changes to the source code of the web app. Before there is slot swap to Production you will have to wait for approval. Approves should receive e-mails with the information that new build is ready and swap to Production can be proceeded:
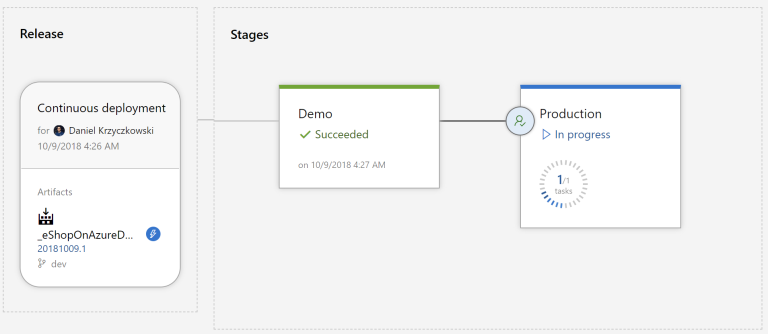
Once swap is approved in the portal information about deployment is displayed:
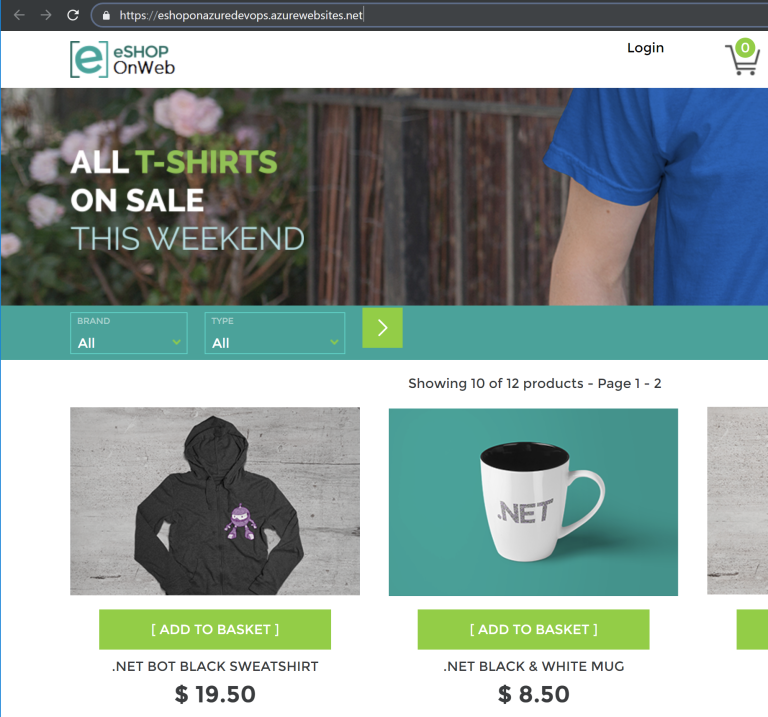
Now lets try to open production URL: https://eshoponazuredevops.azurewebsites.net
Summary
Microsoft Azure DevOps provides tools to manage team work collected in the backlog, it provides GIT repositories to store the code, it provides automatic builds and releases. It help developers and DevOps engineers with setting up the whole Development and Operations related stuff. It is available for free and its worth to mention that it supports not only Microsoft technologies (like ASP .NET Core web applications mentioned in this article). You can read more about Azure DevOps on the official website.