Lost in Azure cloud identity - part 3

Introduction
I have decided to create series related to identity and access management using Azure cloud services. Important note first - I will focus more on the development side and integration aspects. This series is focused on developers who would like to understand different concepts and mechanisms around identity using Azure cloud services like Azure Active Directory and Azure Active Directory B2C. It does not mean that if you are an architect or administrator, you will not find anything interesting. I think that this series can be helpful for everyone who wants to learn more about identity services in the Microsoft Azure cloud.
This is the third article from the series. In this article, we are going to talk about user authorization using Azure Active Directory App Roles. We will learn how verify user role and decide whether user should have access to specific page or not.
Important
This series assumes that you already have some basic knowledge around identity concepts, application implementation, and Azure cloud services - at least Azure Active Directory.
Source code
Source code of all applications and AD B2C custom policies are available on my GitHub
Links to additional helpful resources
In my articles, I will focus on particular topics and I will make some assumptions. For instance, I assume that you already have access to Azure Active Directory and Azure Active Directory B2C services. If you need additional help, below I provide the links to helpful resources so you can learn more:
Getting started with Azure Active Directory
Getting started with Azure Active Directory B2C
Azure AD B2C custom policy overview
Microsoft identity platform documentation
Overview of the Microsoft identity platform for developers
Solution architecture discussed in this series

Authorization in the Tech Mind Factory Corporate Web App
If you have read my previous article, you remember that we created two users in the Azure Active Directory:
- daniel.director@techmindfactory.onmicrosoft.com
- daniel.employee@techmindfactory.onmicrosoft.com
These two above users were assigned to the Tech Mind Factory Corporate Web Application (Blazor app):
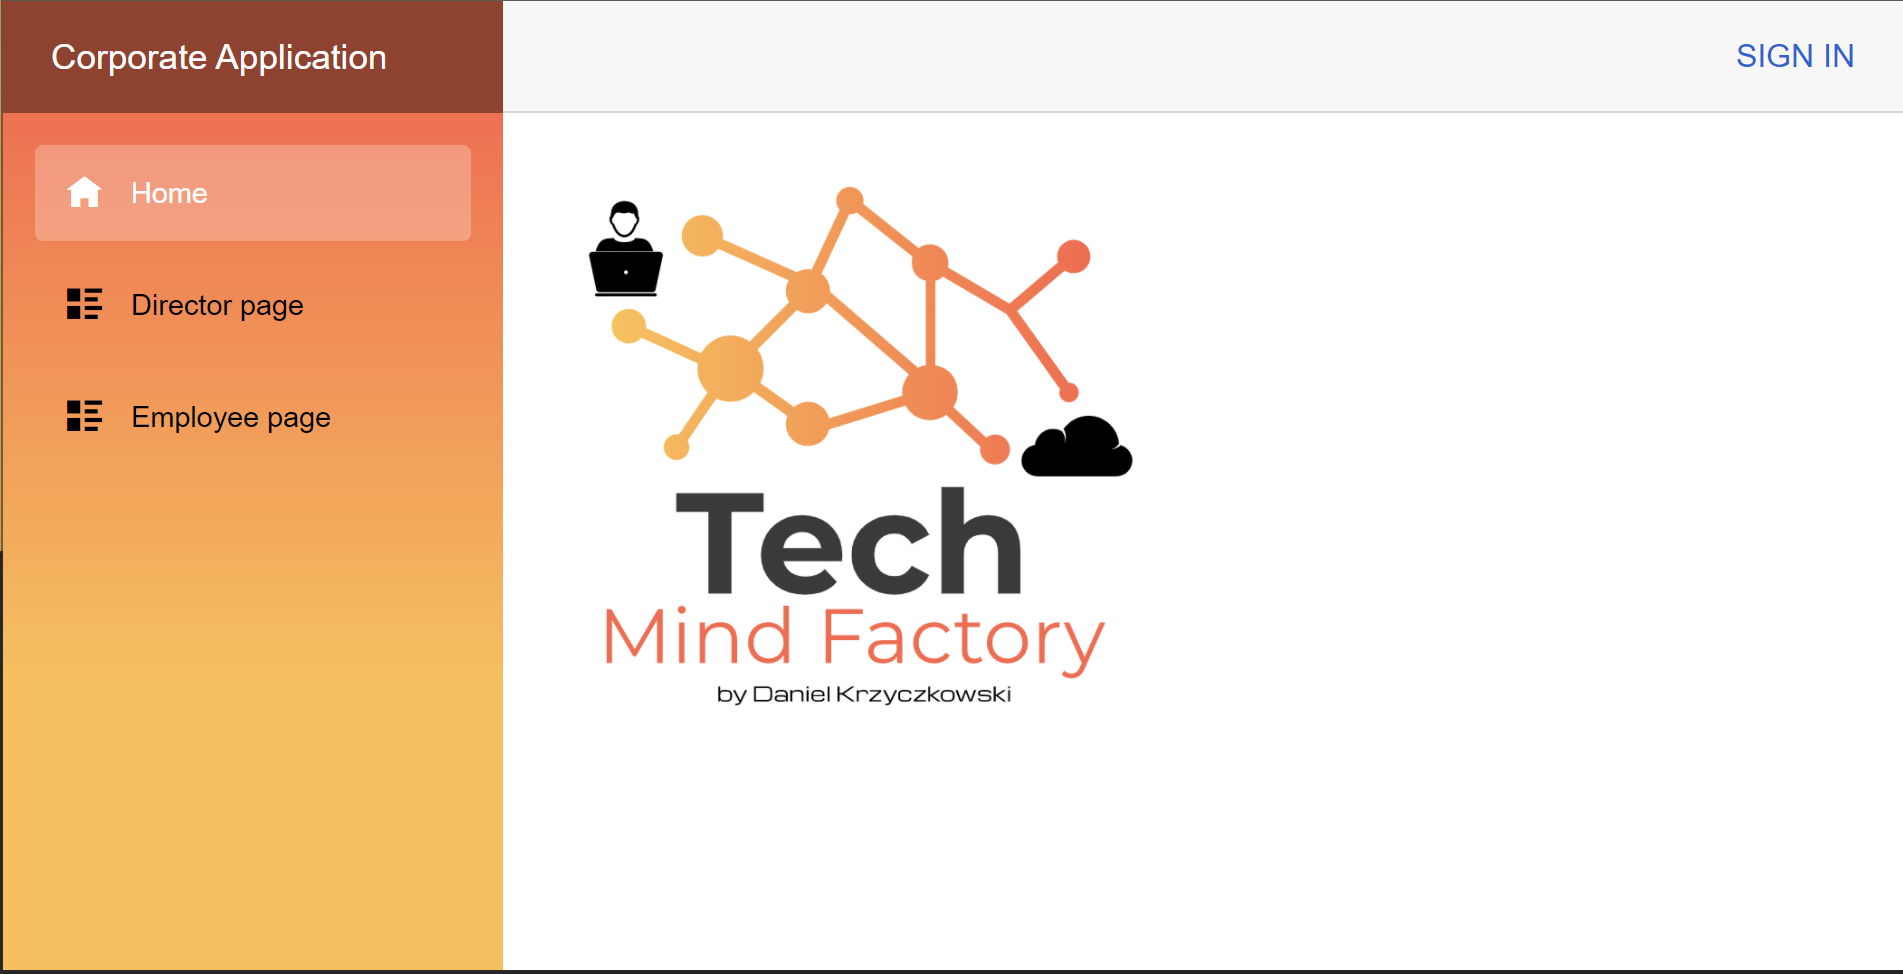
As you can see above, TMF Corporate Web App has two tabs:
- Director page
- Employee page
In this article we will see how to implement authorization so once user is authenticated and tries to access one of these pages, app will verify use role and decide to display the content, or not. First we are going to create App Roles in the Azure Active Directory and we are going to assing users to them.
App Roles in the Azure Active Directory
App roles are usually defined on an application registration representing a service, app or API. When a user signs in to the application, Azure AD emits a roles claim for each role that the user or service principal has been assigned to. Currently there are two options to create App Roles in the Azure AD:
- App roles UI (ath the moment of writing this article, it is in preview) - using UI in the Azure portal
- App manifest editor in the Azure Active Directory Application blade (JSON format)
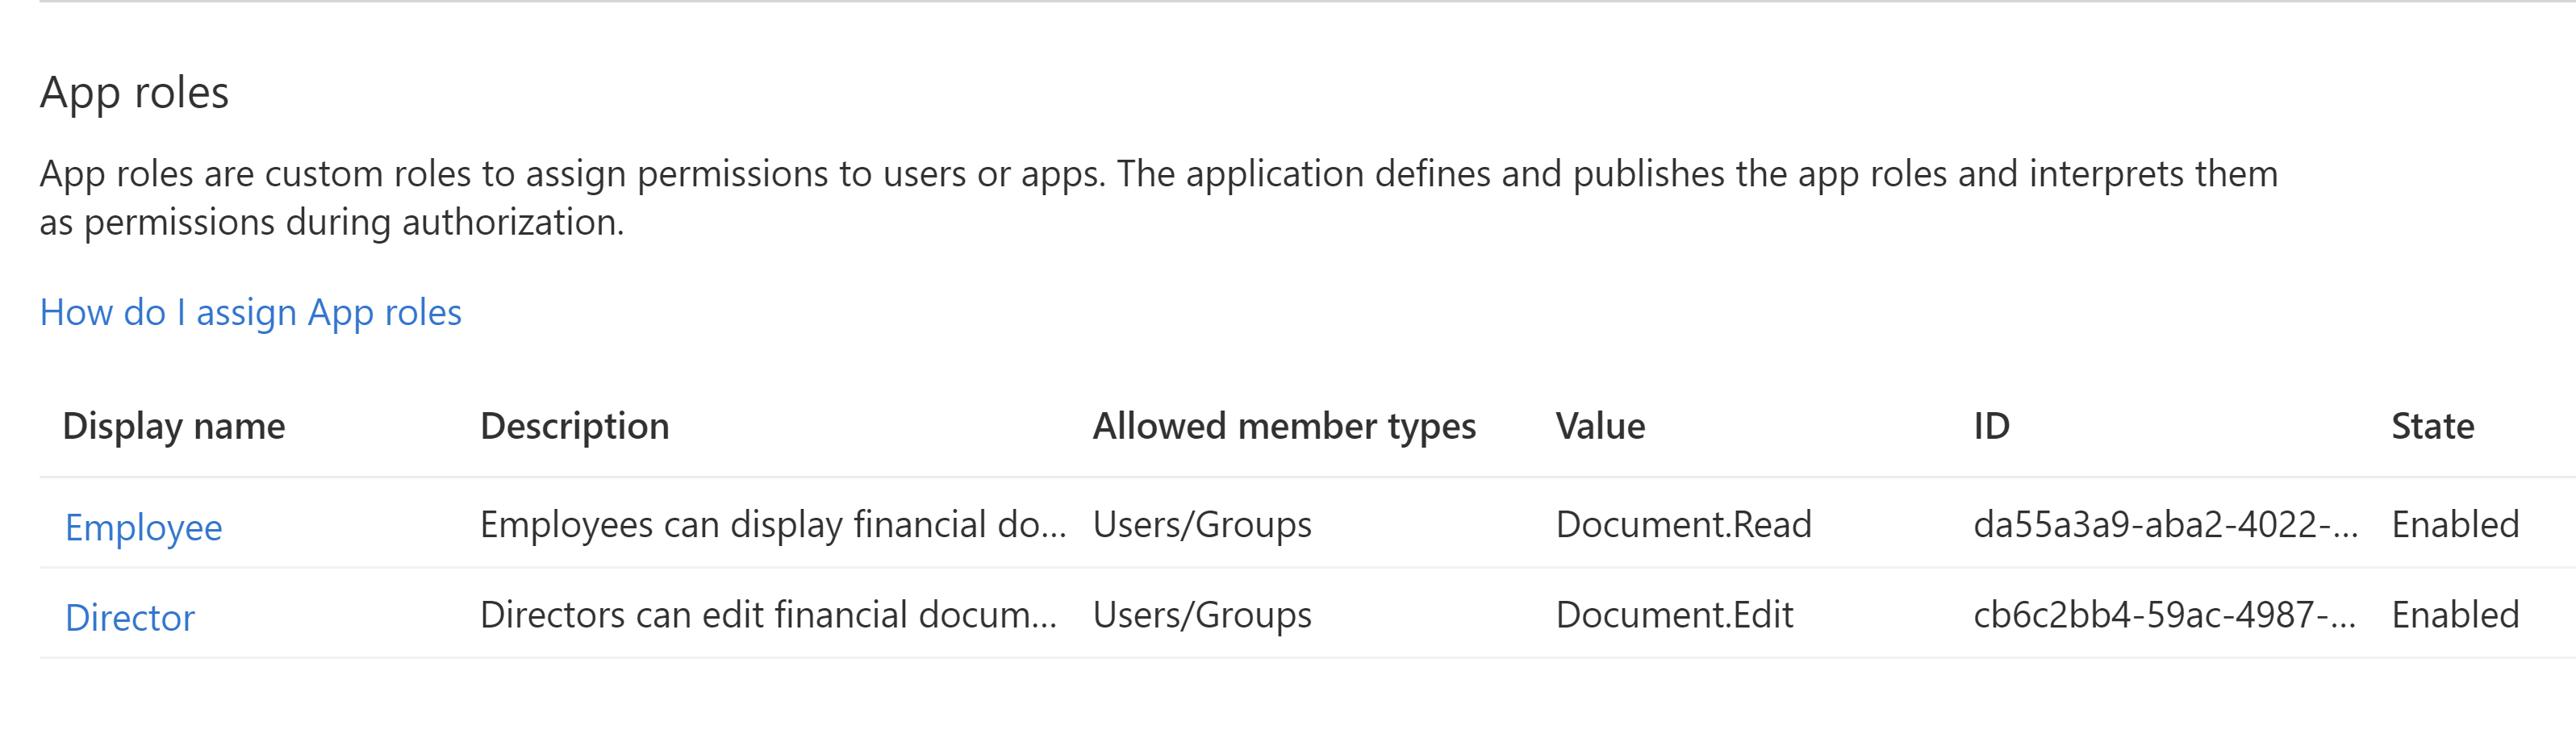
In this article we will create two below roles using App Roles UI:
- Employee
- Director
Register an App Role
To add roles to the TMF Corporate Web App, open previously registered application (we did it in the previous article) in the Azure Active Directory:

1. Select App roles from the left bar:

2. Create Employee app role exactly as presented below:
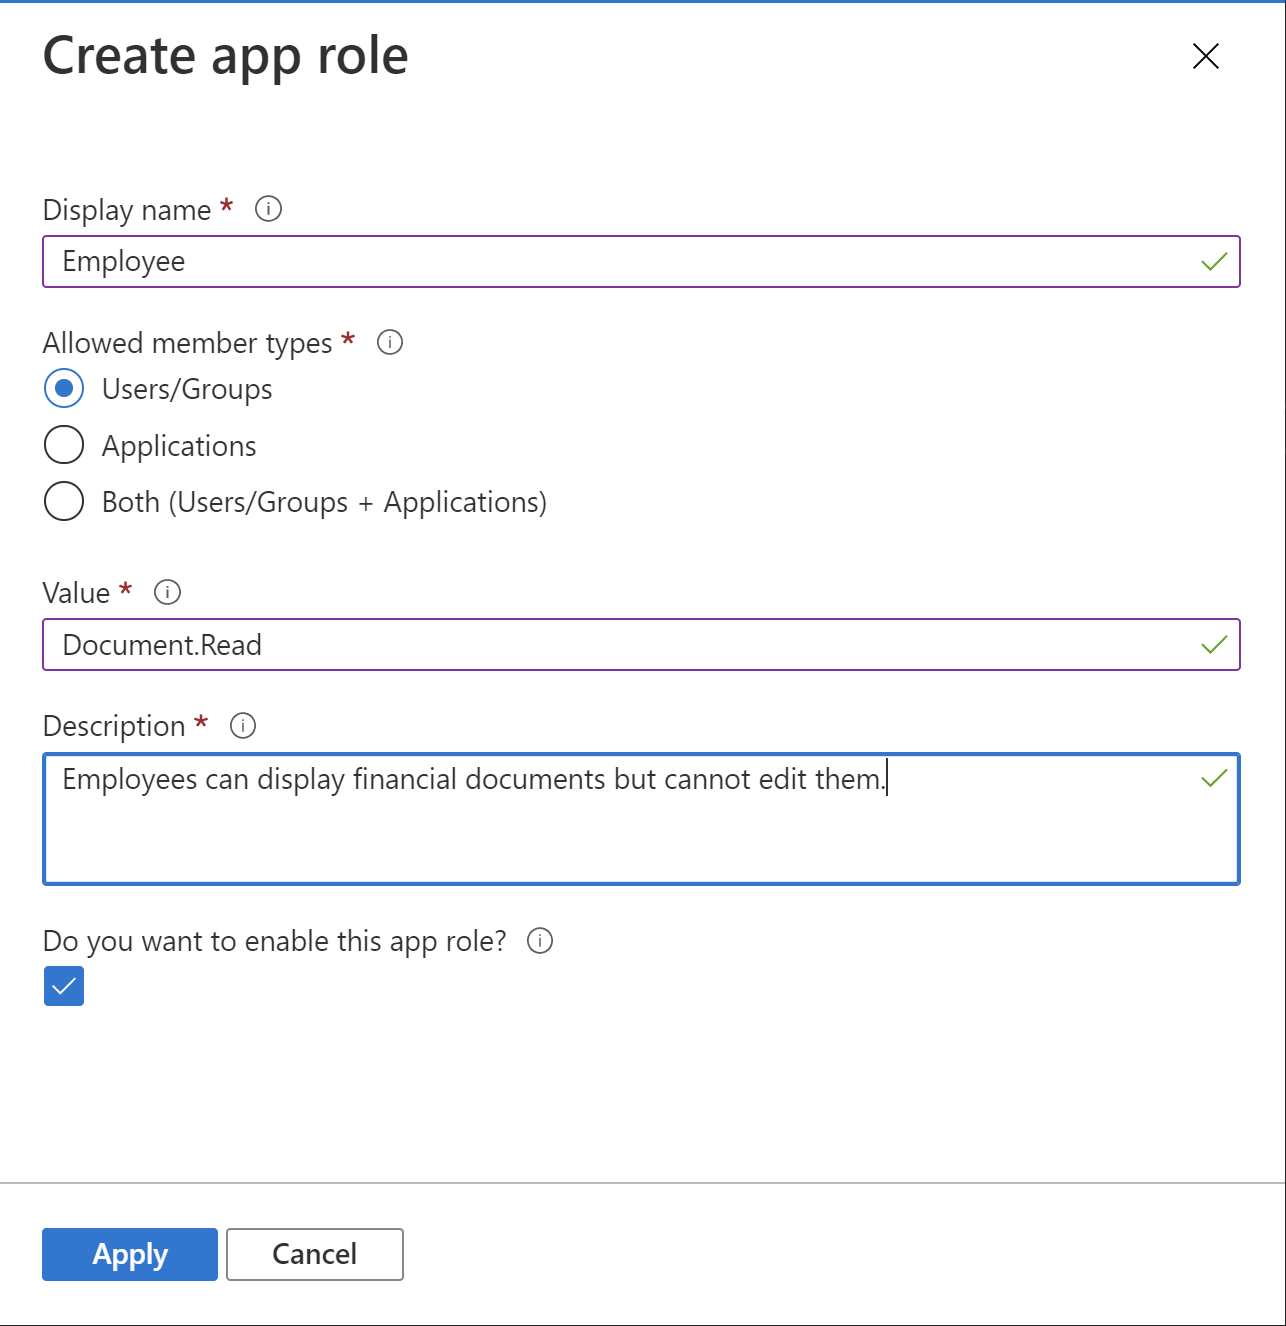
Note that allowed member types is set to users and groups. Users with Employee role can display financial documents but cannot edit them in the TMF Corporate Web App.
3. Create Director app role exactly as presented below:
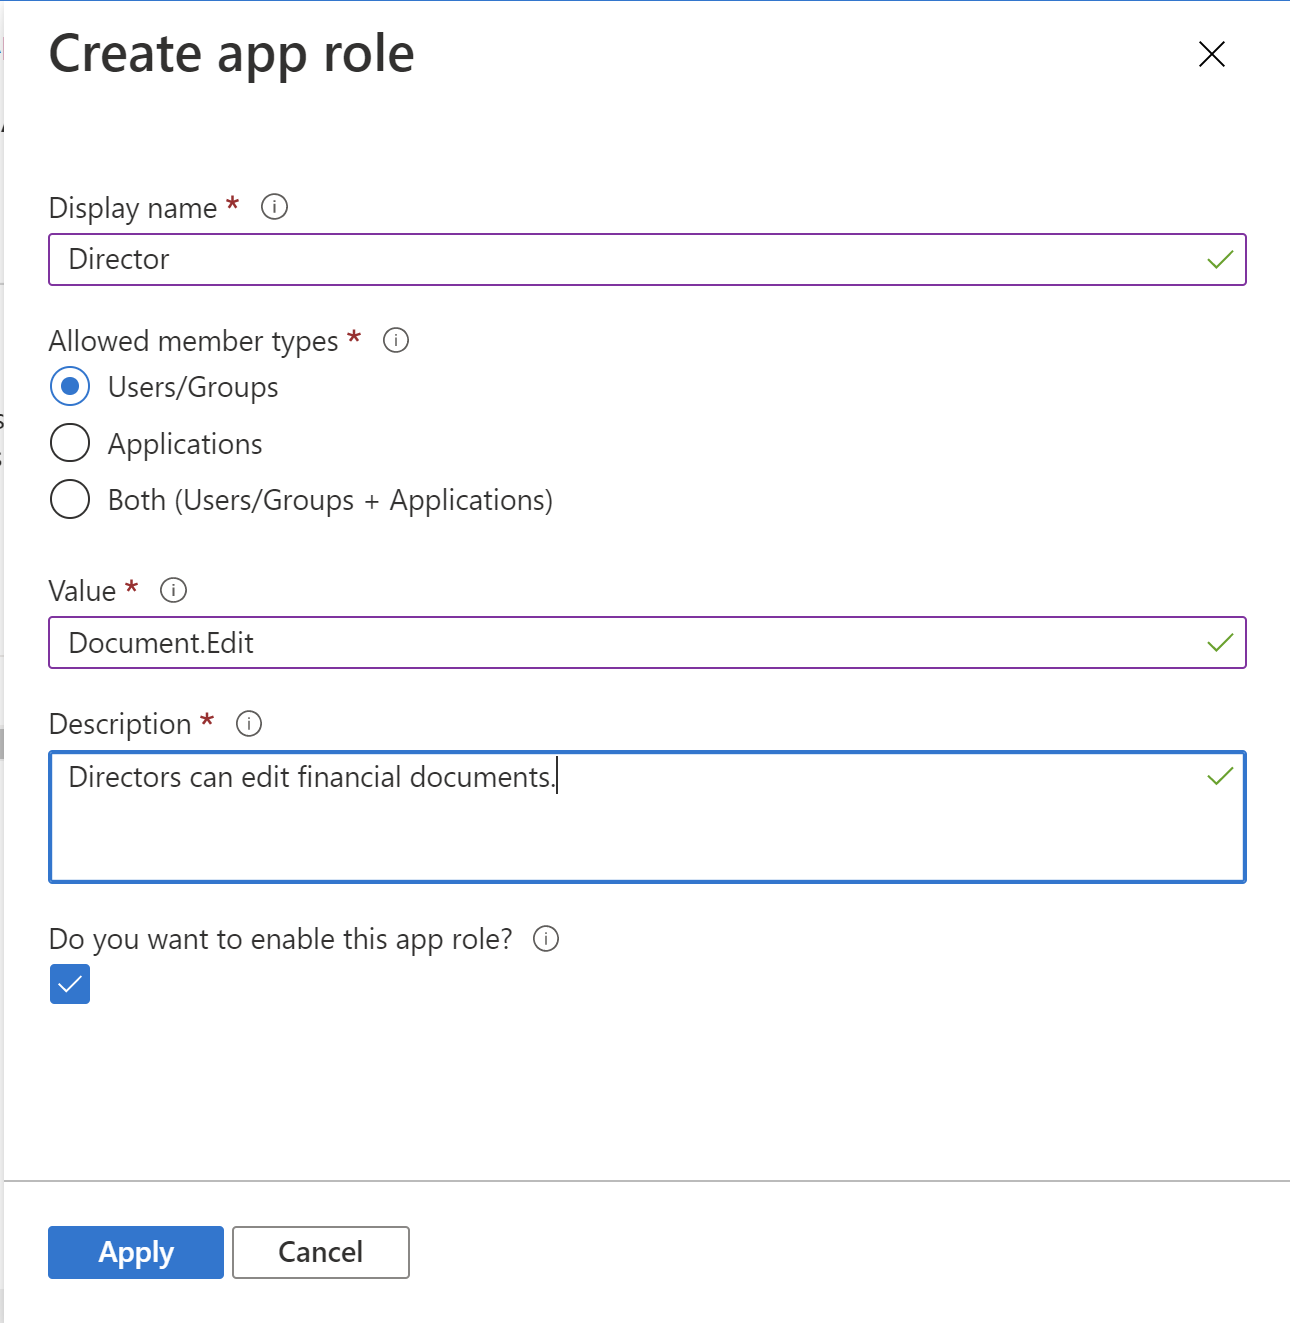
Note that allowed member types is set to users and groups. Users with Director role can edit financial documents.
Once above App Roles are created, you should see them on the list:
Assign users to created app roles
Once roles are created we can assign users to them. We are going to do below assignments:
- daniel.employee@techmindfactory.onmicrosoft.com user will be assigned to Employee role
- daniel.director@techmindfactory.onmicrosoft.com user will be assigned to Employee and Director roles
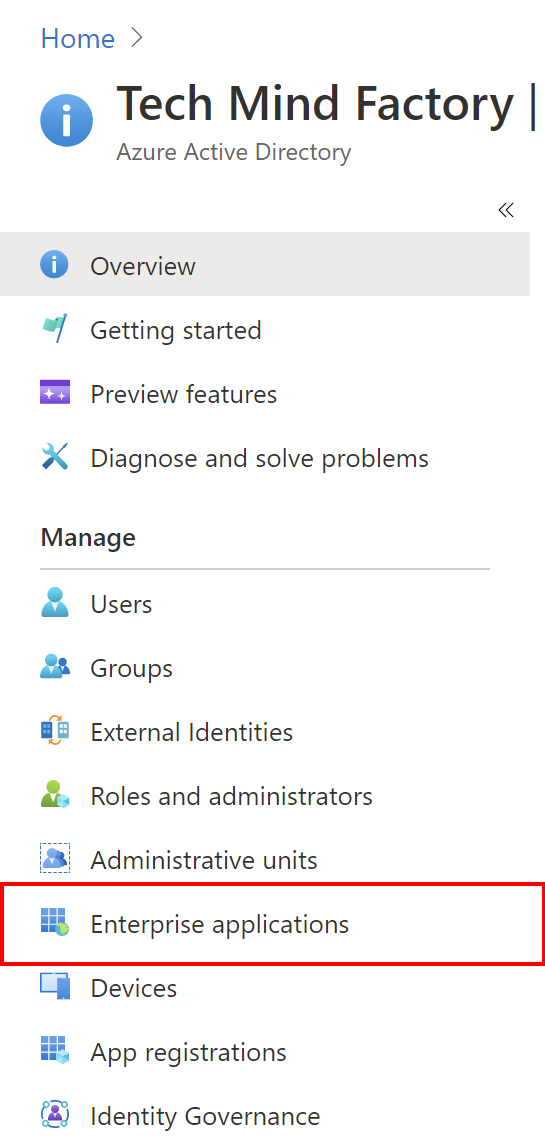
1. From the main blade in Azure Active Directory, open Enterprise applications:
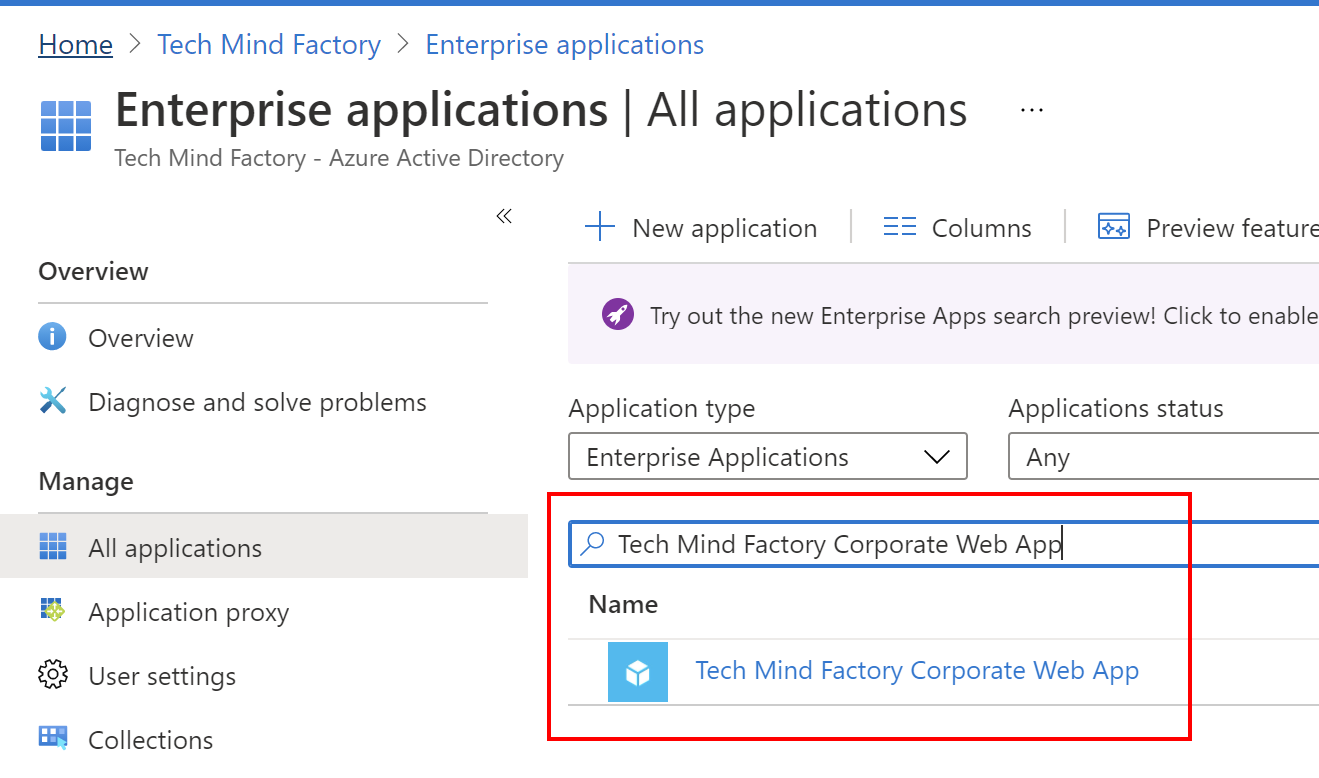
2. Find TMF Corporate Web Applicatin registered before:
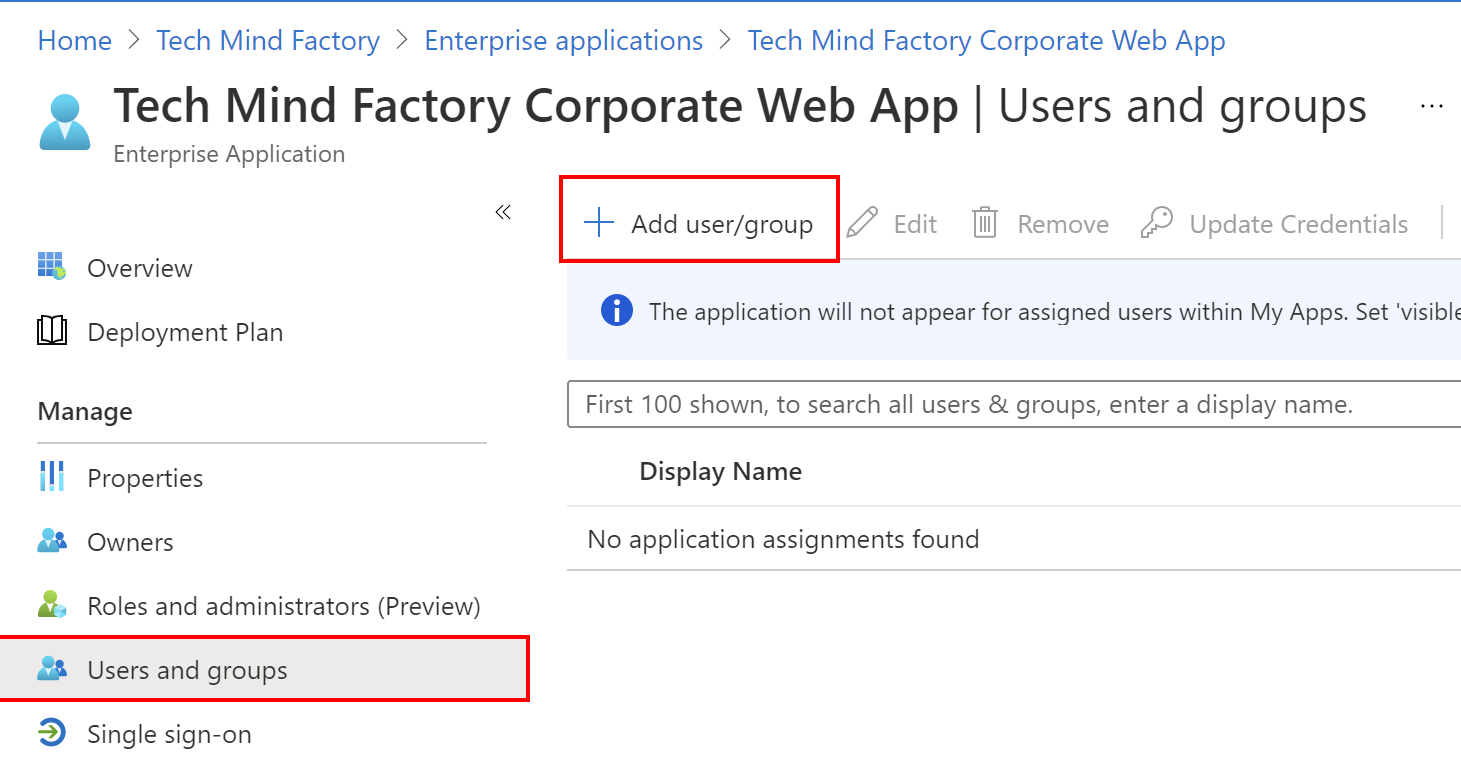
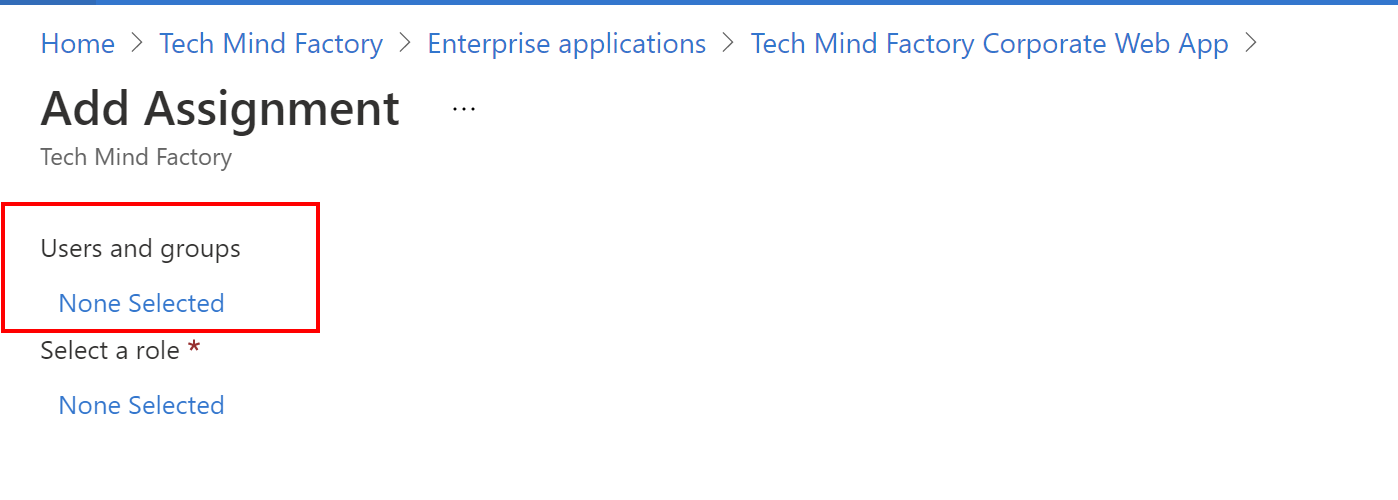
3. Select Users and groups, and click Add user/group:
4. Under Users and groups, click on the Non selected:
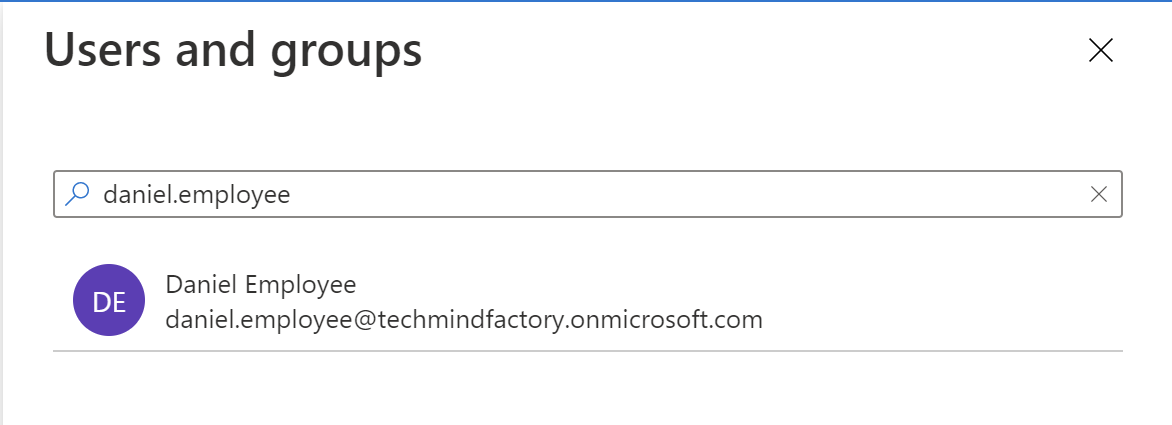
5. First we will assign Employee role to daniel.employee@techmindfactory.onmicrosoft.com user:
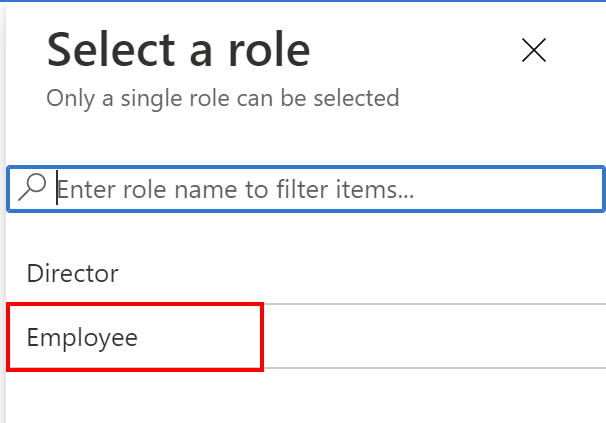
6. Select Employee from the list:
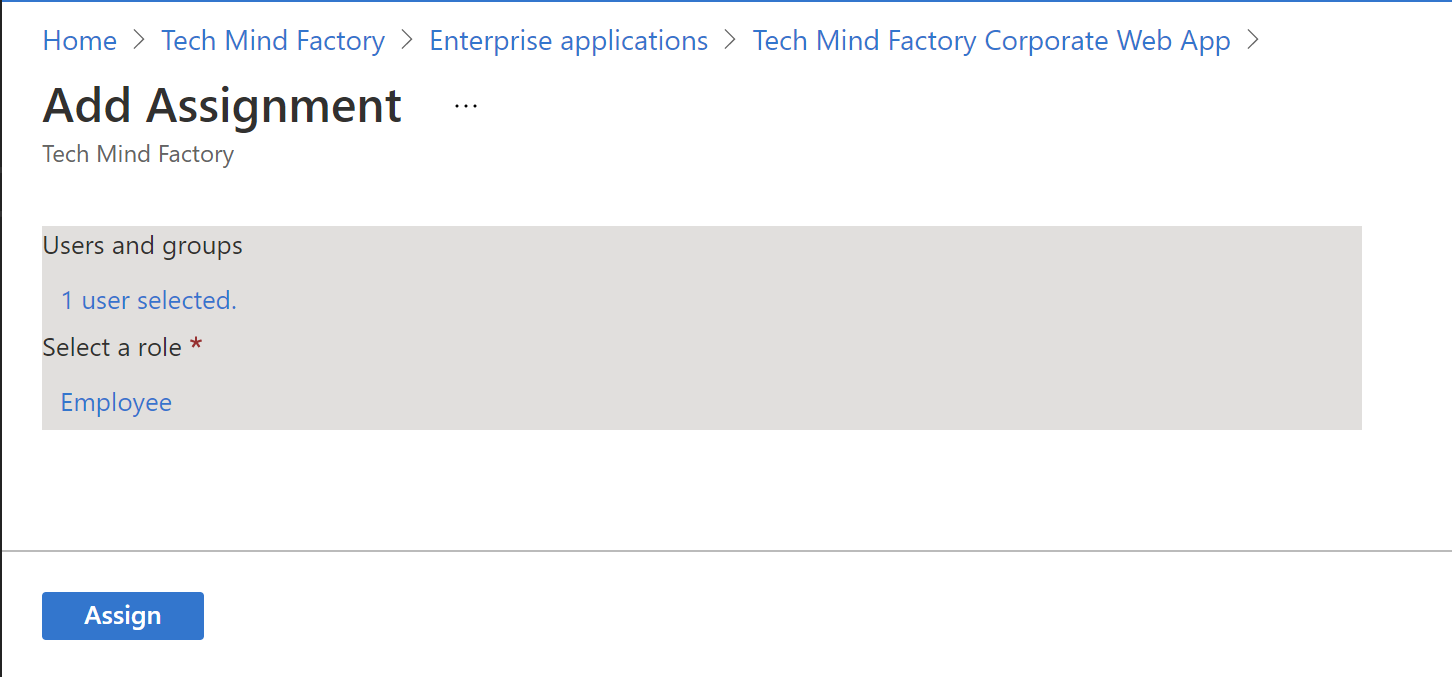
7. Click Assign button:
Follow above steps for the second user - daniel.director@techmindfactory.onmicrosoft.com. This user should have Employee and Director roles assigned:
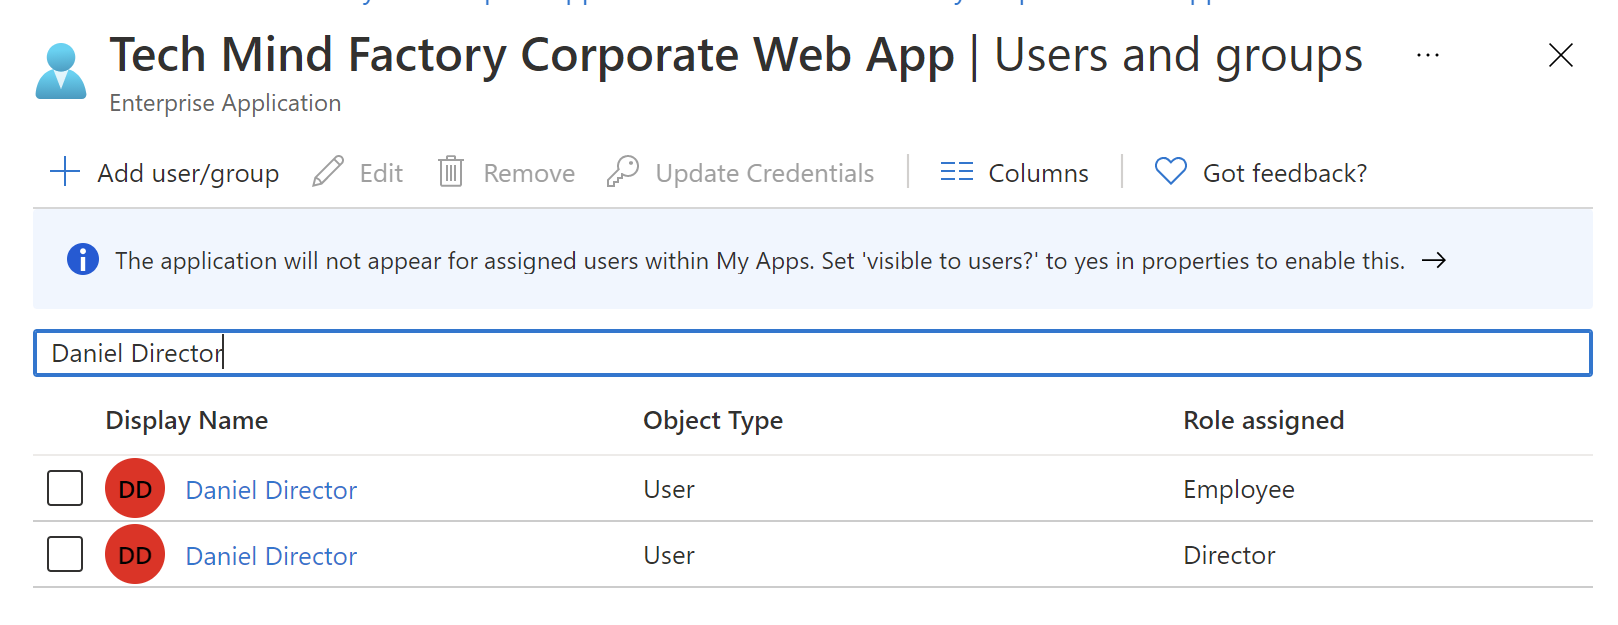
This is how the final list should look like:
Enable user assignment requirement
By default in the Azure Active Directory when you create application, all users in the tenant have access to it. This can be changed and only assigned users will have access to it. We are going to enable user assignment requirement for the Tech Mind Factory Corporate Web App.
To enable user assignment requrement, select Properties from the left bar for the TMF Corporate Web App and set User assignment requirement to Yes:
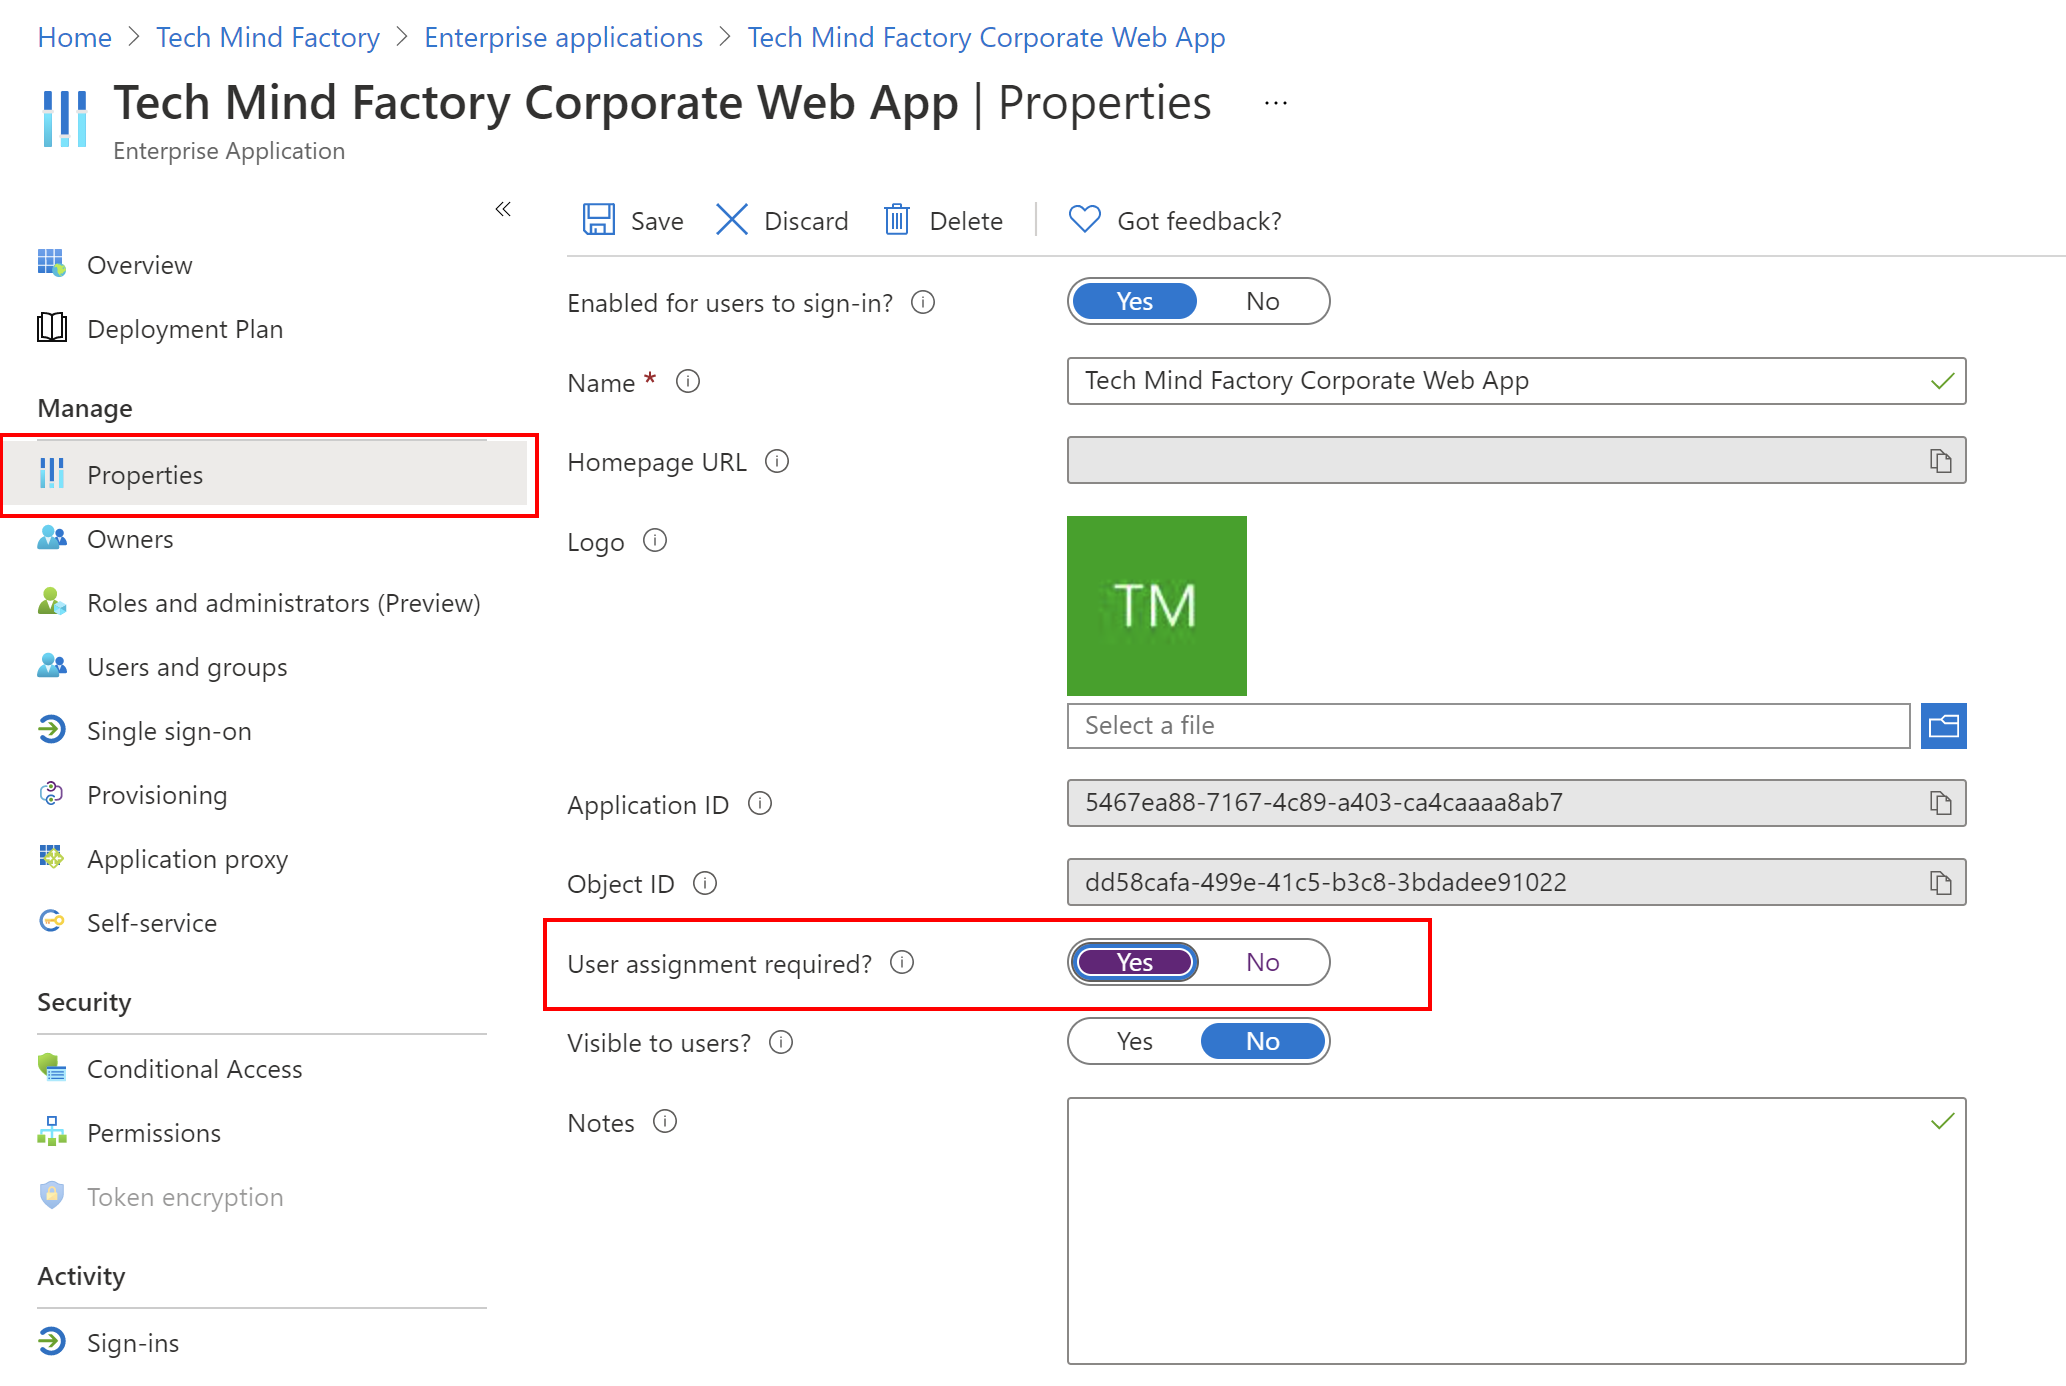
From now only below users have access to TMF Corporate Web App:
- daniel.director@techmindfactory.onmicrosoft.com
- daniel.employee@techmindfactory.onmicrosoft.com
Handling authorization using Azure AD App Roles in the web app
Now it is time to discuss how to implement authorization mechanism in the Tech Mind Factory Corporate Web App (Blazor).
Authorization policies
We handle authorization with a requirement, a requirement handler, and a pre-configured policy. These building blocks support the expression of authorization evaluations in code. An authorization policy consists of one or more requirements. It’s registered as part of the authorization service configuration, in the Startup.ConfigureServices method:
            services.AddAuthorization(options =>
            {
                options.AddPolicy("Employee", configurePolicy =>
                {
                    configurePolicy.AddRequirements(new ClaimRequirement("Document.Read"));
                });

                options.AddPolicy("Director", configurePolicy =>
                {
                    configurePolicy.AddRequirements(new ClaimRequirement("Document.Edit"));
                });
            });

            services.AddSingleton<IAuthorizationHandler, ClaimAuthorizationHandler>();
In the above code we create two policies:
- Employee - this policy requires Document.Read claim to be presented in the ID Token returned from the Azure Active Directory, once user is authenticated
- Director - this policy requires Document.Edit claim to be presented in the ID Token returned from the Azure Active Directory, once user is authenticated
We have to also add below two lines to the Configure method:
            app.UseAuthentication();
            app.UseAuthorization();
ClaimRequirement class implementation details
As you can see, ClaimRequirement class implements IAuthorizationRequirement interface provided by ASP .NET Core framework. This class represents claim requirement so for instance the requirement for the Document.Read claim:
    public class ClaimRequirement : IAuthorizationRequirement
    {
        public string ClaimName { get; set; }

        public ClaimRequirement(string claimName)
        {
            ClaimName = claimName;
        }
    }
ClaimAuthorizationHandler class implementation details
ClaimAuthorizationHandler class is responsible for validaton and verification is specific claim is presented in the token. This class extends generic AuthorizationHandler class with ClaimRequirement as a concrete type:
    public class ClaimAuthorizationHandler : AuthorizationHandler<ClaimRequirement>
    {
        protected override Task HandleRequirementAsync(AuthorizationHandlerContext context, ClaimRequirement requirement)
        {
            var roleClaims = context
                                .User
                                .Claims
                                .Where(c => c.Type == ClaimTypes.Role);

            if (roleClaims != null)
            {
                foreach (var roleClaim in roleClaims)
                {
                    if (roleClaim != null)
                    {
                        if (roleClaim.Value.Equals(requirement.ClaimName,
                                                   StringComparison.InvariantCultureIgnoreCase))
                        {
                            context.Succeed(requirement);
                        }
                    }
                }
            }

            return Task.CompletedTask;
        }
    }
Inside the HandleRequirementAsync method we iterate through all the claims in the user token to check if required claim is presented. If it is presented, we call context.Succeed(requirement) method.
Access to specific pages
In the TMF Corporate Web App there are two pages as I mentioned. One for Employees (they can read documents but not edit them) and one for Directors (they can edit documents but also read them).
ReadDocument.razor page
Below I present ReadDocument page code fragment:
<AuthorizeView Policy="Employee">
    <Authorized>
        <p>
            <b>
                The user is in the 'Employee' AAD Administrator Role
                and can read financial documents.
            </b>
            <br />
            <br />
            <button class="btn btn-primary"
                    @onclick="@(async () => await CallApiAsync())">
                Call API
            </button>
            <br />
            <br />
            <p>@ResponseFromWebApi</p>
        </p>
    </Authorized>
    <NotAuthorized>
        <p>
            <b>The user is not in the 'Employee' role and cannot see the content of this page</b>
        </p>
    </NotAuthorized>
</AuthorizeView>
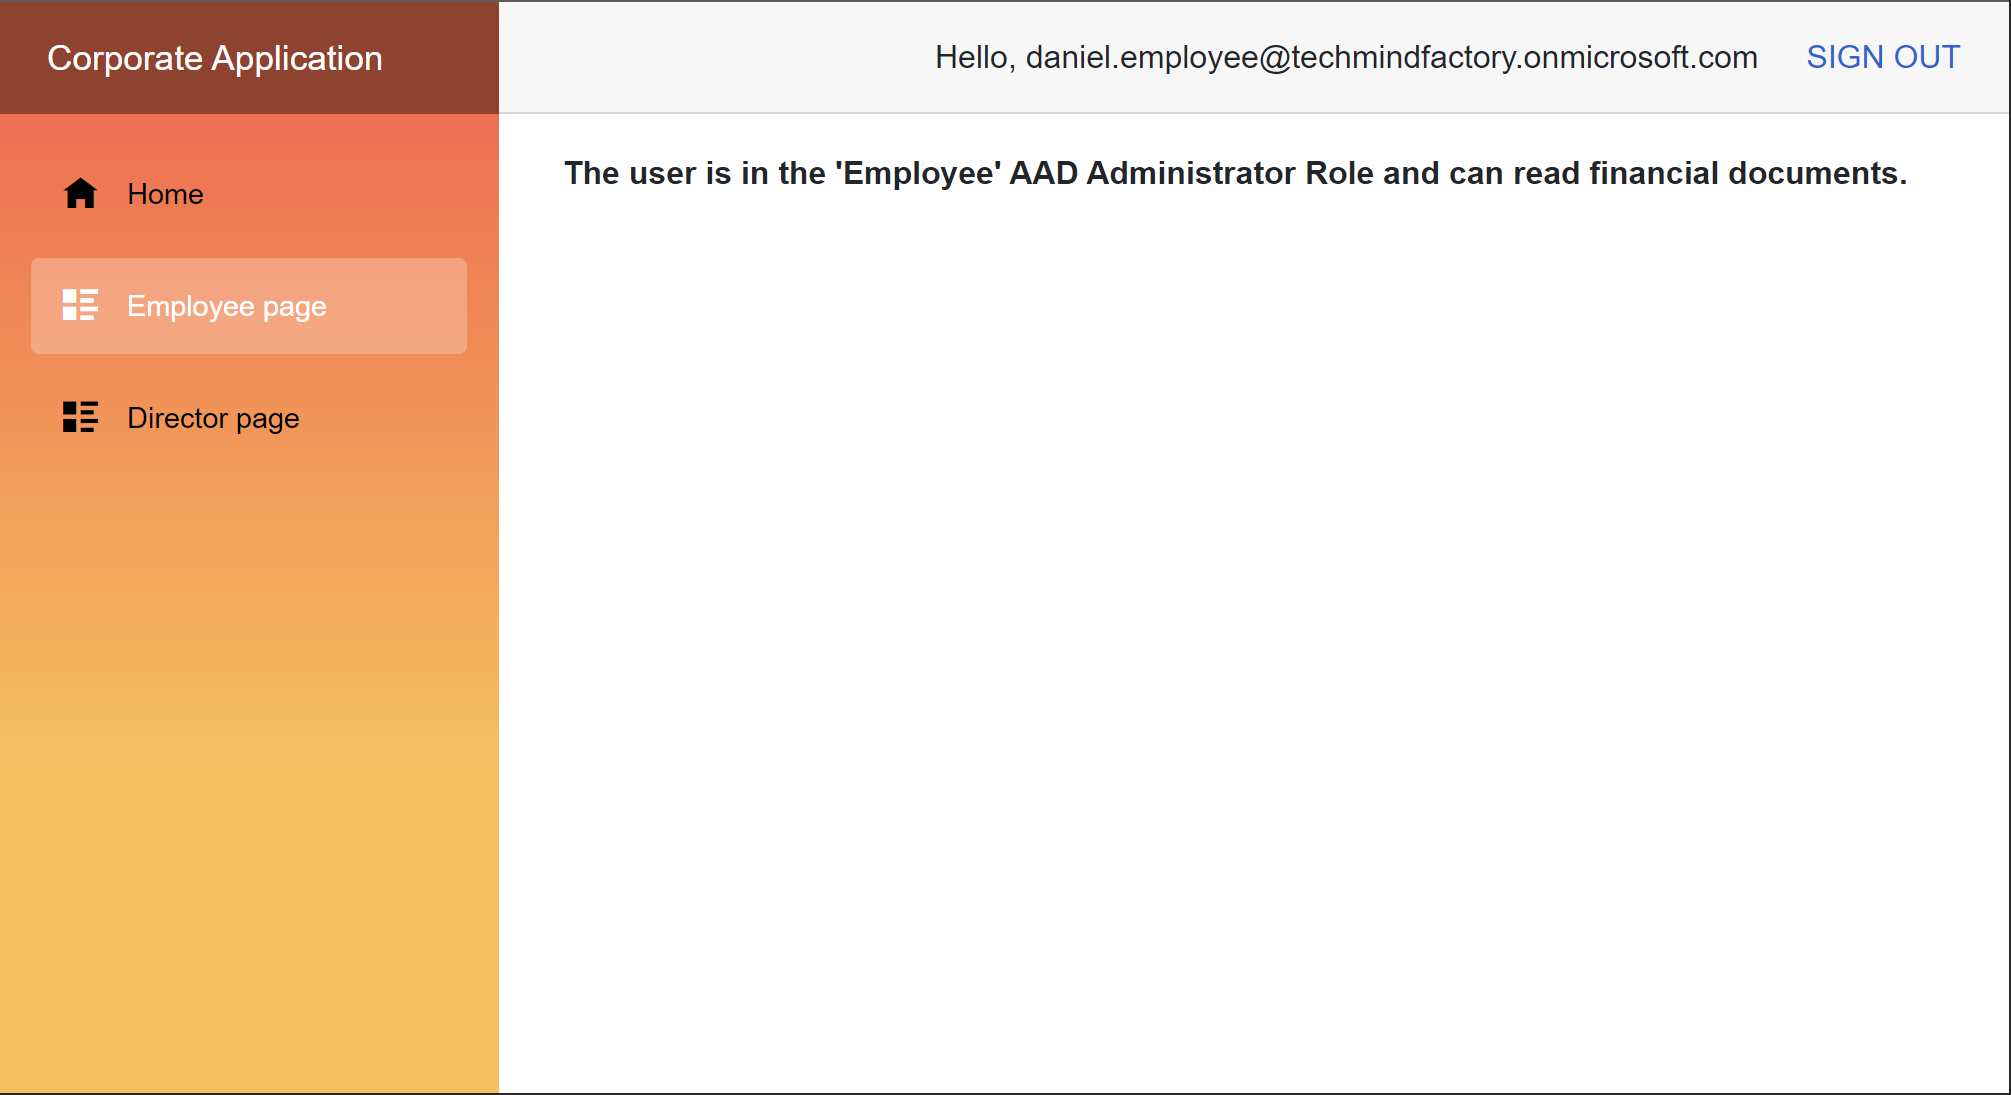
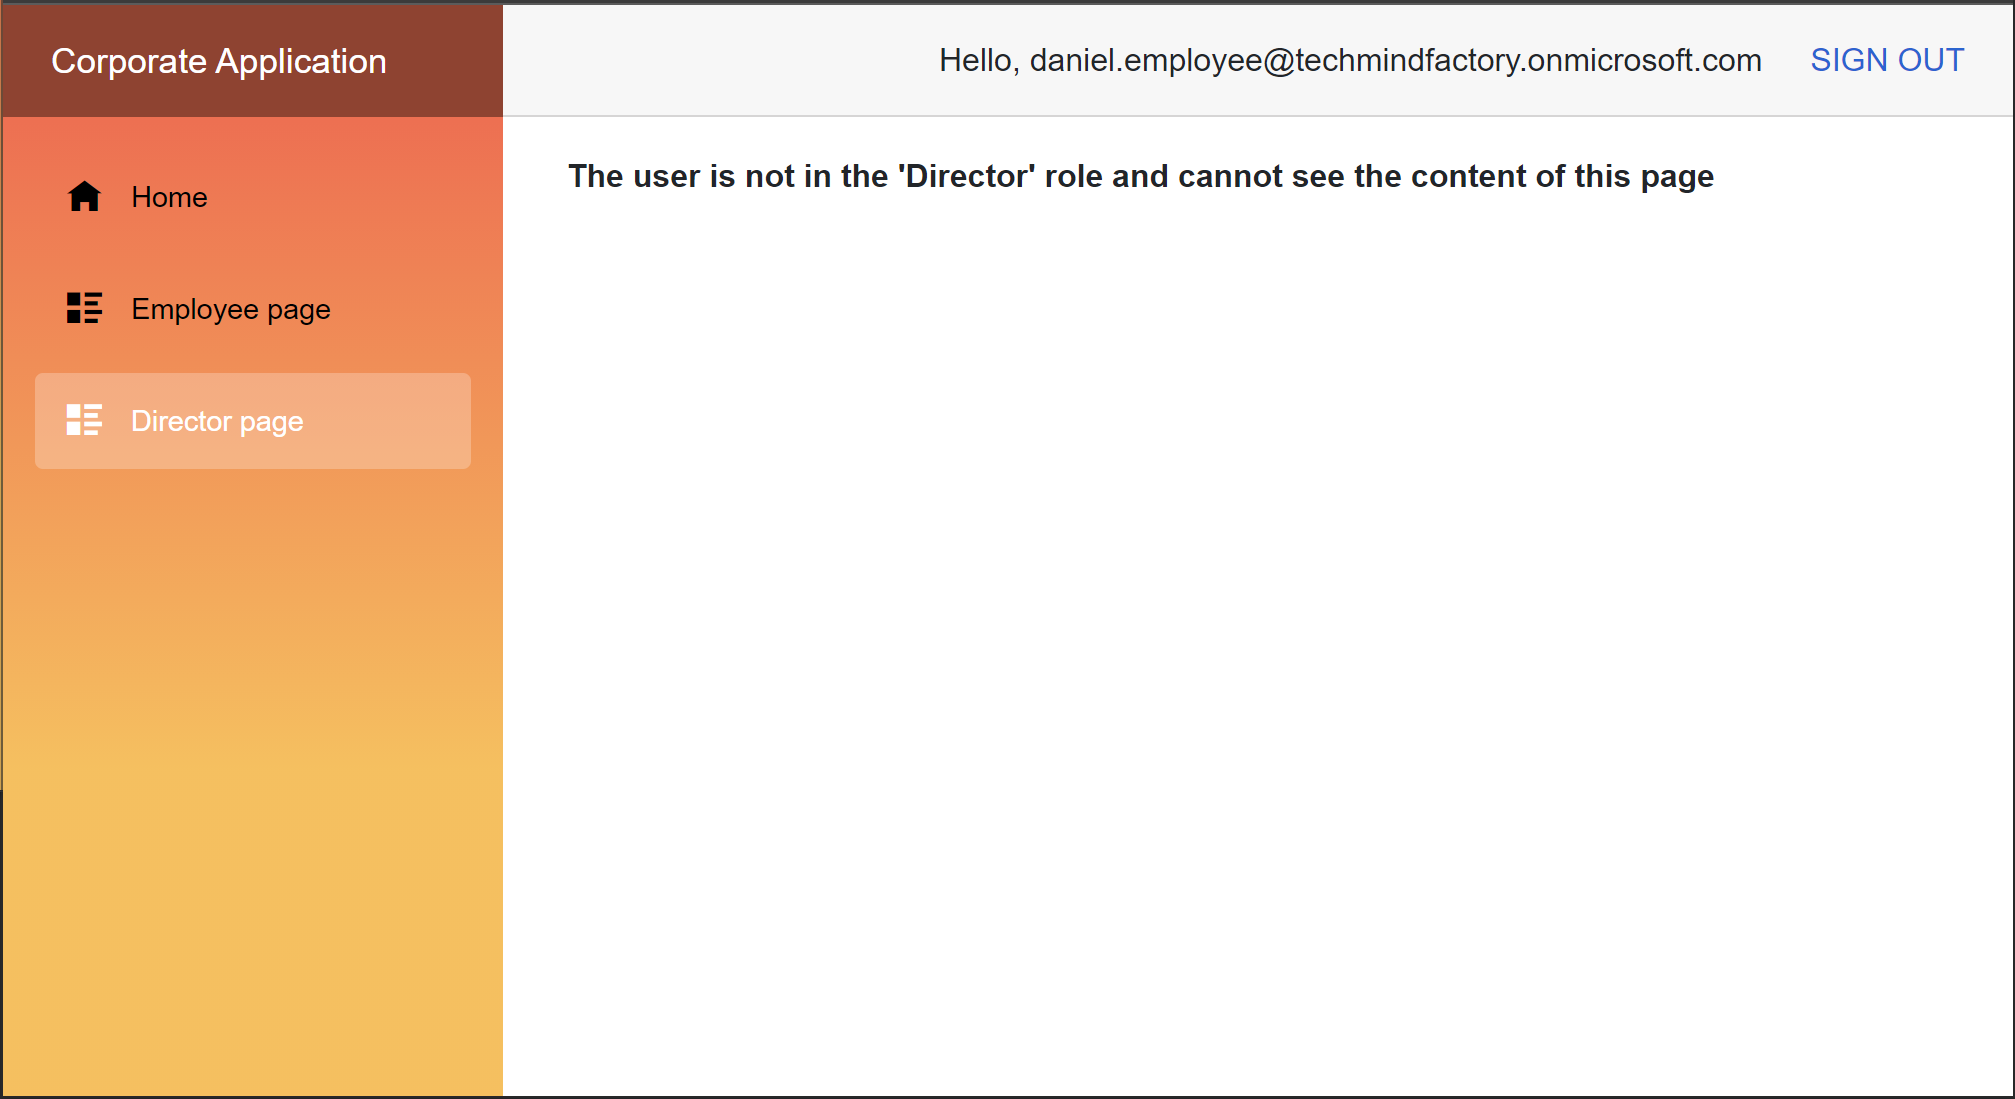
Note that AuthorizeView is used together with Policy set to Employee. If user has the Employee role assigned and Read.Document claim is presented in the token, this page will be displayed. If there is no Read.Document claim in the token, user will see this information: The user is not in the ‘Employee’ role and cannot see the content of this page.
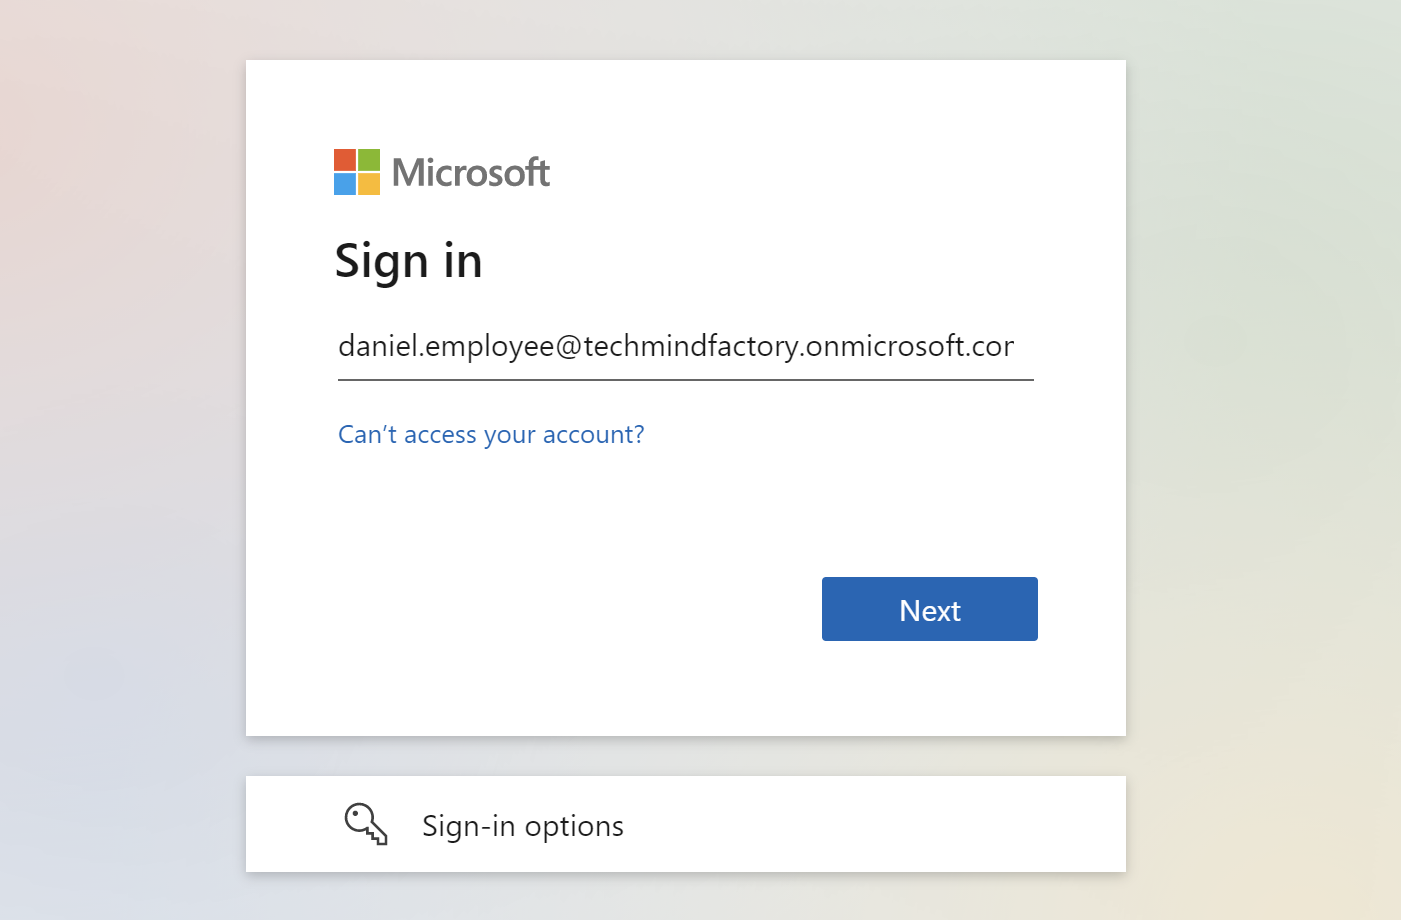
We use the Employee policy we configured in the Startup class described above in the article. If we sign is using daniel.employee@techmindfactory.onmicrosoft.com account, we can access Employee page but not the Director page:
EditDocument.razor page
Below I present EditDocument page code fragment:
<AuthorizeView Policy="Director">
    <Authorized>
        <p>
            <b>
                The user is in the 'Director' AAD Administrator Role
                and can edit financial documents.
            </b>
        </p>
    </Authorized>
    <NotAuthorized>
        <p>
            <b>The user is not in the 'Director' role and cannot see the content of this page</b>
        </p>
    </NotAuthorized>
</AuthorizeView>
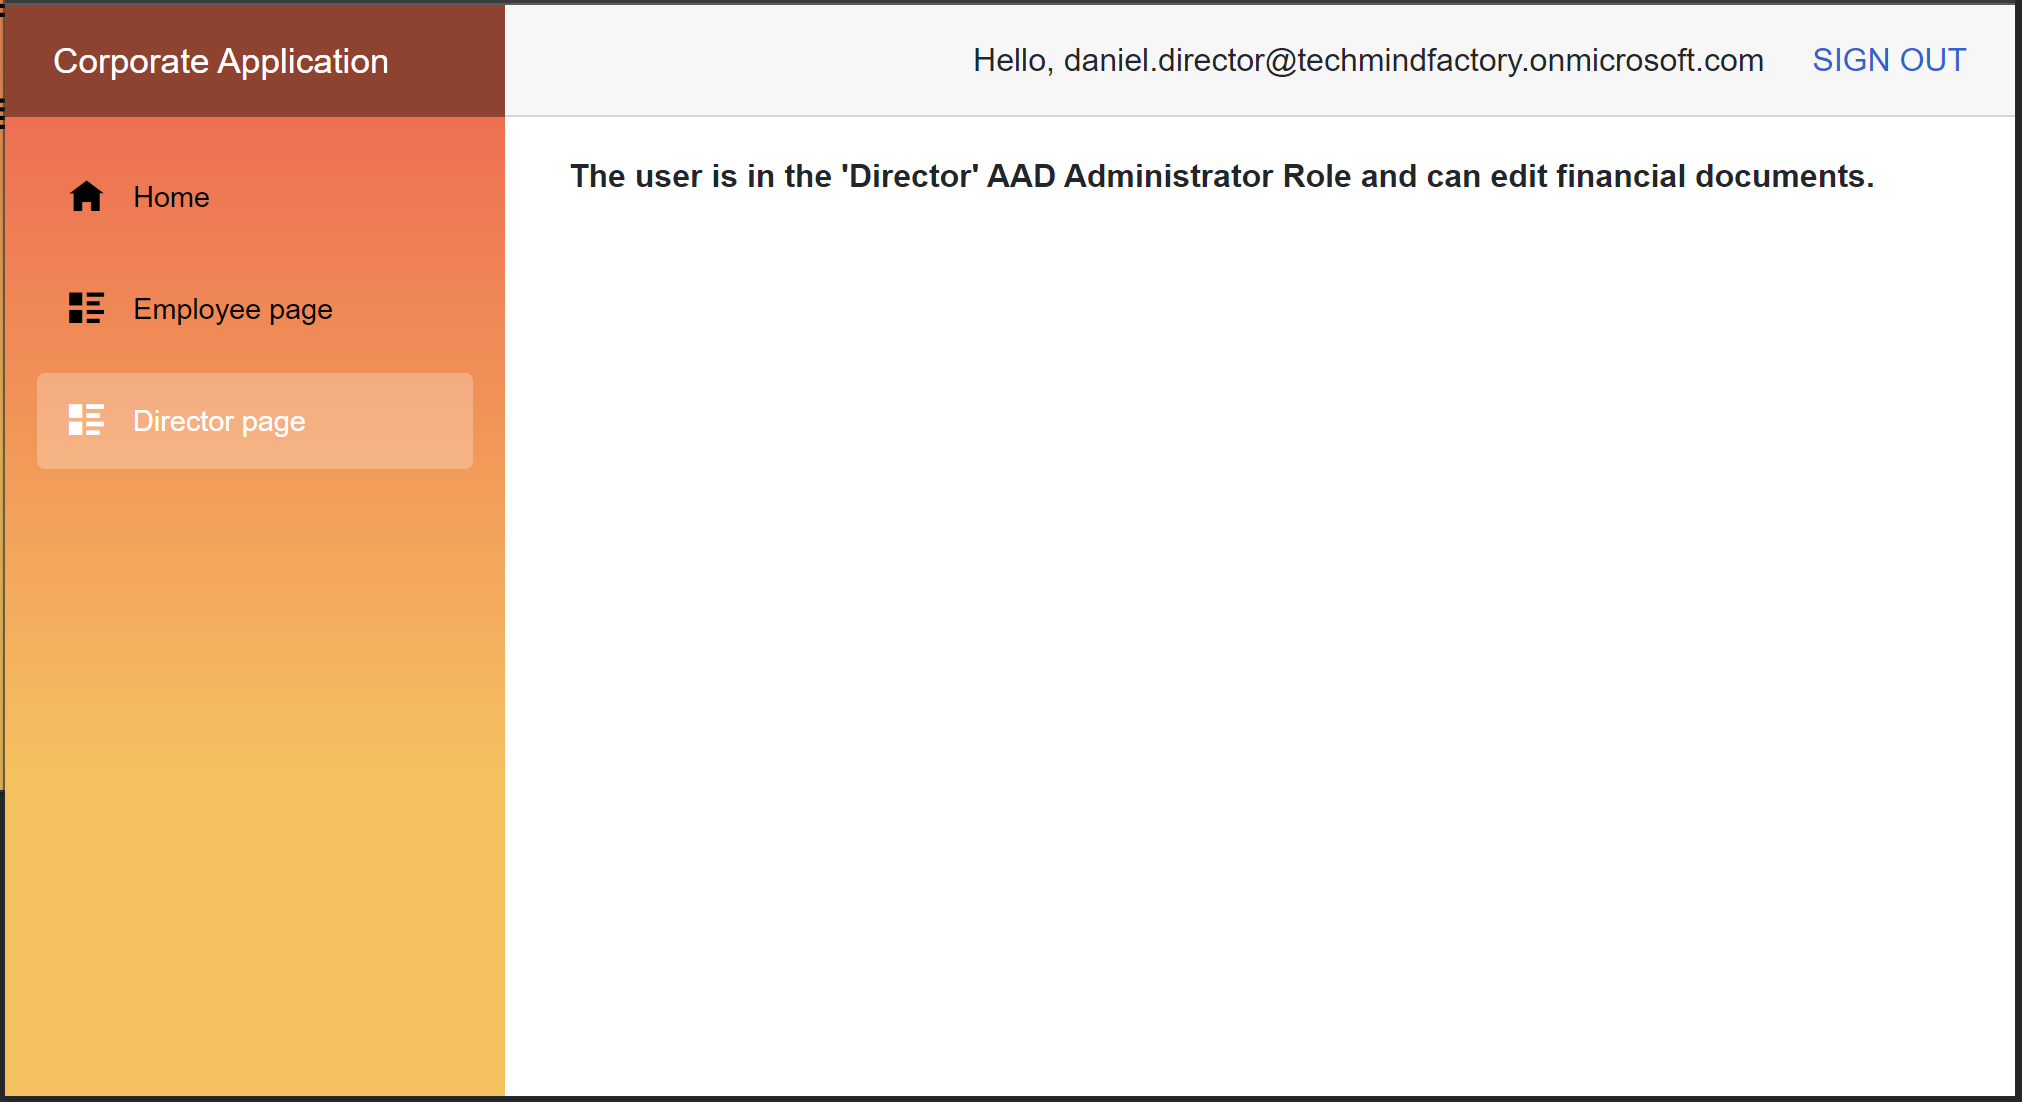
Note that AuthorizeView is used together with Policy set to Director. If user has the Director role assigned and Edit.Document claim is presented in the token, this page will be displayed. If there is no Edit.Document claim in the token, user will see this information: The user is not in the ‘Director’ role and cannot see the content of this page.
We use the Director policy we configured in the Startup class described above in the article.
Summary
In this article we discussed how to implement user authorization using Azure Active Directory App Roles and authorization handlers. I encourage you to check the source code on my GitHub for the Tech Mind Factory Corporate Web App to learn more in detials. You can also ask if the same mechanism can be used with ASP .NET Core Web APIs. Of course it can be used and here is the sample from my GitHub how to achieve that. I hope this will help you.