Face detector - automatic e-mail alerts with Windows IoT Core and Microsoft Azure cloud
Use case
In my previous article (you can find it here) I described how to connect motion sensor to the device with Windows IoT Core system and how to connect it with Microsoft Azure IoT Hub to send SMS alerts once motion is detected.
In this article I would like to extend previous sample with face detection using camera connected to the IoT device and Microsoft Cognitive Serivces (Face API service). Once motion is detected, camera takes picture which is analyzed with Cognitive Services Face API. At the end there is an email notification send with taken image and analyzis result using Azure Logic App.
Solution

In the previous article I presented how to connect motion sensor with Raspberry Pi 2 device running Windows IoT Core system. This time we will add one more element - camera device connected to the USB port. Once motion is detected by sensor - photo is taken and analyzed with Microsoft Cognotive Services Face API. Then image together with analyzis result is sent to the Azure IoT Hub and then used with other components.
Below there is flow presented:
- Motion sensor connected to the Raspberry Pi detects motion
- Image is taken by connected camera device
- Image is analyzed by Microsoft Cognitive Services Face API service
- Analyzis result together with the taken image is sent to the Azure IoT Hub - image is saved in the Azure Blob Storage
- Azure Function is triggered to pass analyzis result to the Azure Logic App
- Azure Logic App receives analyzis result and retrieves taken image from the Azure Blob Storage
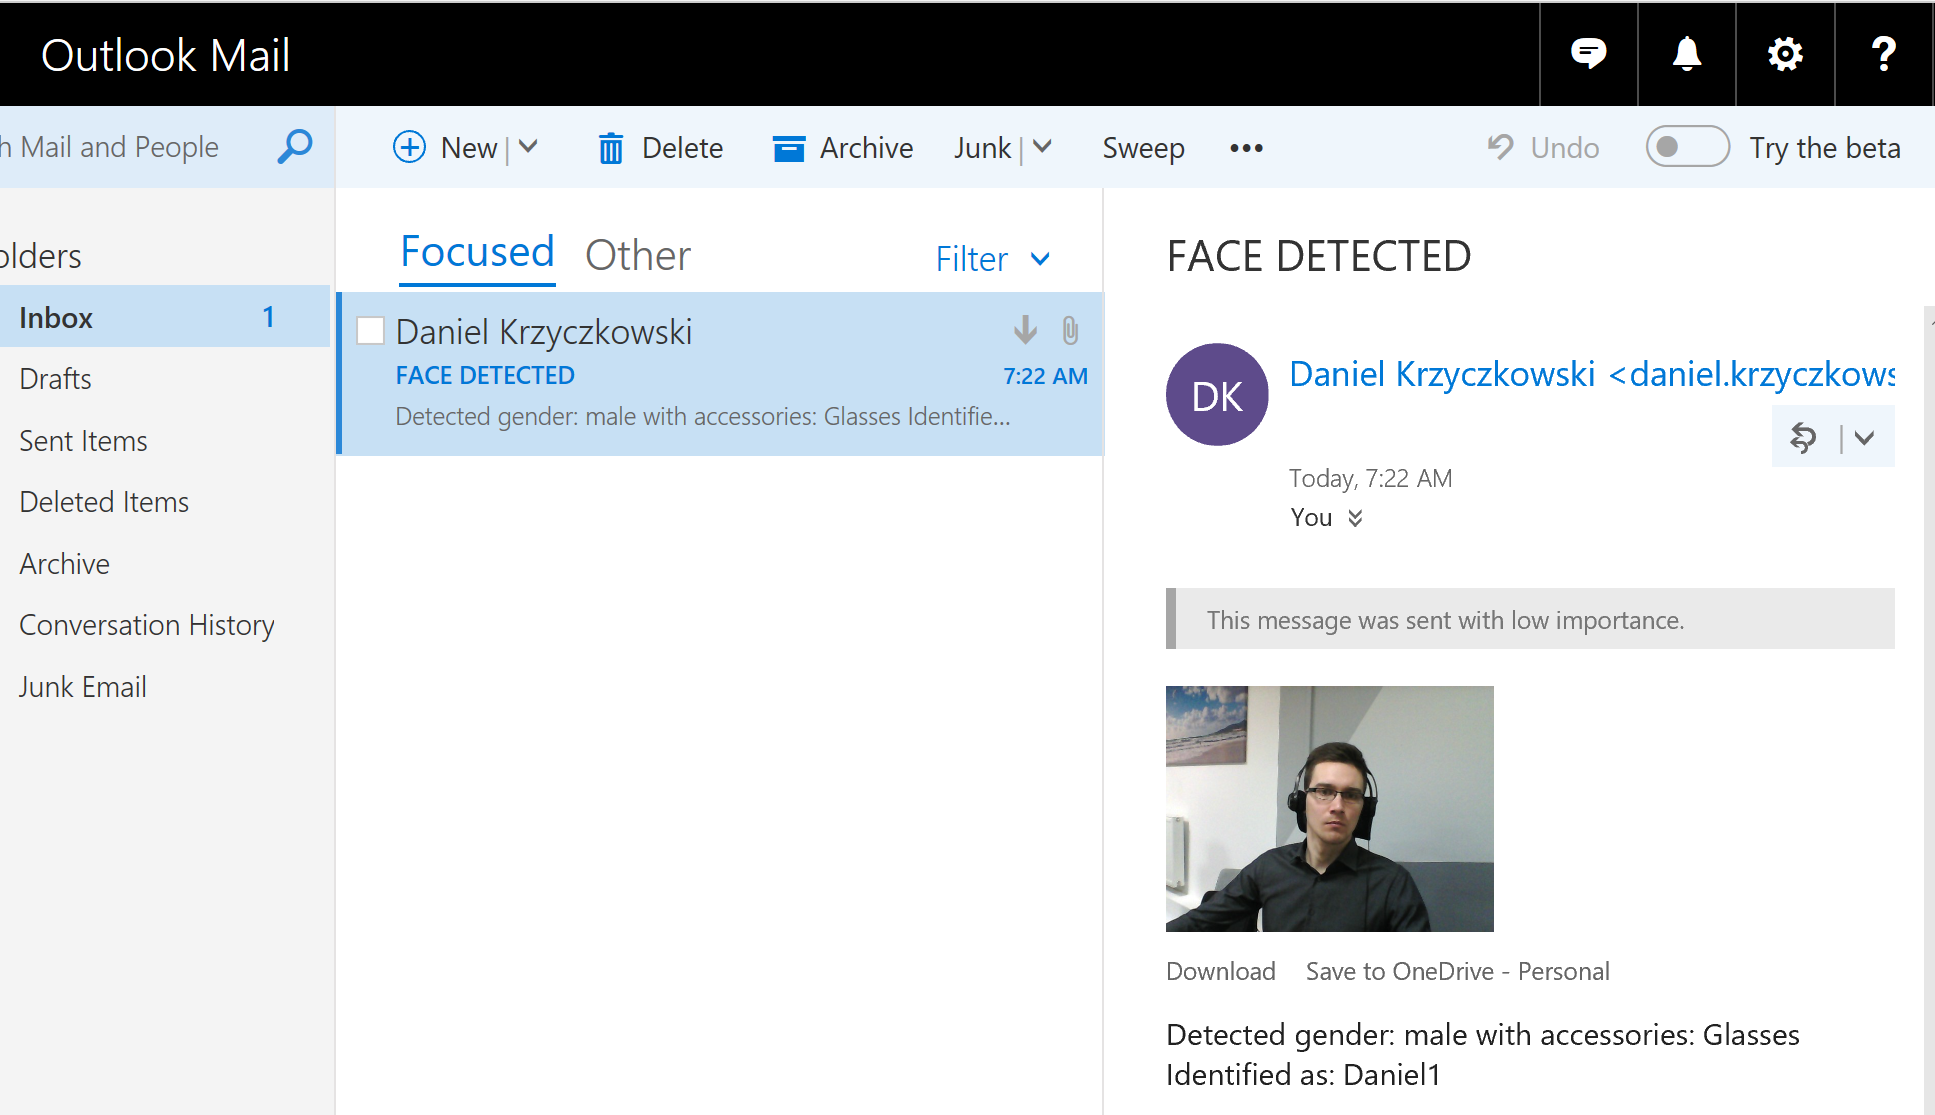
- An e-mail is created with image attachment and then sent to the specific address
I also prepared UWP desktop application called “Face Identifier” to scan and identify people. This enables to register people so Cognitive Services Face API can then detect and analyze people from sent images. Application description is placed below in the article.
Code and Configuration
In this section you will find how to create solution described above.
Face Identifier UWP application - desktop app
Face Identifier UWP applicaton is connected with Microsoft Cognitive Services Face API. You can use it to take picture of your (or your friend) face. Then you can register new group and person in the Face API so once IoT device detects motion and takes image it can be analyzied and recognized. Application is presented below:
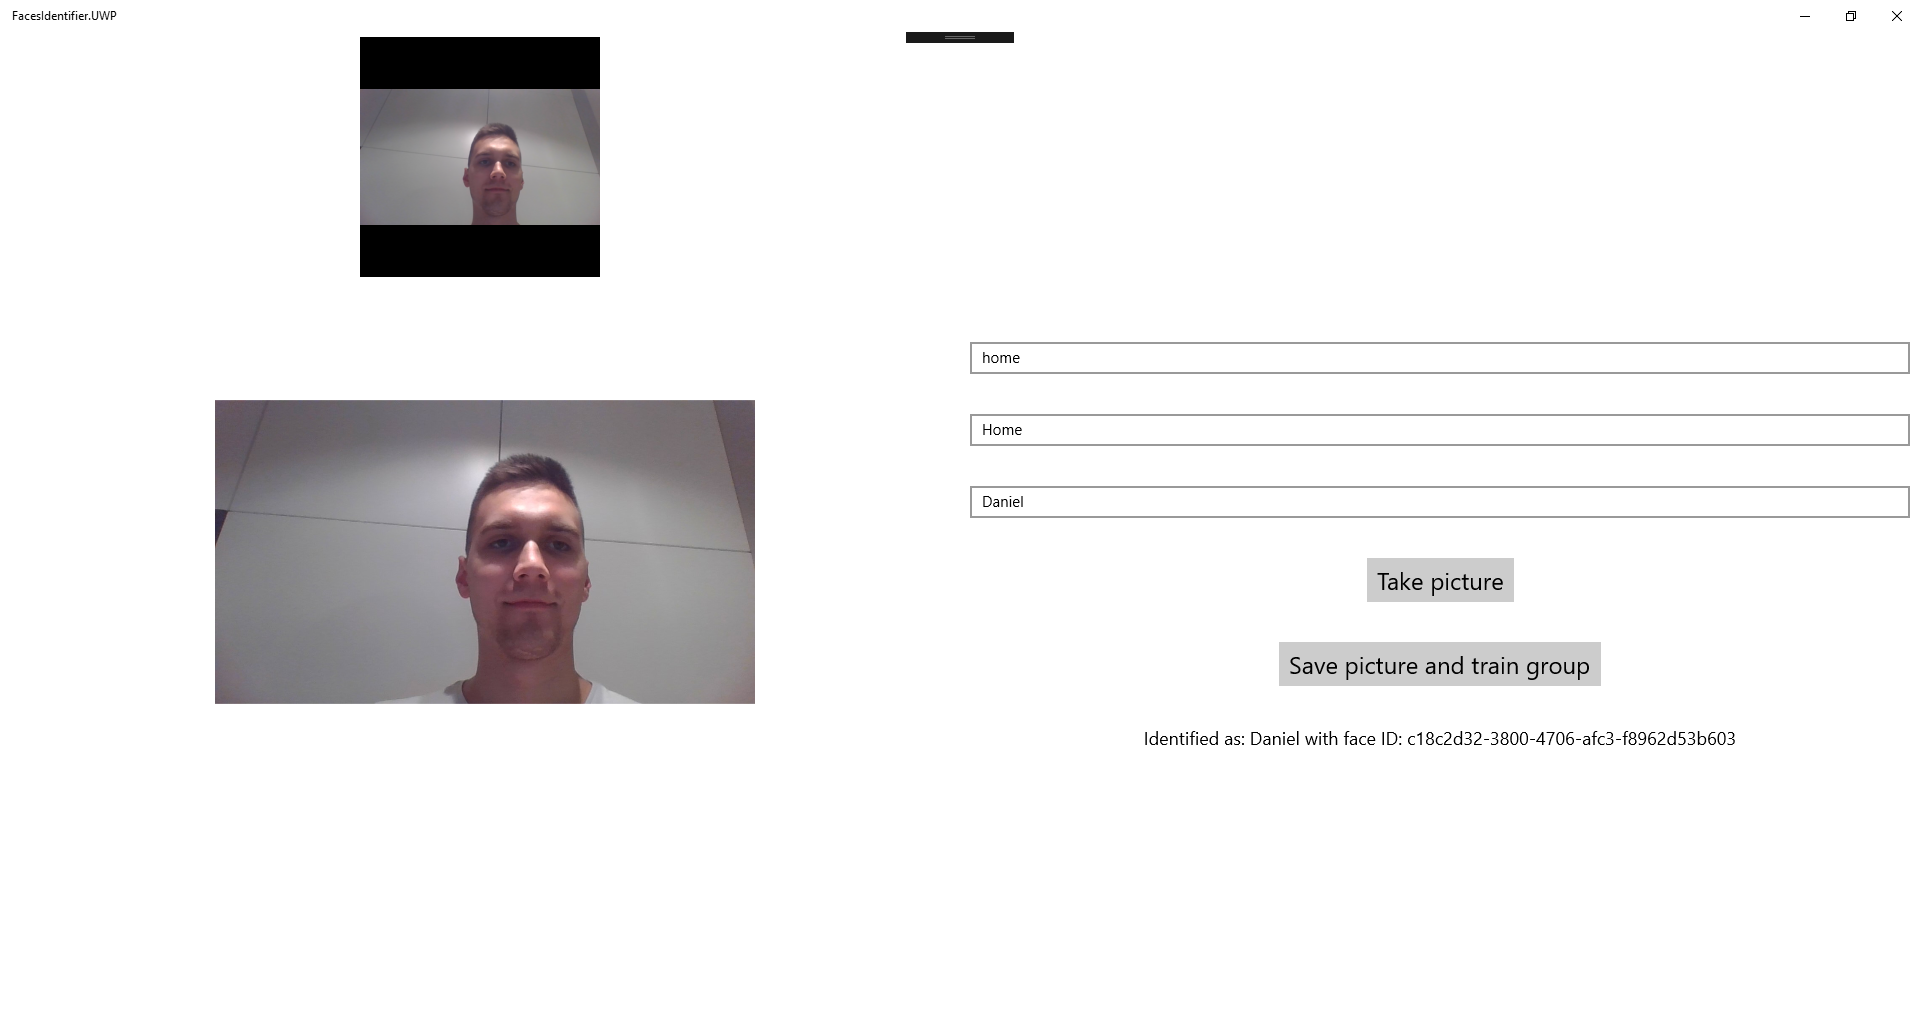
As you can see I scaned my face and registered myself as “Daniel” in the “Home” group. Whole source code you can find on my GitHub here.
The most important part is FaceRecognitionService class. There you can find all methods responsible creating group of known people, adding new person to the group (using image and name) or detecting it after training of Face API:
    public class FaceRecognitionService
    {
        public event EventHandler<string> TrainingStatusChanged;
        private readonly FaceServiceClient _faceServiceClient;
        public FaceRecognitionService()
        {
            _faceServiceClient = new FaceServiceClient("<<Cognitive Services API Key>>", "https://westcentralus.api.cognitive.microsoft.com/face/v1.0");
        }

        public async Task CreatePersonGroup(string personGroupId, string groupName)
        {
            await _faceServiceClient.CreatePersonGroupAsync(personGroupId.ToLower(), groupName);
        }

        public async Task<Tuple<string, CreatePersonResult>> AddNewPersonToGroup(string personGroupId, string personName)
        {

            CreatePersonResult person = await _faceServiceClient.CreatePersonAsync(personGroupId, personName);

            return new Tuple<string, CreatePersonResult>(personGroupId, person);
        }

        public async Task<AddPersistedFaceResult> RegisterPerson(string personGroupId, CreatePersonResult person, Stream stream)
        {

            var addPersistedFaceResult = await _faceServiceClient.AddPersonFaceAsync(
                 personGroupId, person.PersonId, stream);
            return addPersistedFaceResult;
        }

        public async Task TrainPersonGroup(string personGroupId)
        {
            await _faceServiceClient.TrainPersonGroupAsync(personGroupId);
        }

        public async Task<TrainingStatus> VerifyTrainingStatus(string personGroupId)
        {
            TrainingStatus trainingStatus = null;
            while (true)
            {
                TrainingStatusChanged?.Invoke(this, "Training in progress...");
                trainingStatus = await _faceServiceClient.GetPersonGroupTrainingStatusAsync(personGroupId);

                if (trainingStatus.Status != Status.Running)
                {
                    break;
                }

                await Task.Delay(1000);
            }
            TrainingStatusChanged?.Invoke(this, "Training completed");
            return trainingStatus;
        }

        public async Task<string> VerifyFaceAgainstTraindedGroup(string personGroupId, Stream stream)
        {
            var faces = await _faceServiceClient.DetectAsync(stream);
            var faceIds = faces.Select(face => face.FaceId).ToArray();

            var results = await _faceServiceClient.IdentifyAsync(personGroupId, faceIds);
            foreach (var identifyResult in results)
            {
                if (identifyResult.Candidates.Length == 0)
                {
                    return "No one identified";
                }
                else
                {
                    // Get top 1 among all candidates returned
                    var candidateId = identifyResult.Candidates[0].PersonId;
                    var person = await _faceServiceClient.GetPersonAsync(personGroupId, candidateId);
                    return "Identified as: " + person.Name + " with face ID: " + identifyResult.FaceId;
                }
            }
            return "No one identified";
        }
    }
We are using FaceRecognitionService instance in the MainPage class so I encourage you to go through the source code of the app project.
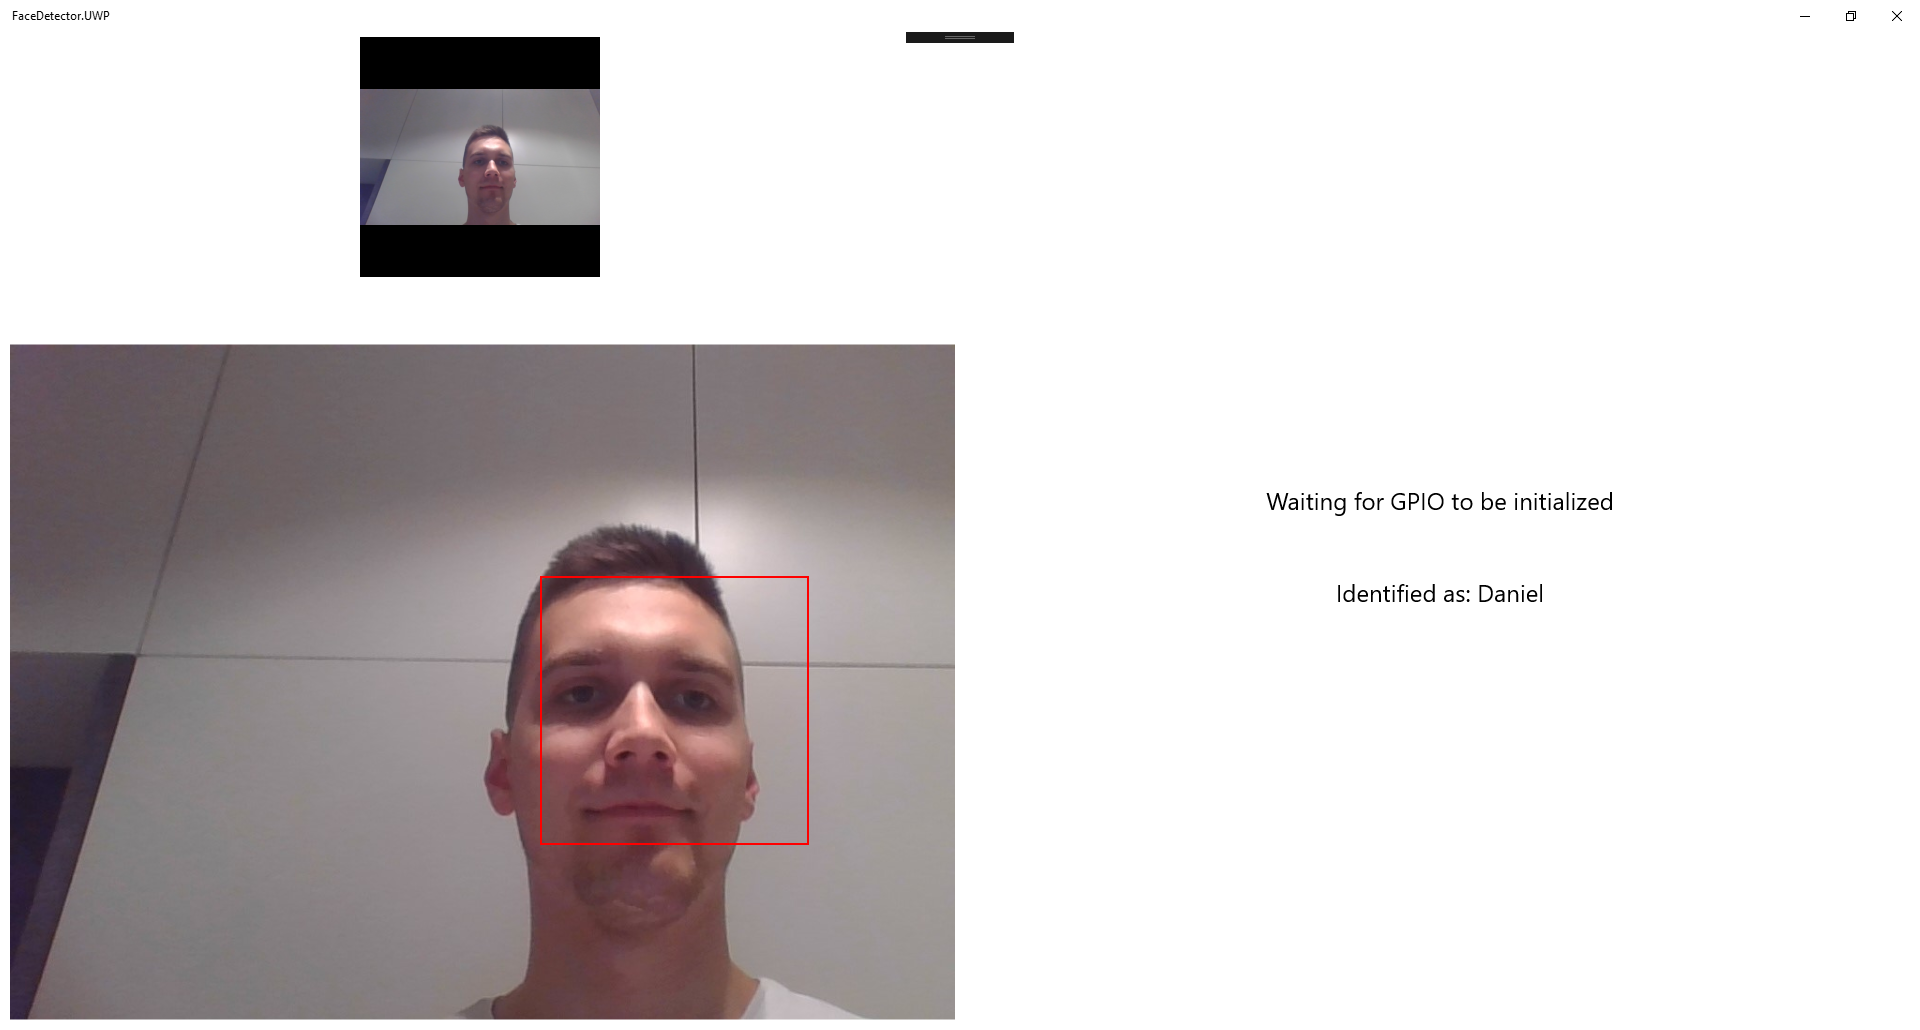
Face Detector UWP application for Windows IoT Core
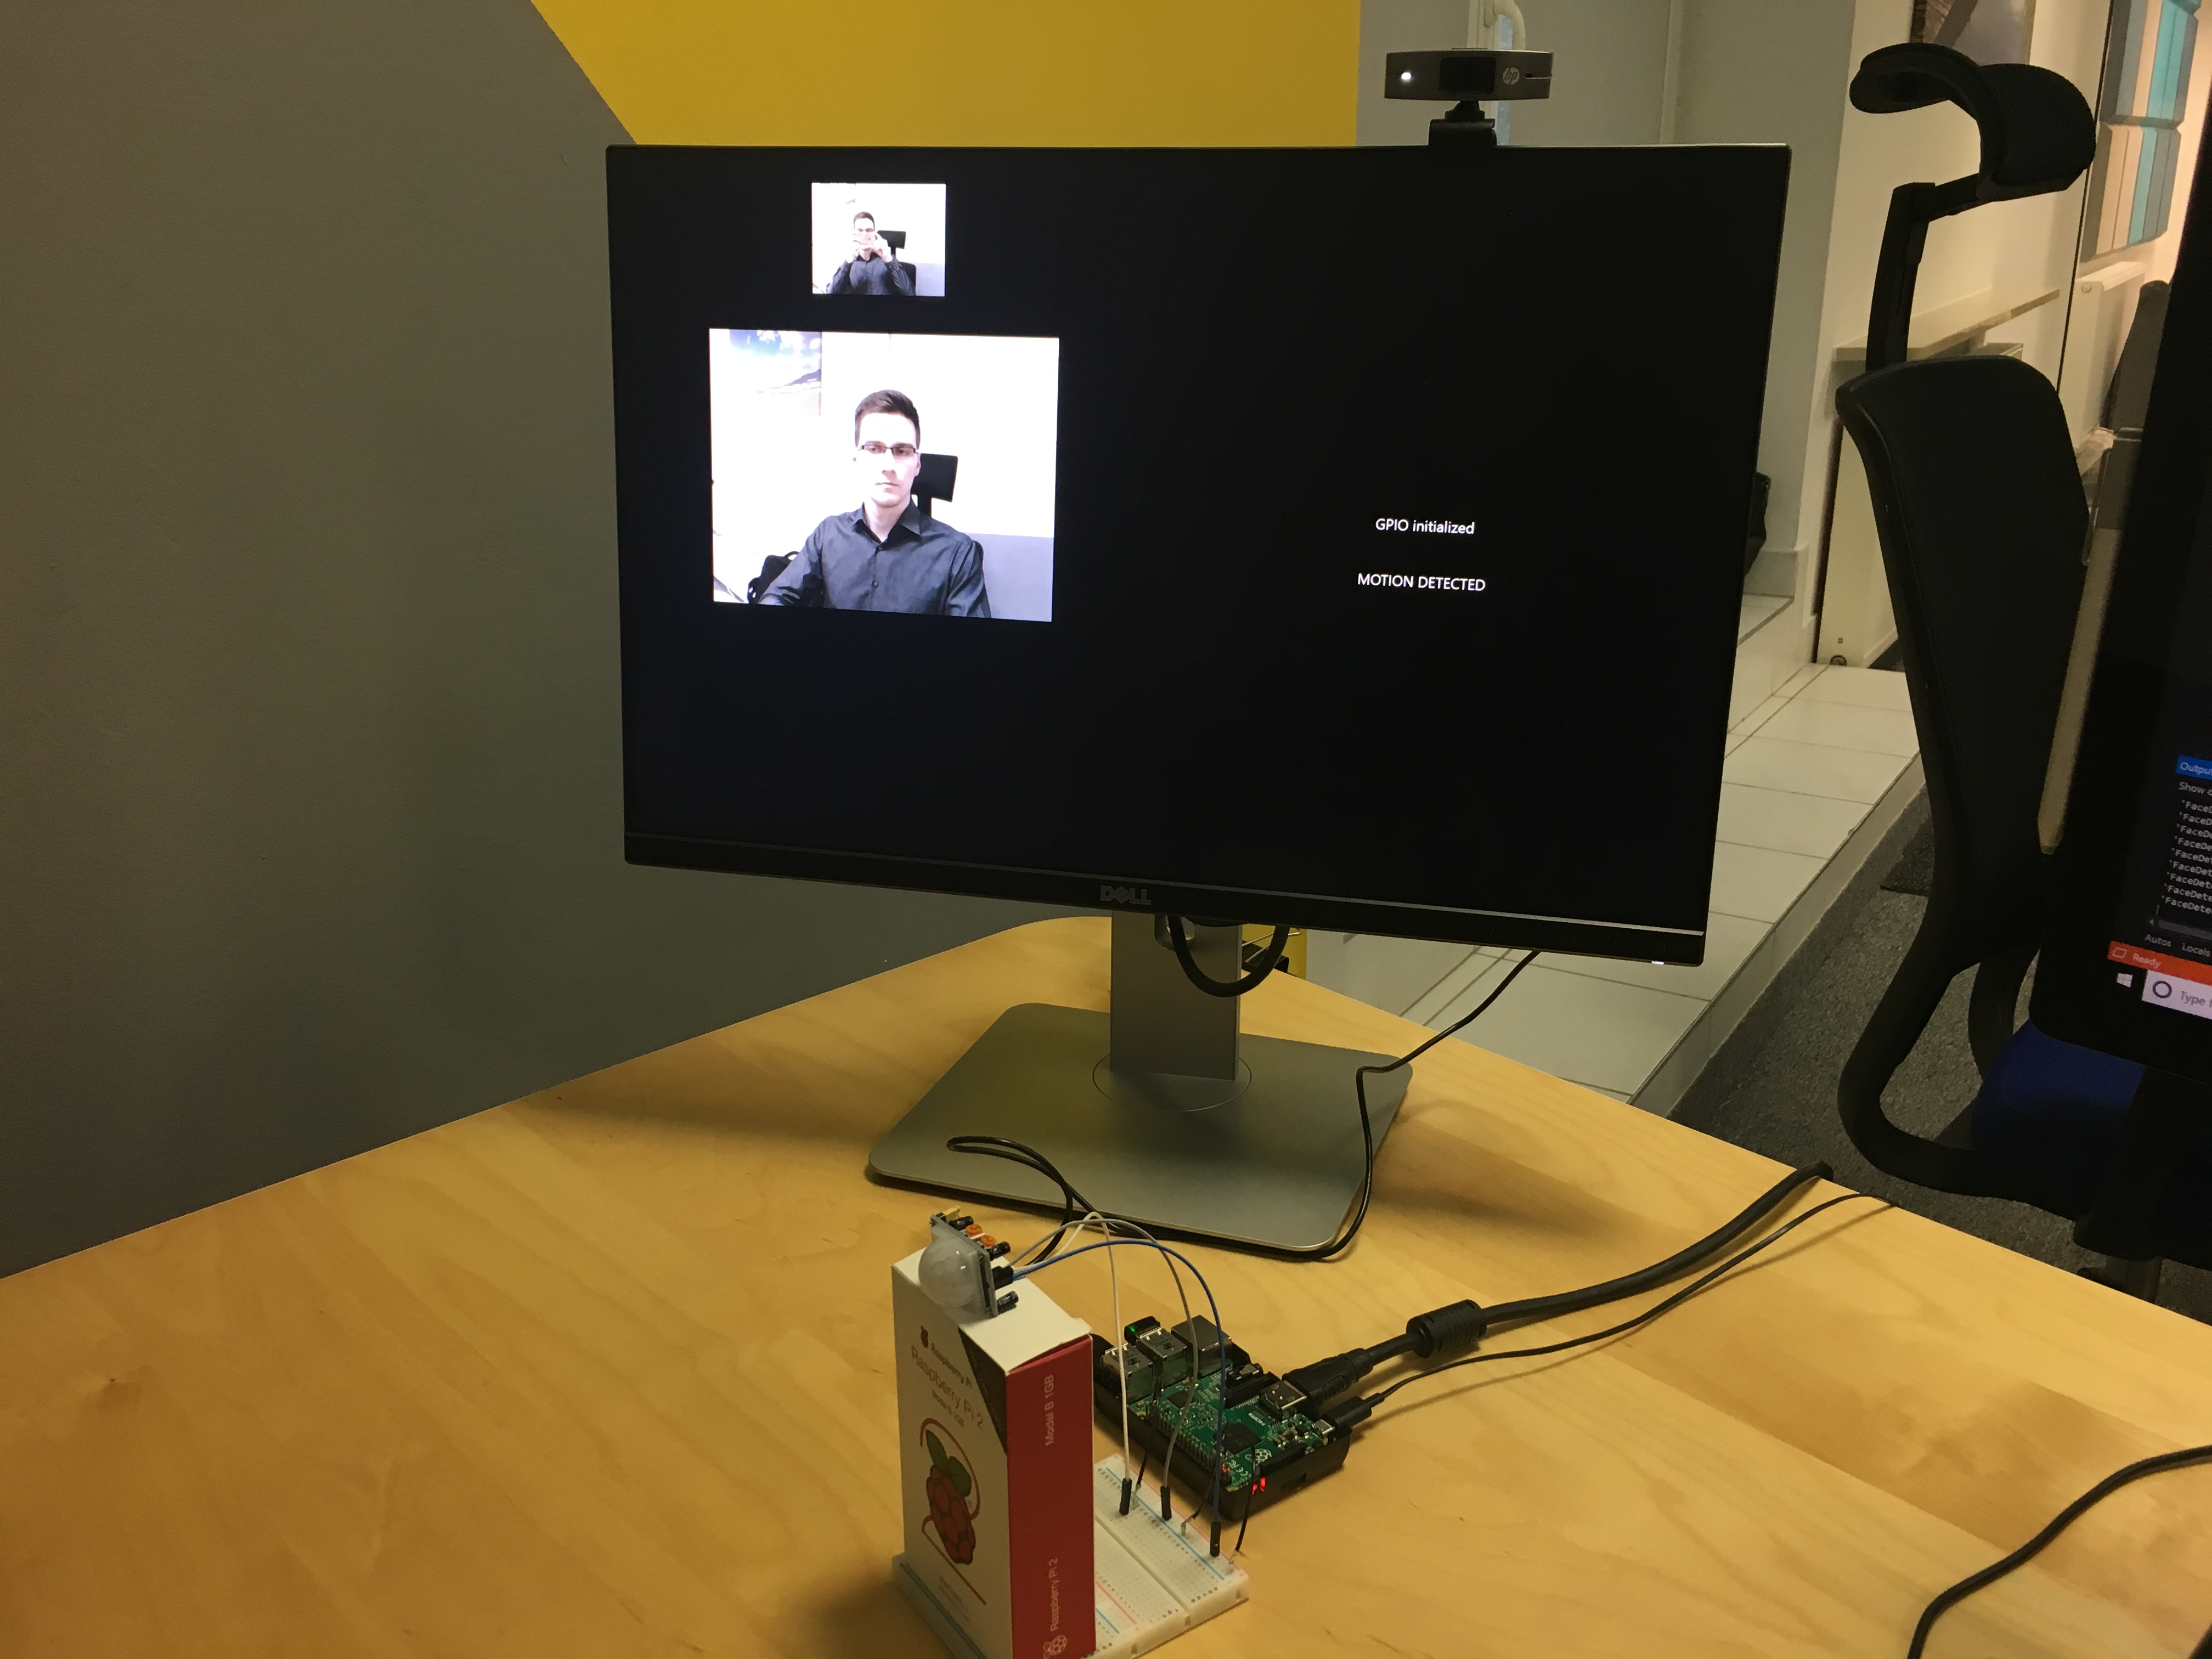
Face Detector UWP application is created for IoT devices with Windows IoT Core system. Once motion is detected, camera connected to the device takes picture which is then analyzed by Microsoft Cognitive Services. Image and analyzis result are sent then to the Azure IoT Hub. Application is presented below:
Whole source code you can find on my GitHub here.
I extended previous application (Motion Detector) with connected camera device and Microsoft Cognitive Services Face API. There is one more service added to the project called FaceRecognitionService (as in the Face Identifier app) which helps detect people from the images taken by camera device once motion is detected:
public class FaceRecognitionService
    {
        public FaceRecognitionService()
        {
            FaceServiceClient = new FaceServiceClient("<<API key here>>", "https://westcentralus.api.cognitive.microsoft.com/face/v1.0");
        }

        public FaceServiceClient FaceServiceClient { get; }

        public async Task<string> VerifyFaceAgainstTraindedGroup(string personGroupId, Stream stream)
        {
            try
            {
                var faces = await FaceServiceClient.DetectAsync(stream);
                var faceIds = faces.Select(face => face.FaceId).ToArray();

                var results = await FaceServiceClient.IdentifyAsync(personGroupId, faceIds);
                foreach (var identifyResult in results)
                {
                    Console.WriteLine("Result of face: {0}", identifyResult.FaceId);
                    if (identifyResult.Candidates.Length == 0)
                    {
                        return "No one identified";
                    }
                    else
                    {
                        // Get top 1 among all candidates returned
                        var candidateId = identifyResult.Candidates[0].PersonId;
                        var person = await FaceServiceClient.GetPersonAsync(personGroupId, candidateId);
                        return "Identified as: " + person.Name;
                    }
                }
                return "No one identified";
            }

            catch(FaceAPIException ex)
            {
                return "An error has occurred: " + ex.Message;
            }
        }
    }
AzureIoTHubService class was extended with one more method - written to uplad taken image to the Azure Storage:
     public async Task SendImageToAzure(Stream imageStream)
     {
          await _deviceClient.UploadToBlobAsync($"Person.jpg", imageStream);
     }
In the MainPage class there is a method which prepares data (Face API analyzis result and image) to be send to the Azure IoT Hub:
        private async Task SendImageWithAnalysis(string analyzisResult)
        {
            var personPicture = await GetImageStream();
            var motionEvent = new MotionEvent
            {
                RoomNumber = 1,
                ImageAnalyzisResult = analyzisResult
            };
            await _azureIoTHubService.SendImageToAzure(personPicture);
            await _azureIoTHubService.SendDataToAzure(motionEvent);
        }
Microsoft Azure services configuration
In this section you will find which services were used in the Azure cloud and how to configure them. I assume that you have active Azure subscription.
Azure IoT Hub
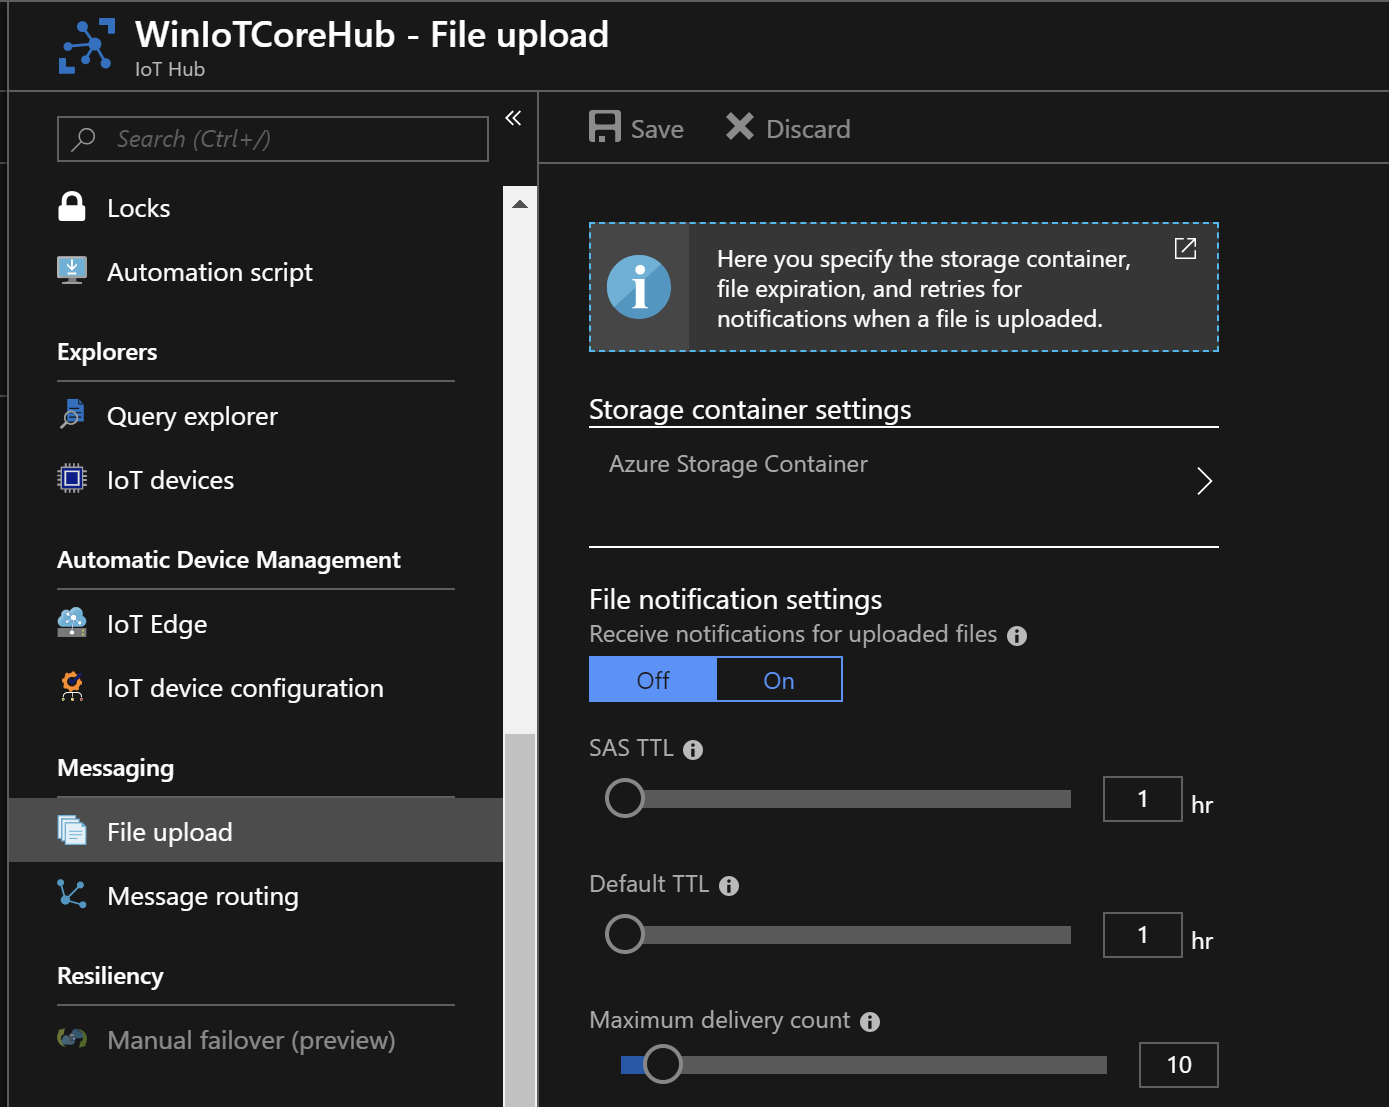
We will use Azure IoT Hub created previously - if you do not have one please refer to the previous article where all required steps are described. We need to add file upload support (connect IoT Hub with Azure Storage Account) so please follow below steps:
In the messaging setion select File upload then select Azure Storage Container:
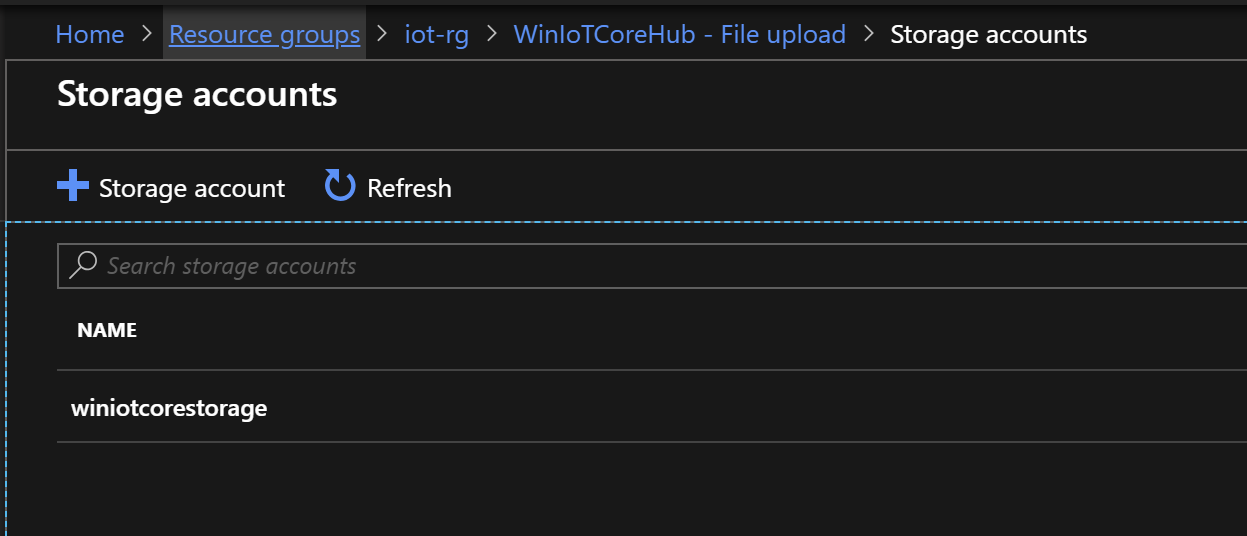
Then if you do not have storage already select +Storage account and create it. If you already have one select it from the list:
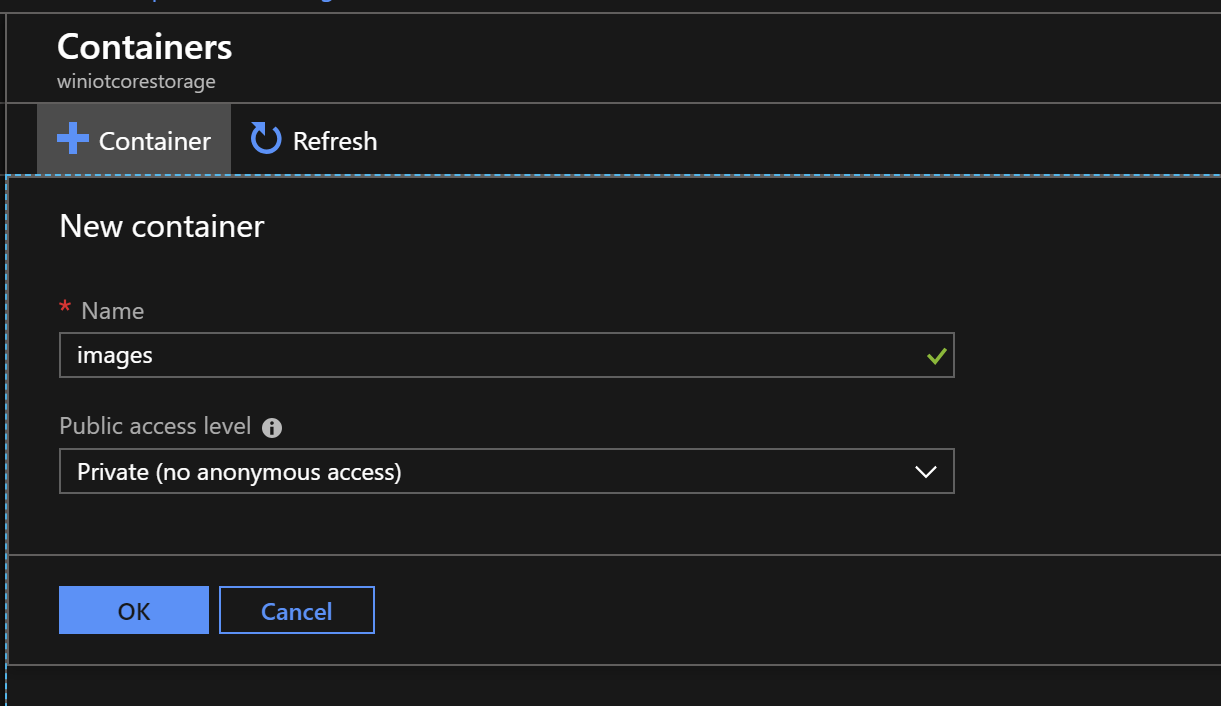
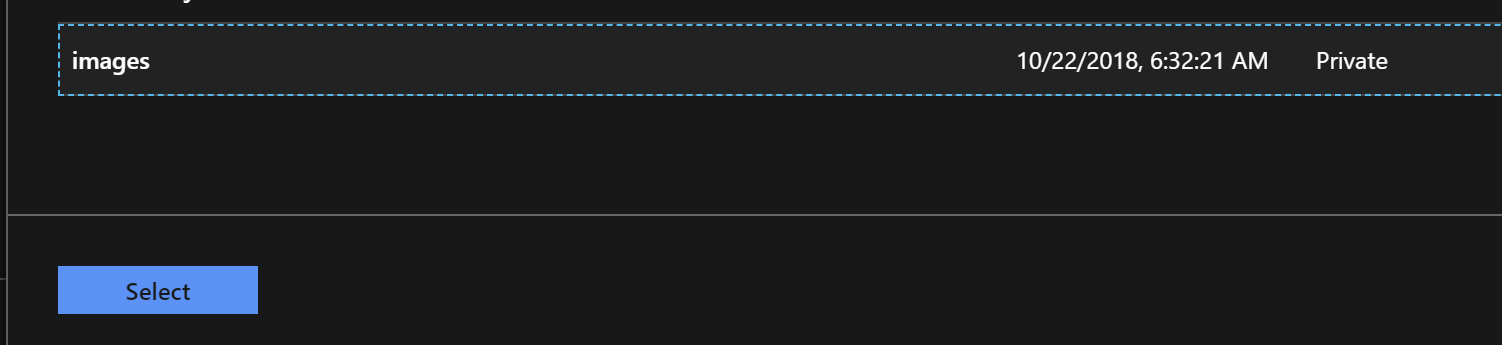
Click +Container and name it. This is the container where we will store taken image from IoT device:
Select this container so IoT Hub will know where to store images:
Save all settings:
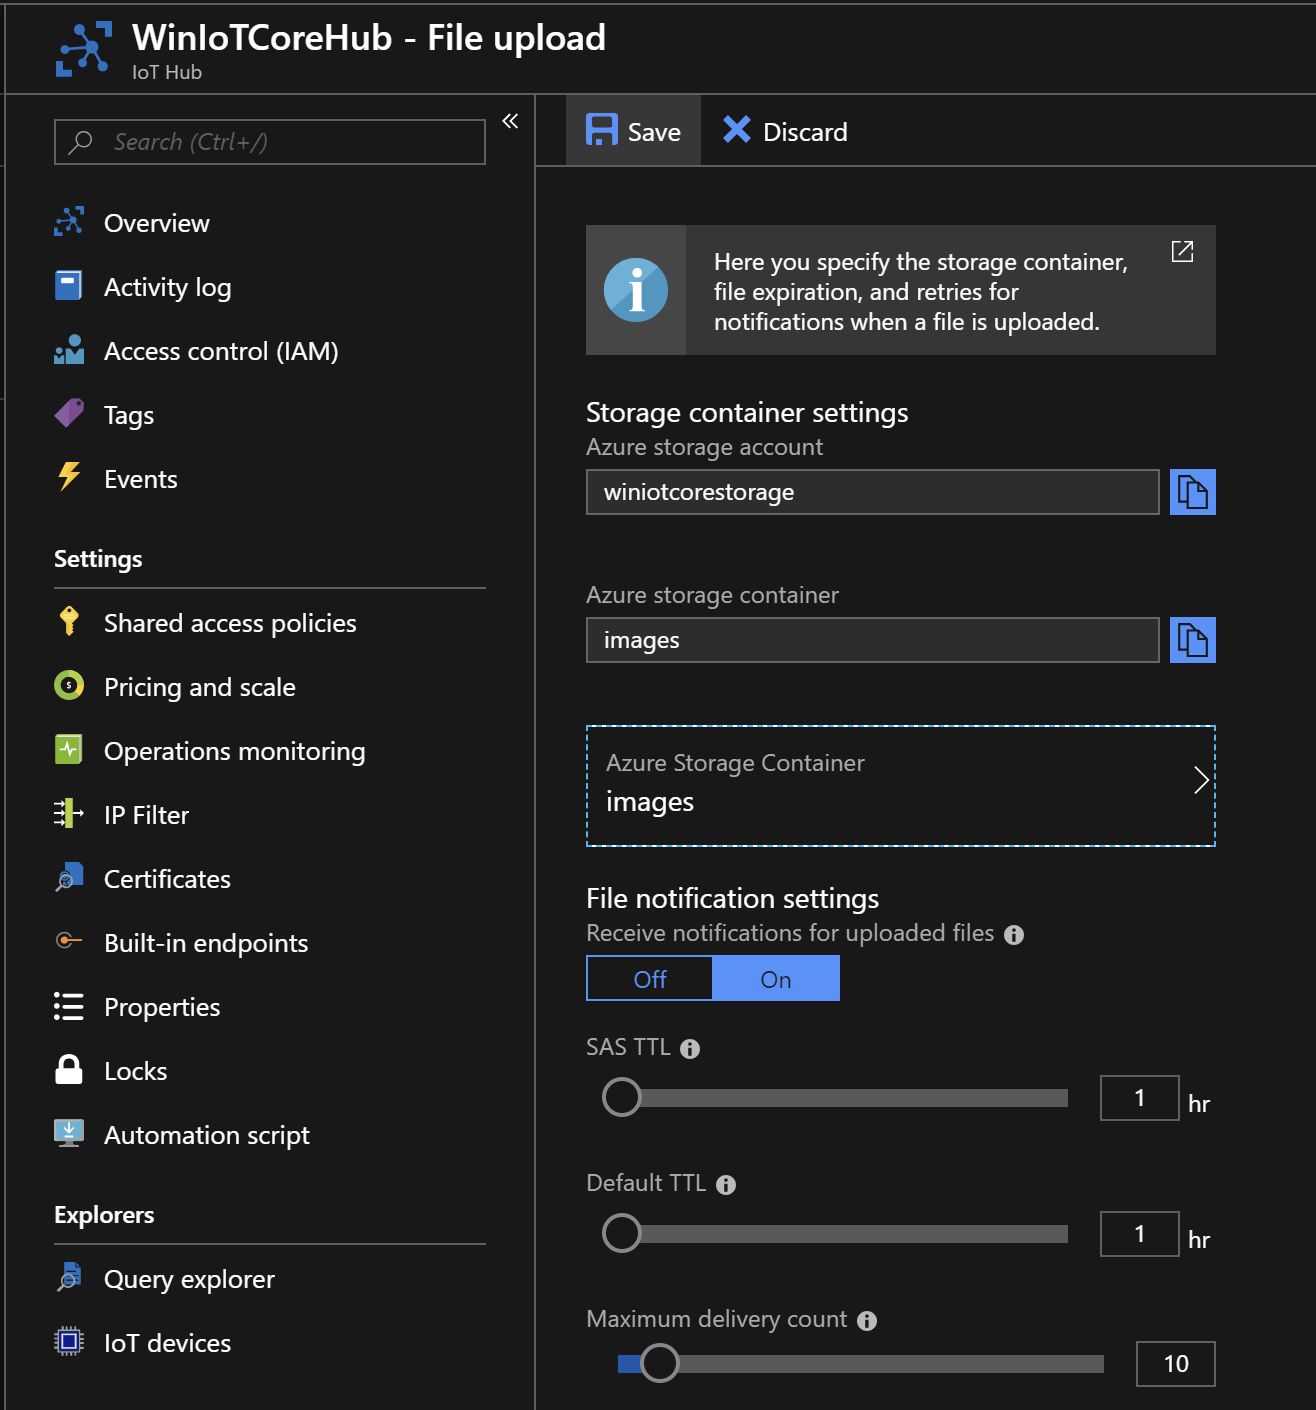
Azure IoT Hub is now connected with Azure Storage Account. Once image is taken by IoT device it is sent to the IoT Hub and then stored in the blob container.
Azure Function IoTHubTrigger
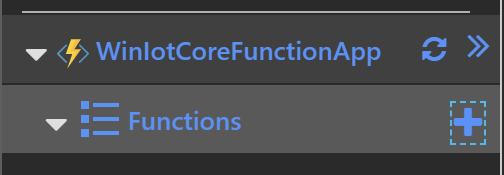
Once there is new information sent to the Azure IoT Hub we want to trigger Function App. Here we will use IoTHubTrigger.
Open Functions blade and select “+” button to add new function:
Select “Event Hub Trigger C#” template. Type the name and select IoT Hub for the Azure Event Hubs Trigger:

That’s it! Now you can paste the code responsible for sending Face API analyzis received from the device to the Azure Logic App:
using System.Net;
using Microsoft.Extensions.Logging.Abstractions;
using System.Text;

private static HttpClient httpClient = new HttpClient();

public static void Run(string myEventHubMessage, ILogger logger)
{
    logger.LogInformation($"C# Event Hub trigger function processed a message: {myEventHubMessage}");

    HttpContent content = new StringContent(myEventHubMessage, Encoding.UTF8, "application/json");
    var response = httpClient.PostAsync("<<ADDRESS OF THE LOGIC APP TO HANDLE REQUESTS>>", content).Result;
    if (response.IsSuccessStatusCode)
    {
      logger.LogInformation("Status from the Logic App: " + response.StatusCode);
    }

}
Remember to add project.json file with below content so NuGet packages are correctly added:
{
  "frameworks": {
    "net46":{
      "dependencies": {
        "Newtonsoft.Json": "11.0.2",
        "Microsoft.Extensions.Logging.Abstractions": "2.1.1"
      }
    }
   }
}
We will store the logs in the Application Insights - if you do not have one please again refer to the previous article.
Azure Logic App
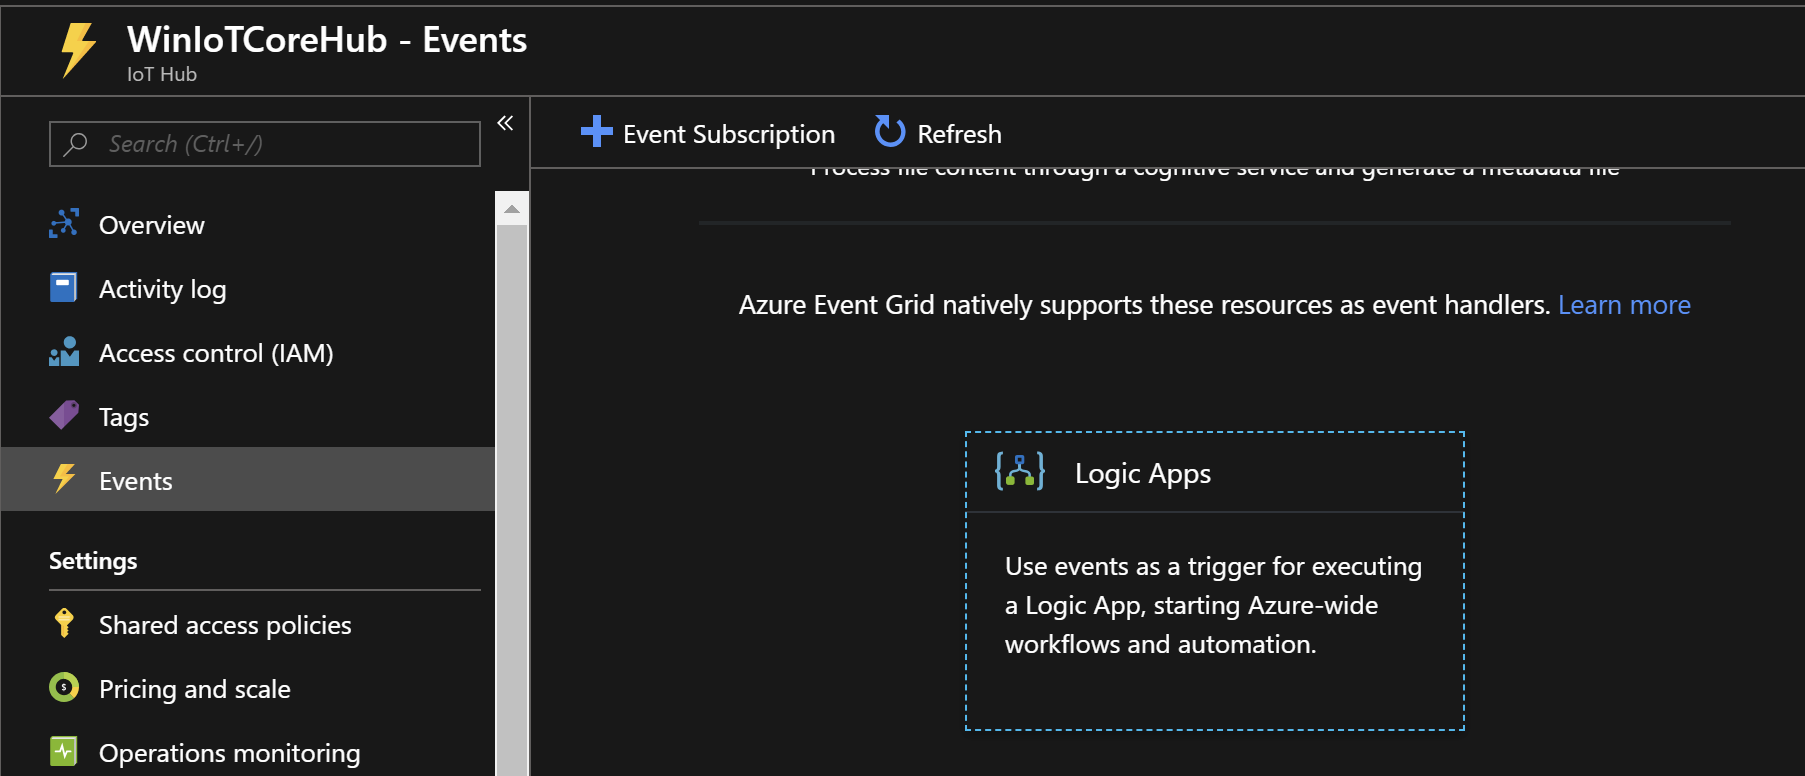
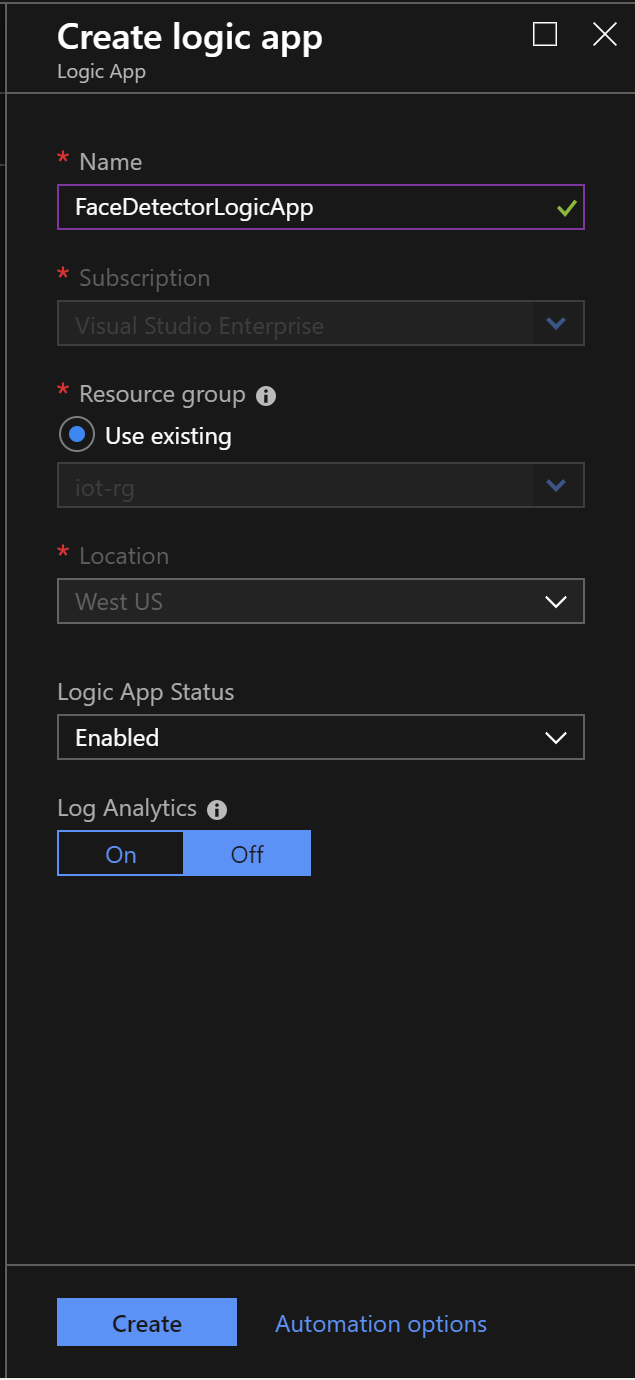
Now its time to configure Azure Logic App to send e-mail notifications with Face API analyzis result and taken image attached to the message. Go to the IoT Hub resource in Azure portal and open Events section and click Logic App tile:
Fill required data including name of the Logic App:
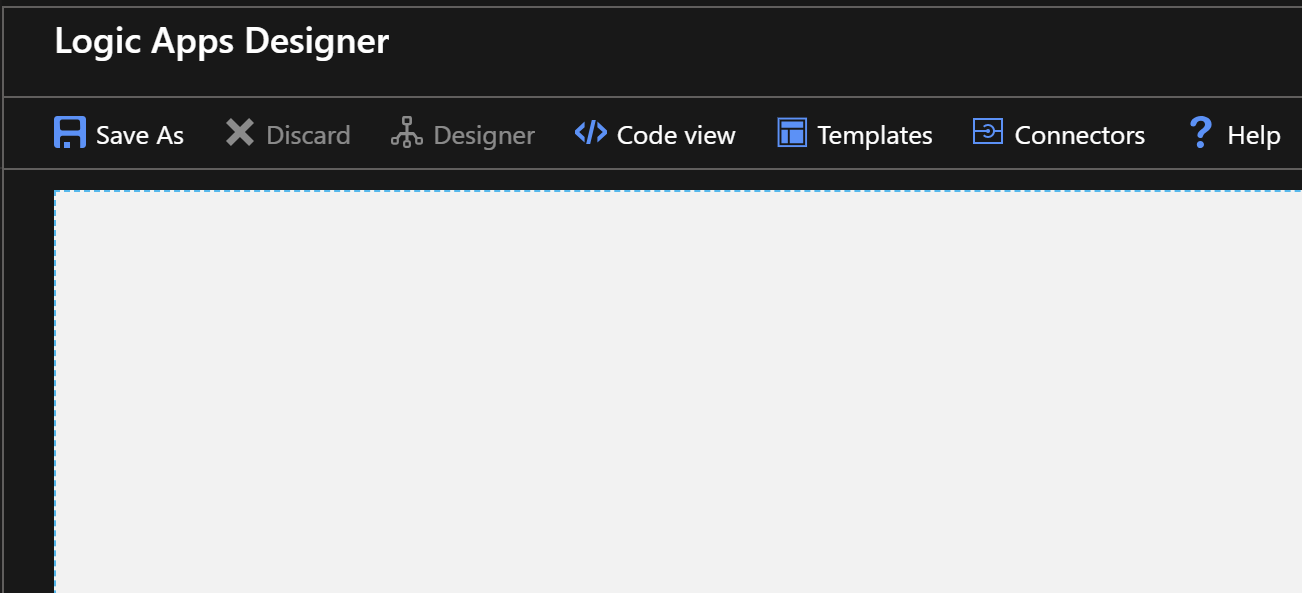
Then select Templates from the top:
Select When a HTTP request is received trigger:
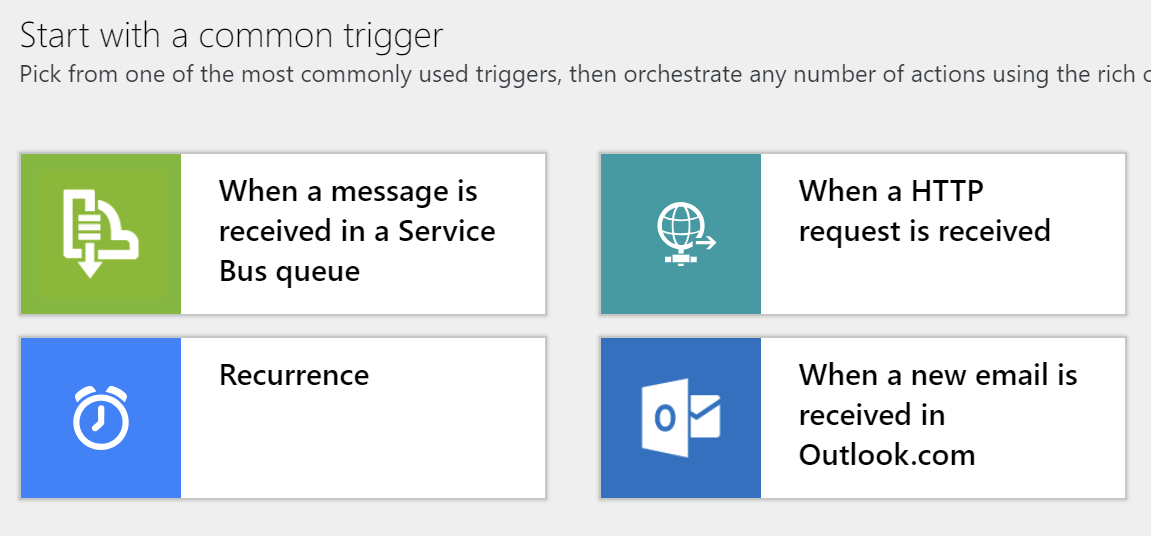
This will generate first step for the Logic App:
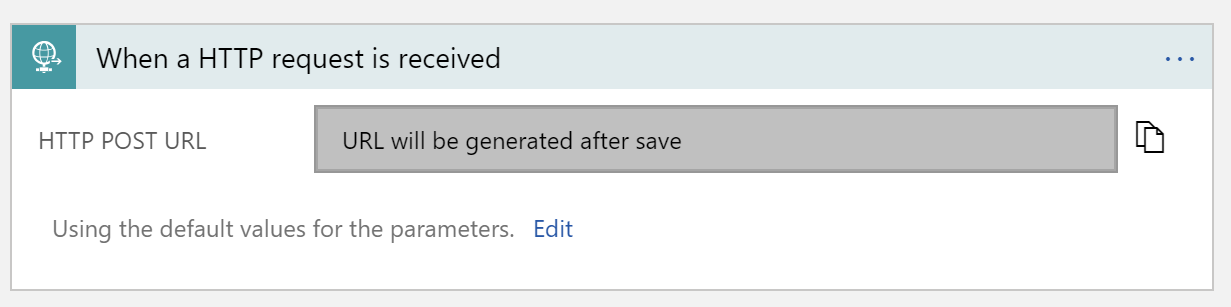
We need to define JSON schema for received messages:
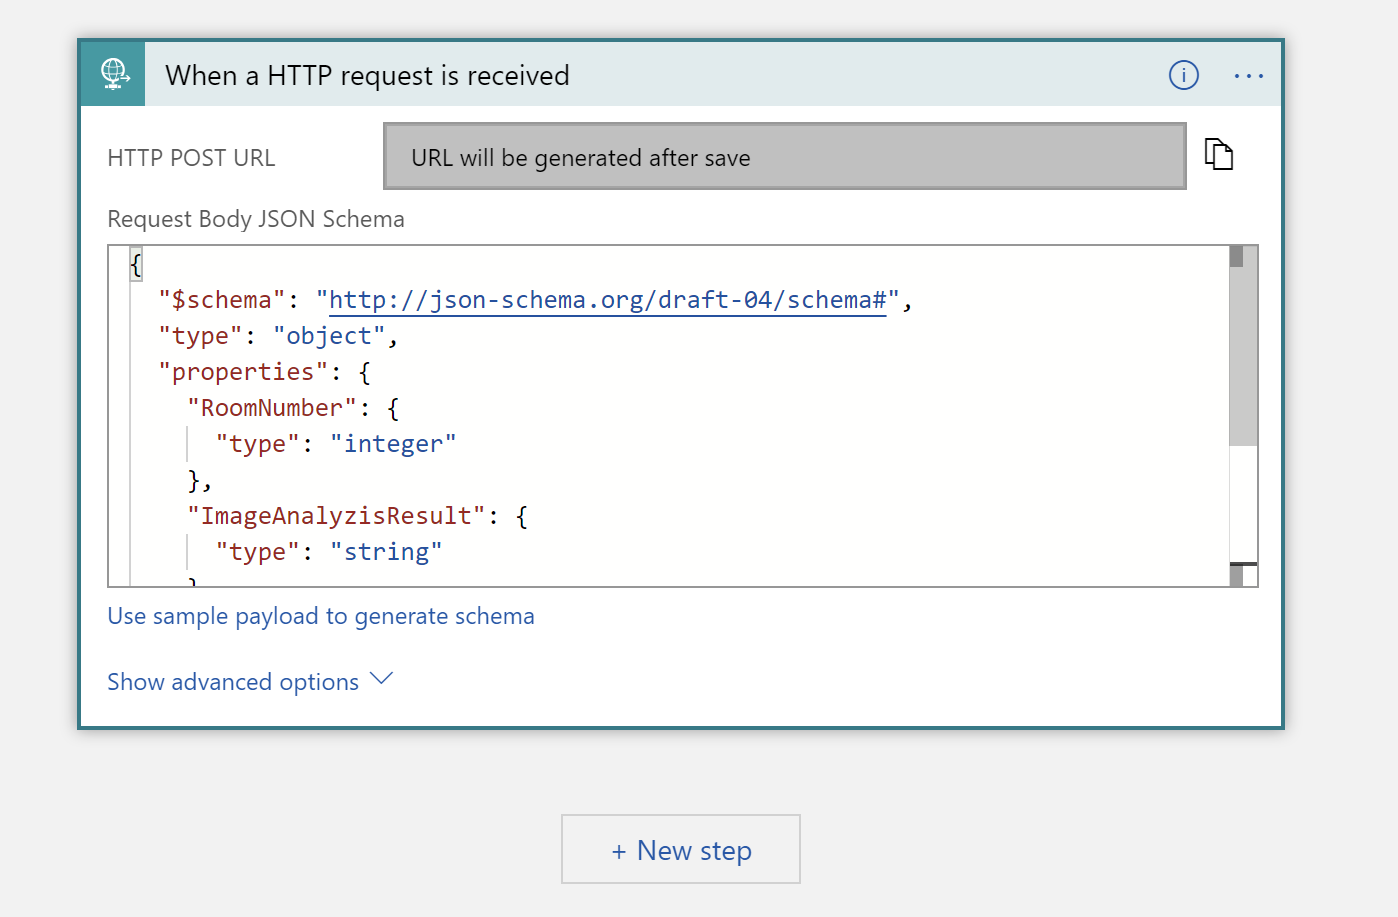
Paste below schema and save changes. Note that here we expecting to receive analyzis result and room number where motion was detected:
{
    "$schema": "http://json-schema.org/draft-04/schema#",
    "properties": {
        "ImageAnalyzisResult": {
            "type": "string"
        },
        "RoomNumber": {
            "type": "integer"
        }
    },
    "required": [
        "RoomNumber",
        "ImageAnalyzisResult"
    ],
    "type": "object"
}
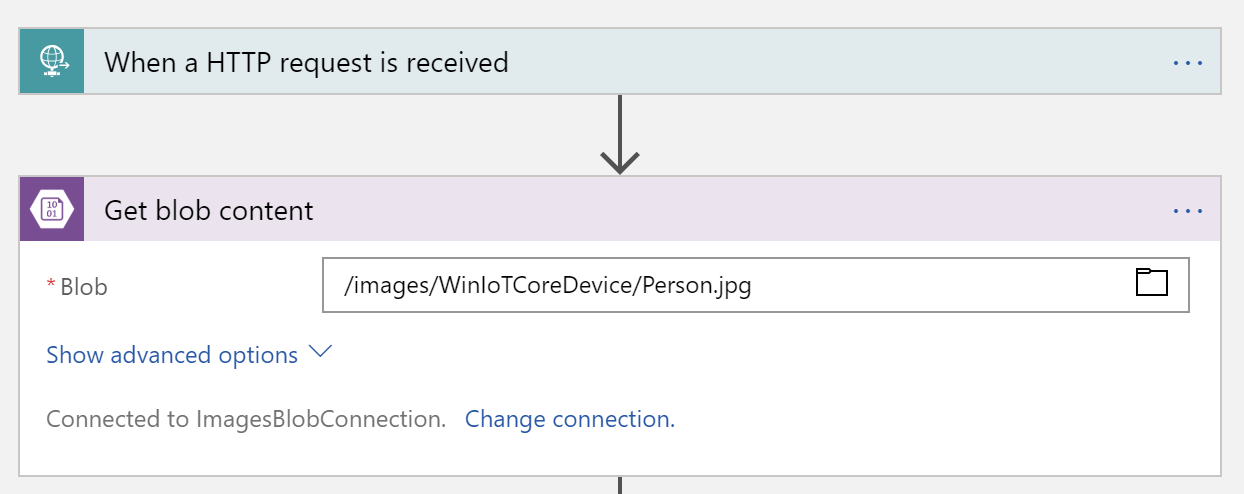
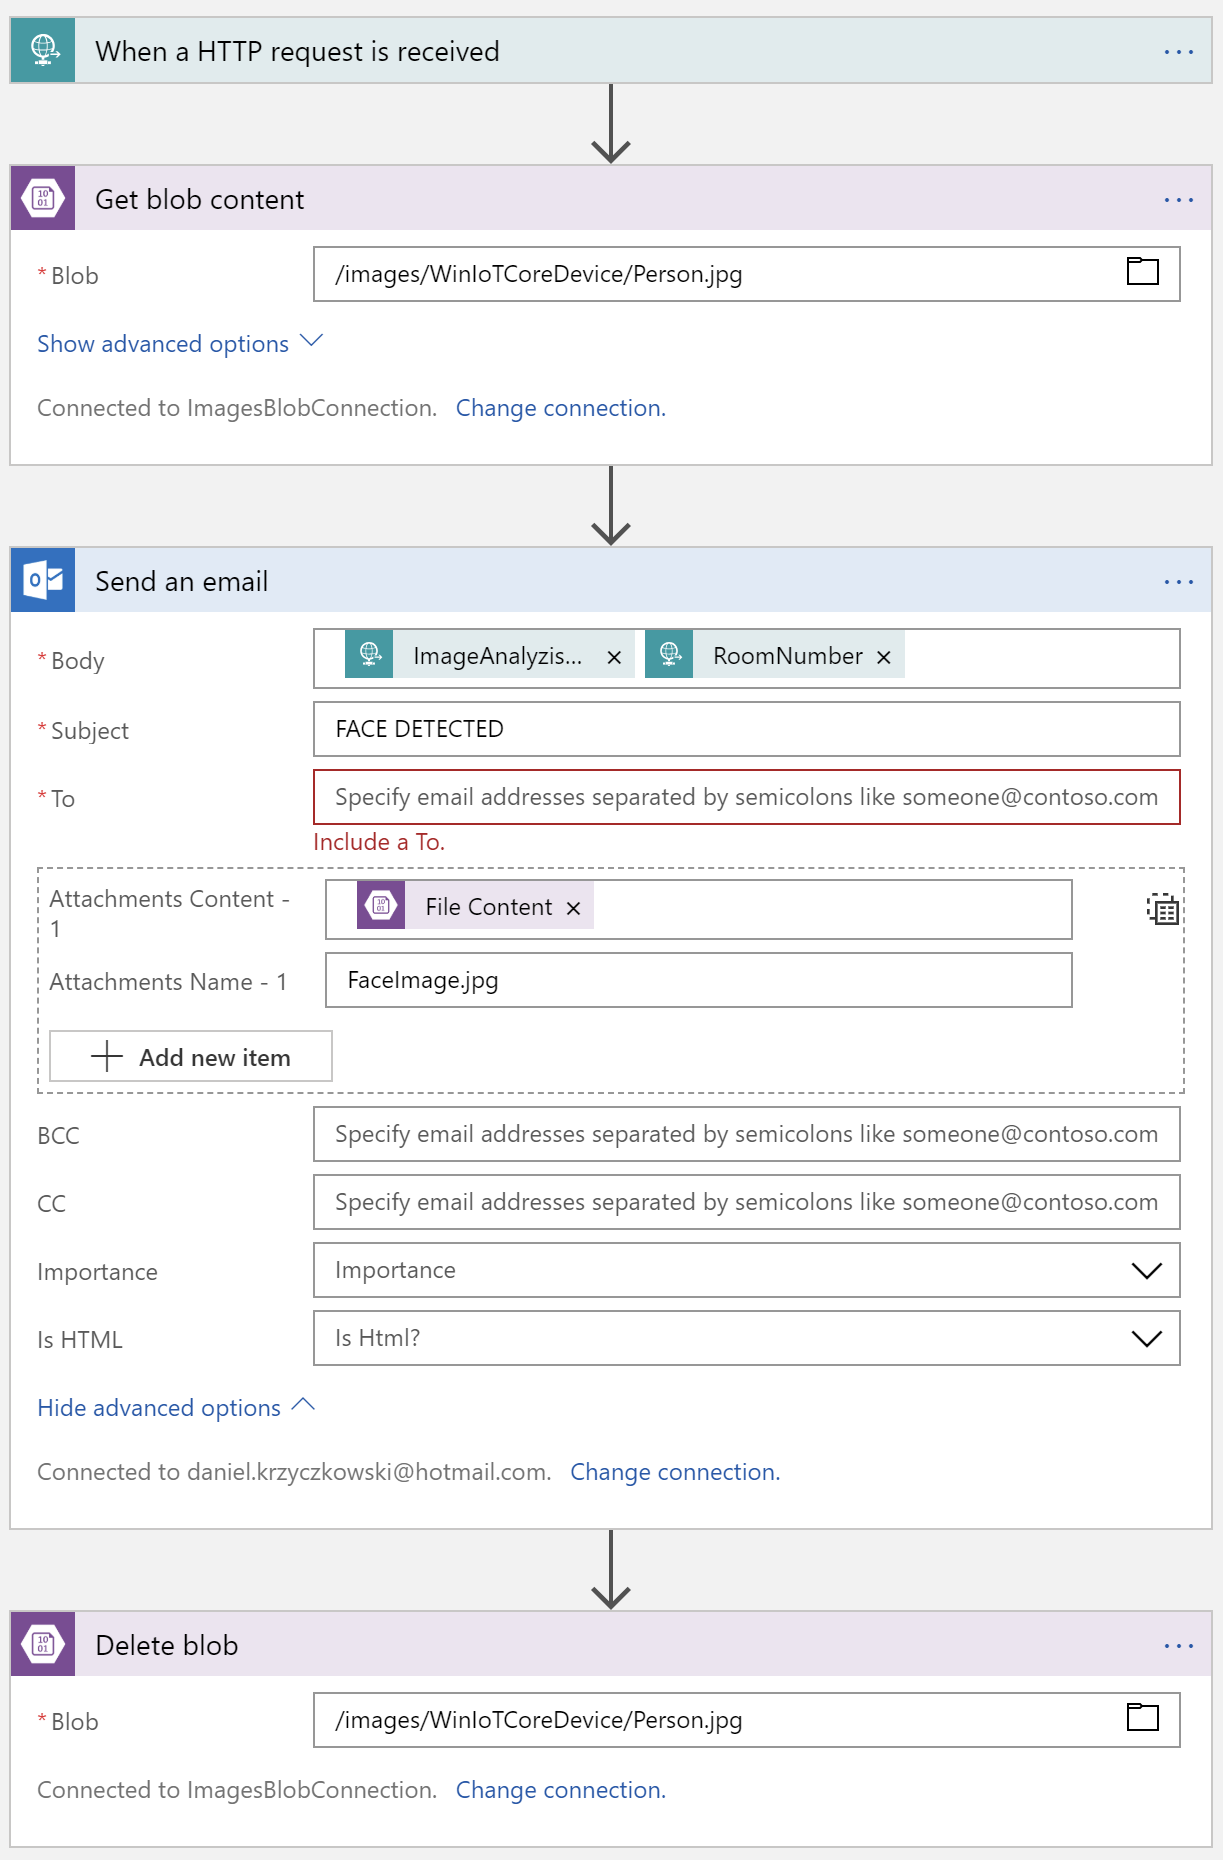
Add next step to the Logic App. We want to take image stored in the Azure Storage by name:
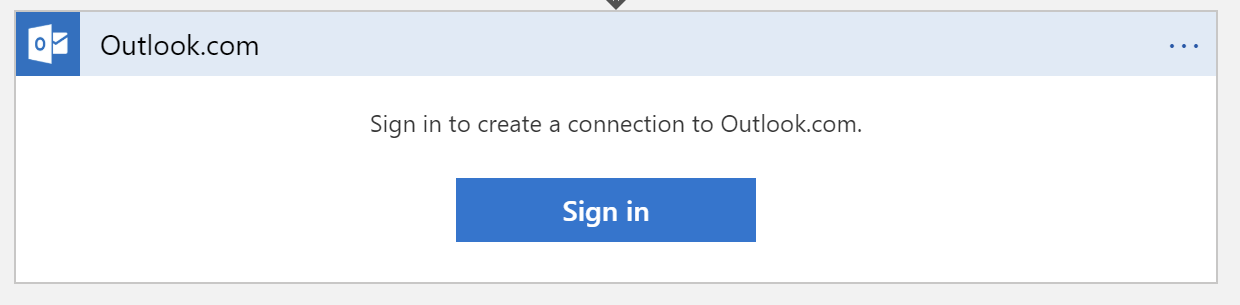
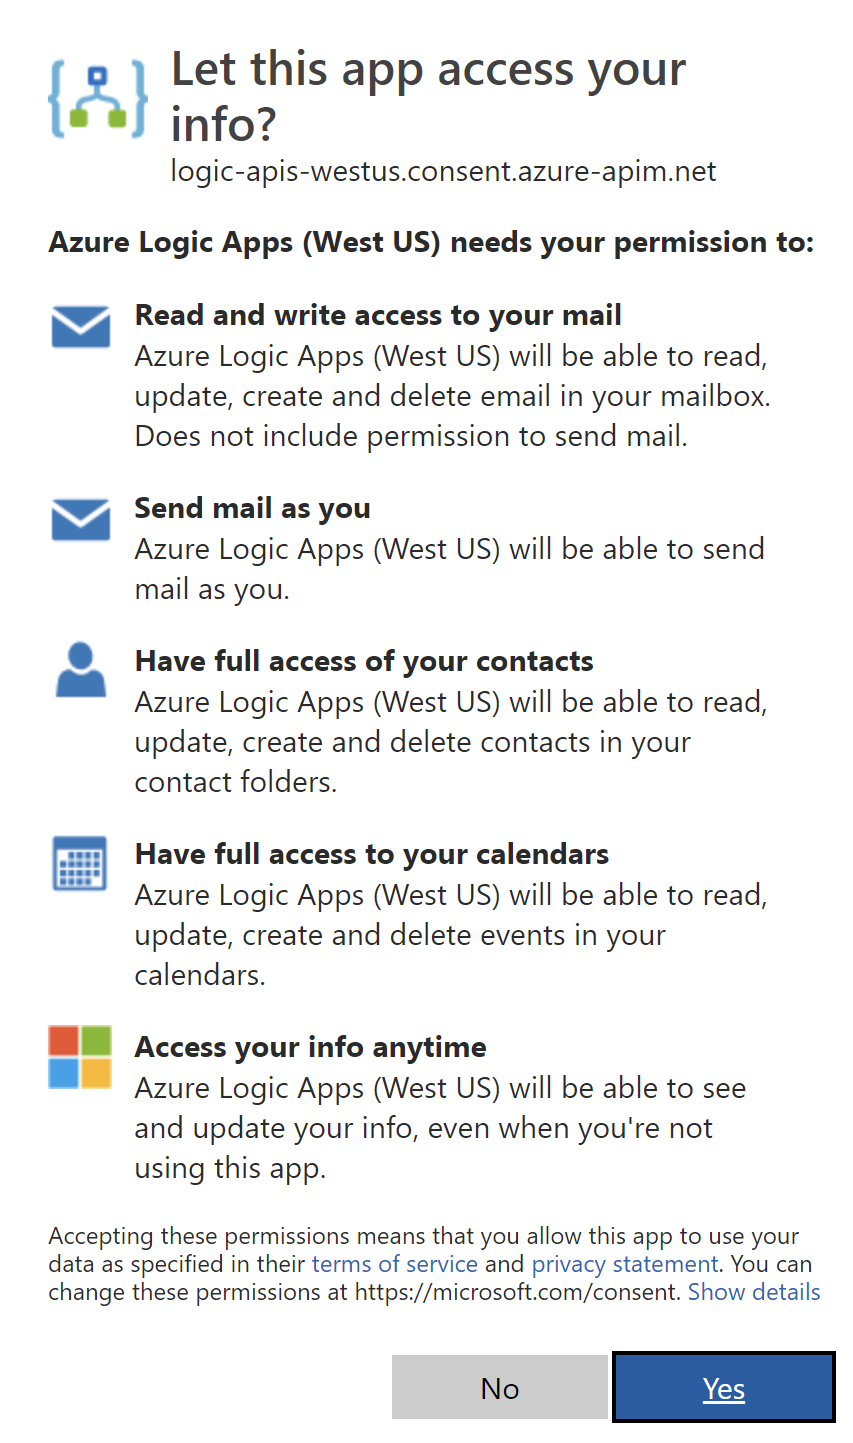
Add next step called Send an email. Here you have to sign in to your Outlook account so you need to have one:
As you can see below there is body included with the analyzis result and room number where motion was detected.There is also image attached:

Once email is sent we want to remove image from the Azure Storage so next step has to be added:
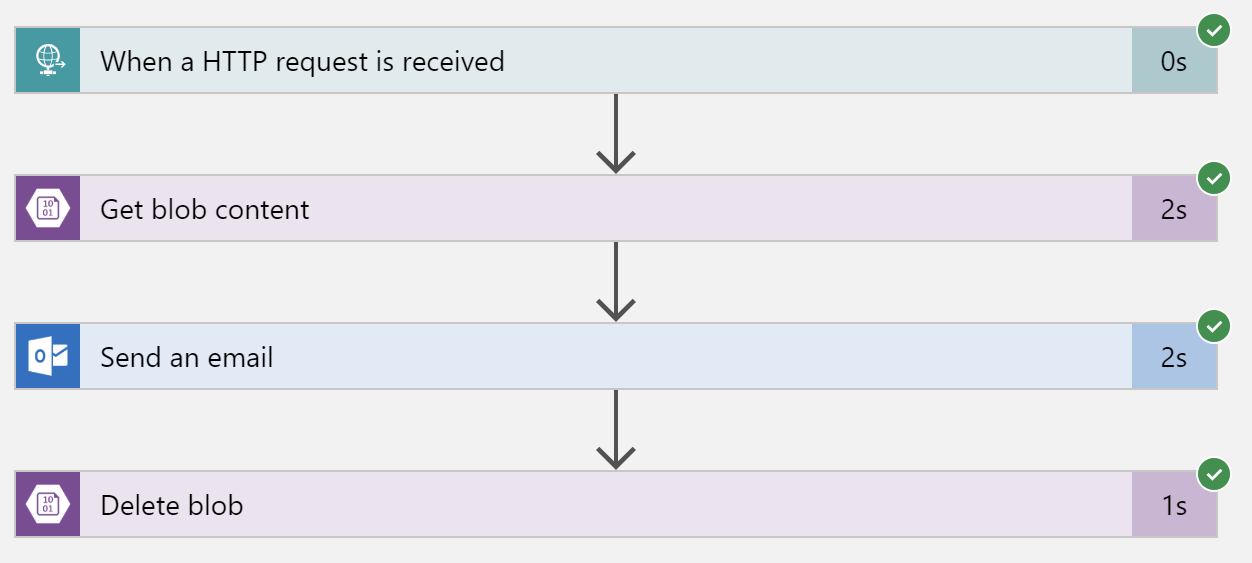
Final steps of the Logic App should look like below:
Final project
Once you scan and register yourself with Face Identifier UWP application, launch IoT device with Face Detector app. When motion is detected camera takes picture and analyzis is started. You should receive an email after short time: